Accessibility Scan & Monitor can help you find and resolve accessibility issues on your website. It was developed by Userway.
The app scans for code-level WCAG (Web Content Accessibility Guidelines) violations down to the specific line of code. It also provides recommendations on how to fix them.
With Accessibility Scan & Monitor, you can:
- Scan your website for issues on both desktop and mobile
- Identify the specific website elements and lines of code causing violations
- Coordinate website updates with your scan data
- Prioritize site-wide violations so that the highest-impact issues are addressed first
Find the app in the Semrush App Center.
How Can Accessibility Scan & Monitor Help Me?
Between new content, regular website maintenance, third-party and CMS updates, staying on top of your website’s accessibility can be time-consuming and difficult.
However, doing it well can expand your potential audience and even increase your credibility among users with disabilities.
Accessibility Scan & Monitor helps make it easier for you by:
- Automating the process of checking your website’s accessibility
- Checking your website against relevant legal accessibility guidelines like WCAG and ADA (Americans with Disabilities Act)
- Enabling you to customize your scan, including frequency, rate limiting, authentication, and more
- Prioritizing severe and site-wide issues so that you can address the most critical violations first
- Clearly explaining exactly where the violation is and how to fix it
Pricing
You can access the Accessibility Scan & Monitor app for free in the Semrush App Center. By default, you can scan five pages per month.
If you need to scan more than five pages per month, you can add pages via in-app purchase:
|
Free |
Scan 5 pages per month |
|
+ $39/month |
Scan an additional 25 pages per month |
|
+ $99/month |
Scan an additional 100 pages per month |
|
+ $499/month |
Scan an additional 500 pages per month |
|
+ $1099/month |
Scan an additional 1500 pages per month |
How To Use Accessibility Scan & Monitor
To start your first standard scan, enter the website URL into the search bar on the app’s home screen (pictured below). Then, click “start scan”.
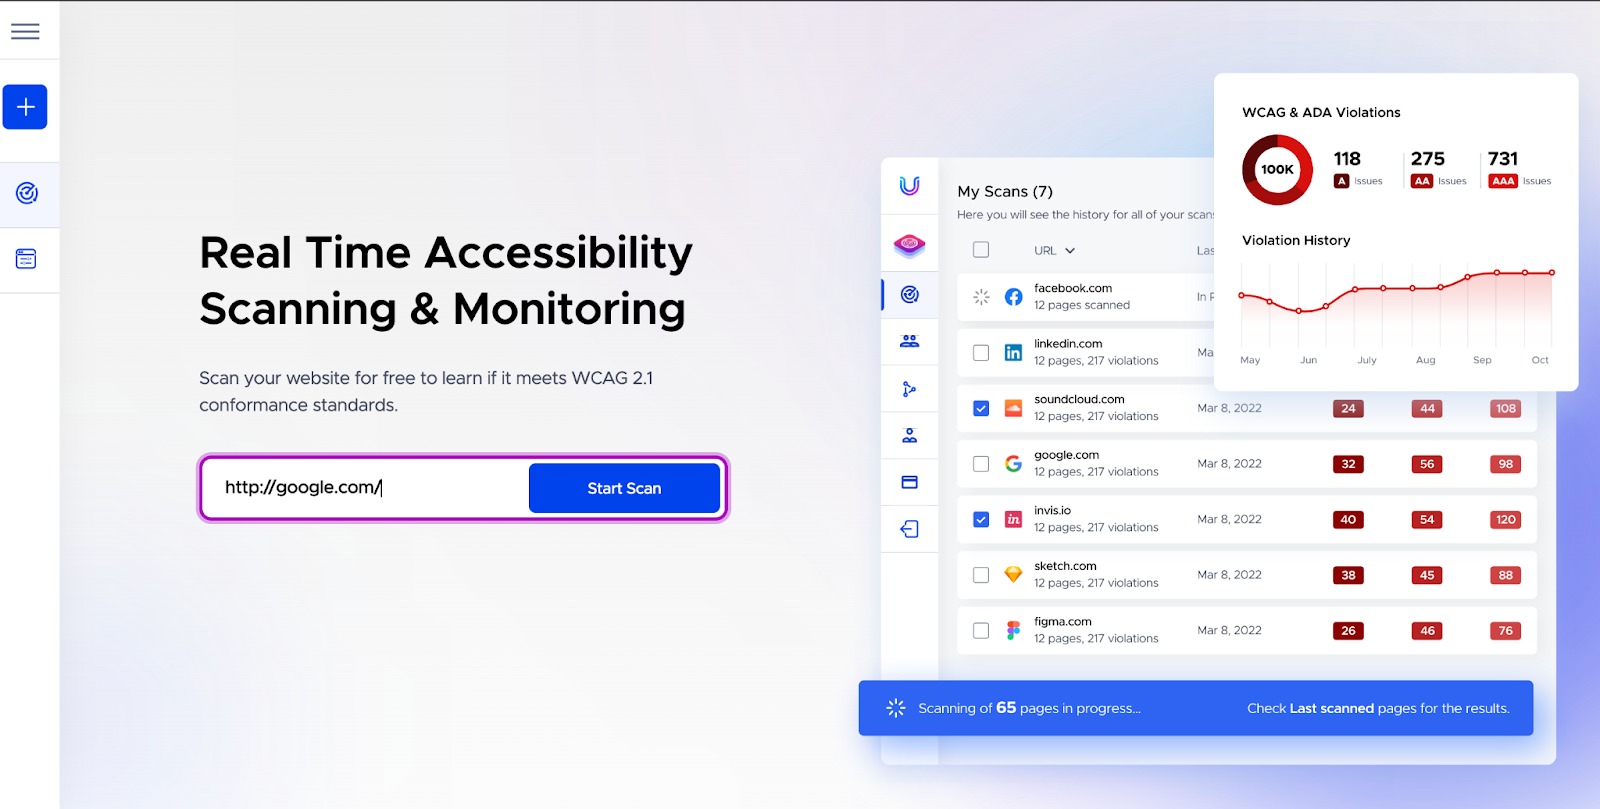
The app will begin indexing the pages on your site, or generating a sitemap.

From here, you can select pages you want to scan, or create specific scenarios to test. We’ll cover each of those in more detail below.
Later, if you want to scan a new website, click the “New Scan” button in the menu on the left.
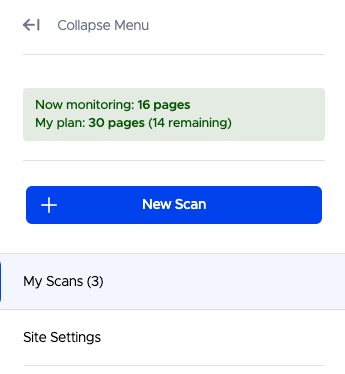
When the menu is collapsed, this appears as a blue and white “+” button.

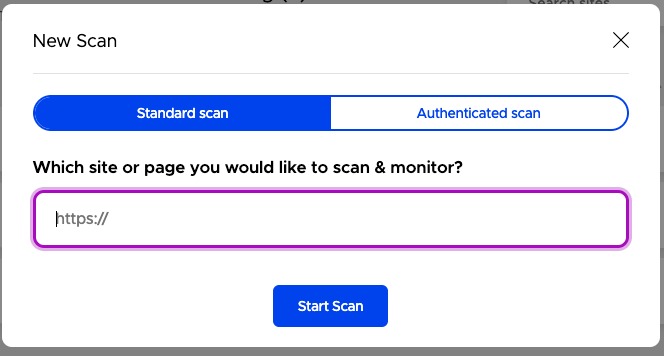
When you click the “New Scan” or “+” button, a frame will appear in the center of your screen. Enter the URL you’d like to scan and monitor here. Then select your scan type, and click “start scan.”
To see all scans you’ve already set up, open the left menu and click “My Scans.” This will open the Active Real Time Monitoring report.

To update the real-time monitoring settings for each of your websites, open the left menu and click “Site Settings.”

Authenticated Scanning
An authenticated scan is one in which part or all of the website requires secure access (e.g. a username and password). This usually happens in one of two scenarios:
- Your website is still in a secure pre-production environment
- Part of your website is only available to registered users
You can set up authentication when adding a new scan for the first time, or later on.
For security reasons, we recommend creating a dedicated login for the app to use.
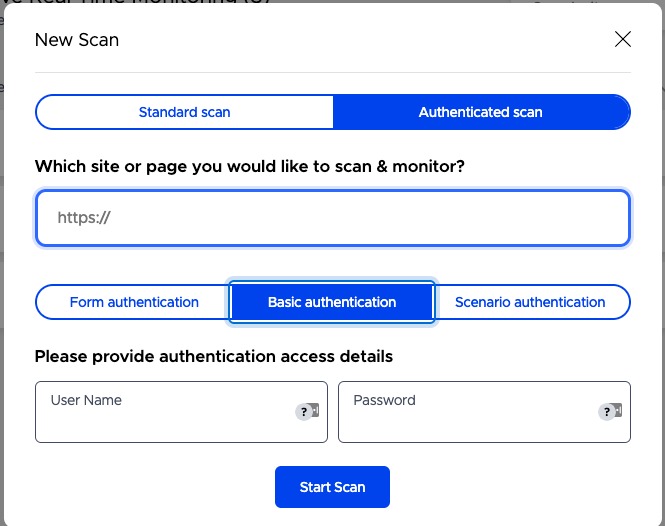
To add authentication during setup, first click “Authenticated scan” on the New Scan screen.

Next, choose the type of authentication (Form, Basic, or Scenario Authentication).
Form Authentication manually interacts with a login form in a human like way, for example, by clicking to a button launch a login popup, and then entering a username and password and clicking “submit.” The app does this via CSS selectors. To set it up, you’ll need to enter:
- The login URL
- The assigned username and password
- If applicable, the CSS click selector that loads the login screen or popup on your website. (For example, an ID would look like “#loginPopup” and a class would look like “.loginPopup”)
- The username field CSS selector (e.g. “#username” or “.username”)
- The password field CSS selector (e.g. “#password” or “.password”)
- The submit button CSS selector (e.g. “#submit” or “.submit”)
Basic Authentication is a username and password. To set it up, click “basic authentication” and enter the username and password you’d like the app to use.
Scenario Authentication is a login that happens during a simulated user journey scenario. In other words, the app mimics the path and actions of a user during the login process.
To set it up, first select “Scenario authentication.” Then enter your website’s login URL, and provide the login scenario in the black field. You can write your scenario in JavaScript, or by using the following shorthand functions:
- clickOnSelector ("#myButton");
- typeInSelector ("#fullName, 'John Doe'");
- waitForSelector (".myID, 2000");
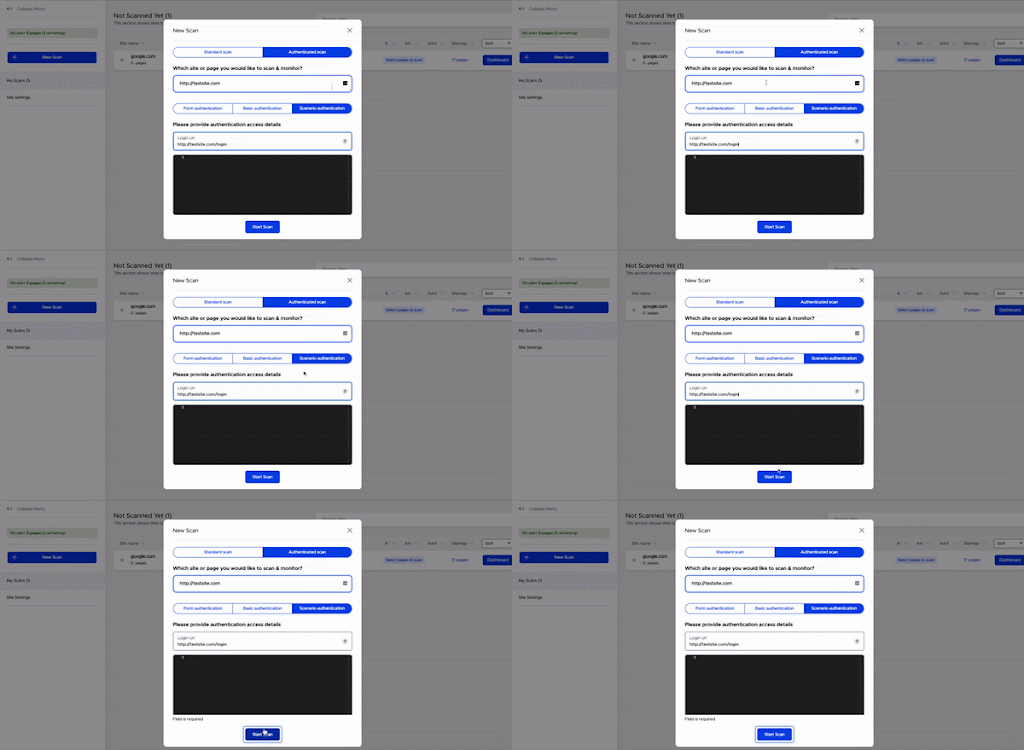
We’ll cover scenario creation in more detail below.
After entering the appropriate details for your authentication type, click “Start scan.”
If you set up a basic scan and then later need to add authentication, just click the “Set up scanning behind login wall” button in the top right corner of the screen.
Then you can follow the same process described above, and click “Authenticate.”
Sitemap
Once you add a website to Accessibility Scan & Monitor, the app will generate a sitemap. This is a list of pages on the website that the app can access and scan.

The sitemap is made up of three parts:
- The header
- The left sitemap menu
- The list of pages
The header includes:
- Search URL: Find a specific page in the sitemap that you want to scan
- Select All: Appears as an empty box when unselected, and a checkbox when selected
- Add Scenario: Create a simulated user journey (see the section on scenarios below)
- Re-index: Creates a fresh sitemap for your site (for example, if you updated your website so that it no longer aligns with the current sitemap)
- Add URLs Manually: Enter a URL into your sitemap that was not already included
- Scan Pages: When pages are selected, click this button to start scanning (when nothing is selected, it appears as “Initiating scan…” and you cannot click it)

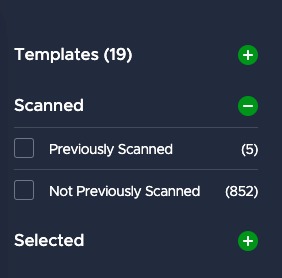
The left sitemap menu allows you to select pages to scan by group:
- Templates: Choose one or more subfolders to scan
- Scanned: Choose either already-scanned pages, or pages that you have never scanned before
- Selected: Scan all pages currently selected in your sitemap, or scan all pages that are NOT selected
Simply click the green “+” or “-” sign to open or close a section.
Finally, in the center of your page, you’ll find the sitemap. This has three parts:
- Selection box: Click here to select a page for scanning. Appears as an empty square when not selected, and a checkbox when selected.
- URL
- Arrow button: Click here to go directly to that URL in a new tab

Creating Scenarios
Scenarios are simulated user journeys. In other words, they enable you to test a series of actions on your website, similar to the way a real person would behave.
Here’s an example of a scenario from a user’s perspective:
- Access a website’s online store
- Search for a product
- Open a product page
- Select size and color variations
- Add to cart
- Check out
To test user journeys like these, you can set up custom scenario scans. These are made up of three parts:
- Scenario name
- Starting URL
- Scenario script
To start creating a scenario, click the “Add scenario” button on the Sitemap report.

A form will appear in the center of the screen. This is where you can set up your scenario.
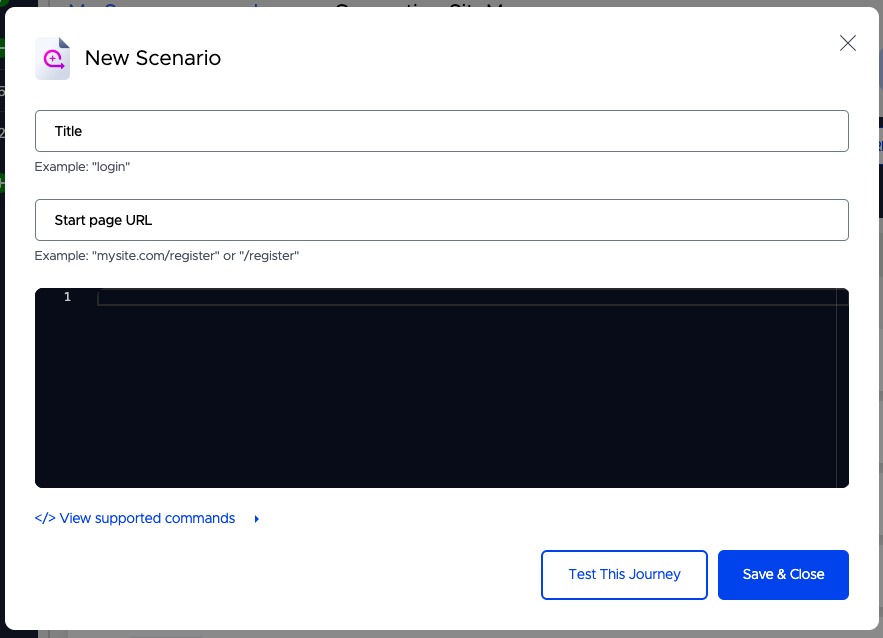
First, name your scenario and enter the starting URL. The starting URL is the location on your website where the actions begin (e.g. your support page).
Finally, enter the command script for the app to follow in the black field, using JavaScript or a predefined SDK function.
Predefined SDK functions include:
- clickOnSelector ("#myButton") to perform a mouse click
- typeInSelector ("#fullName, 'John Doe'") to type text into a field
- waitForSelector (".myID", 2000) to pause a scenario for a specified number of milliseconds while the selector loads
- setSelectorChecked(selector: string, checked: boolean) to select a checkbox
- selectDropdown(selector: string, value: string) to select something from a dropdown menu
- waitForTimeout(timeout: 2000): pauses a scenario for a specified number of milliseconds
- navigateToURL(url:string) to go to a new URL
If you use a predefined SDK function from the list above, remember to personalize them to align with your CSS ID or class names.
Please note that, when you create a scenario, the scan will only be performed once all the actions have been completed. So if you create a user journey that ends on the shopping cart page, the app will then scan the shopping cart.
If you need to scan multiple pages along a user journey, then you’ll need to create separate scenarios for each.
Active Real Time Monitoring (My Scans)
The Active Real Time Monitoring or “My Scans” report lists all the websites you currently have set up in the app, along with some basic information about the website.
To search for a specific website, use the search bar in the top right.

Website scan data is displayed in seven columns.

From left to right:
- Site name: Here, you’ll find the site’s browser icon, your top level domain, the number of pages scanned, and the number of violations found
- Last scanned: The date of the most recent scan
- A: The number of WCAG A-level violations
- AA: The number of WCAG AA-level violations
- AAA: The number of WCAG AAA-level violations
- Sitemap: The number of indexed pages that can be scanned
- Dashboard: Shows the most recent scan results report
Click any column header to sort according to that value. Additionally, you can use the drop down menu on the right to sort by:
- Newest: Show the site with the most recent scan at the top of the list
- Oldest: Show the site with the most recent scan at the end of the list
- Most Violations: Show the site with the highest total number of violations at the top
- Medium Violation: Show the site with a medium amount of violations (relative to the rest of the list) at the top
- Low Violations: Show the site with the lowest total number of violations at the top
Dashboard
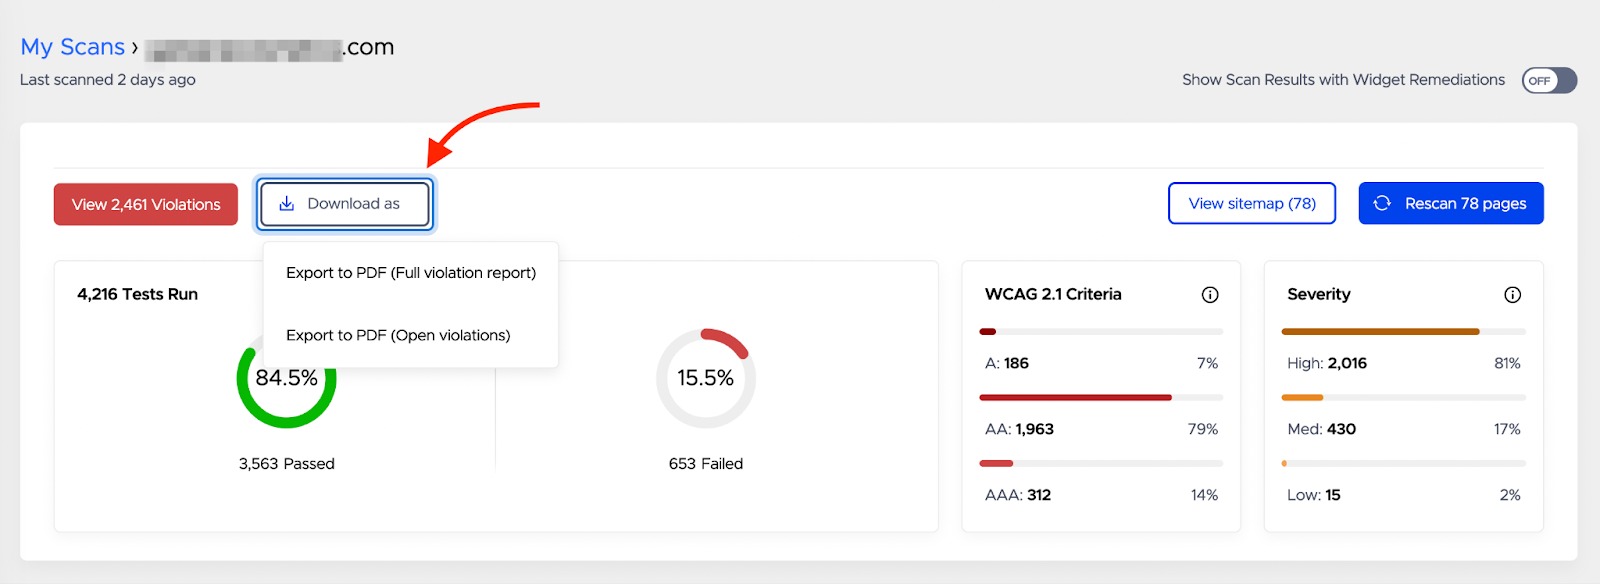
Each site you add to the app has its own dashboard. Here, you’ll find an overview of the most recent scan results. Use this screen to report on your most recent scan and review the violations it uncovered.
At the top of the page is the test summary section.
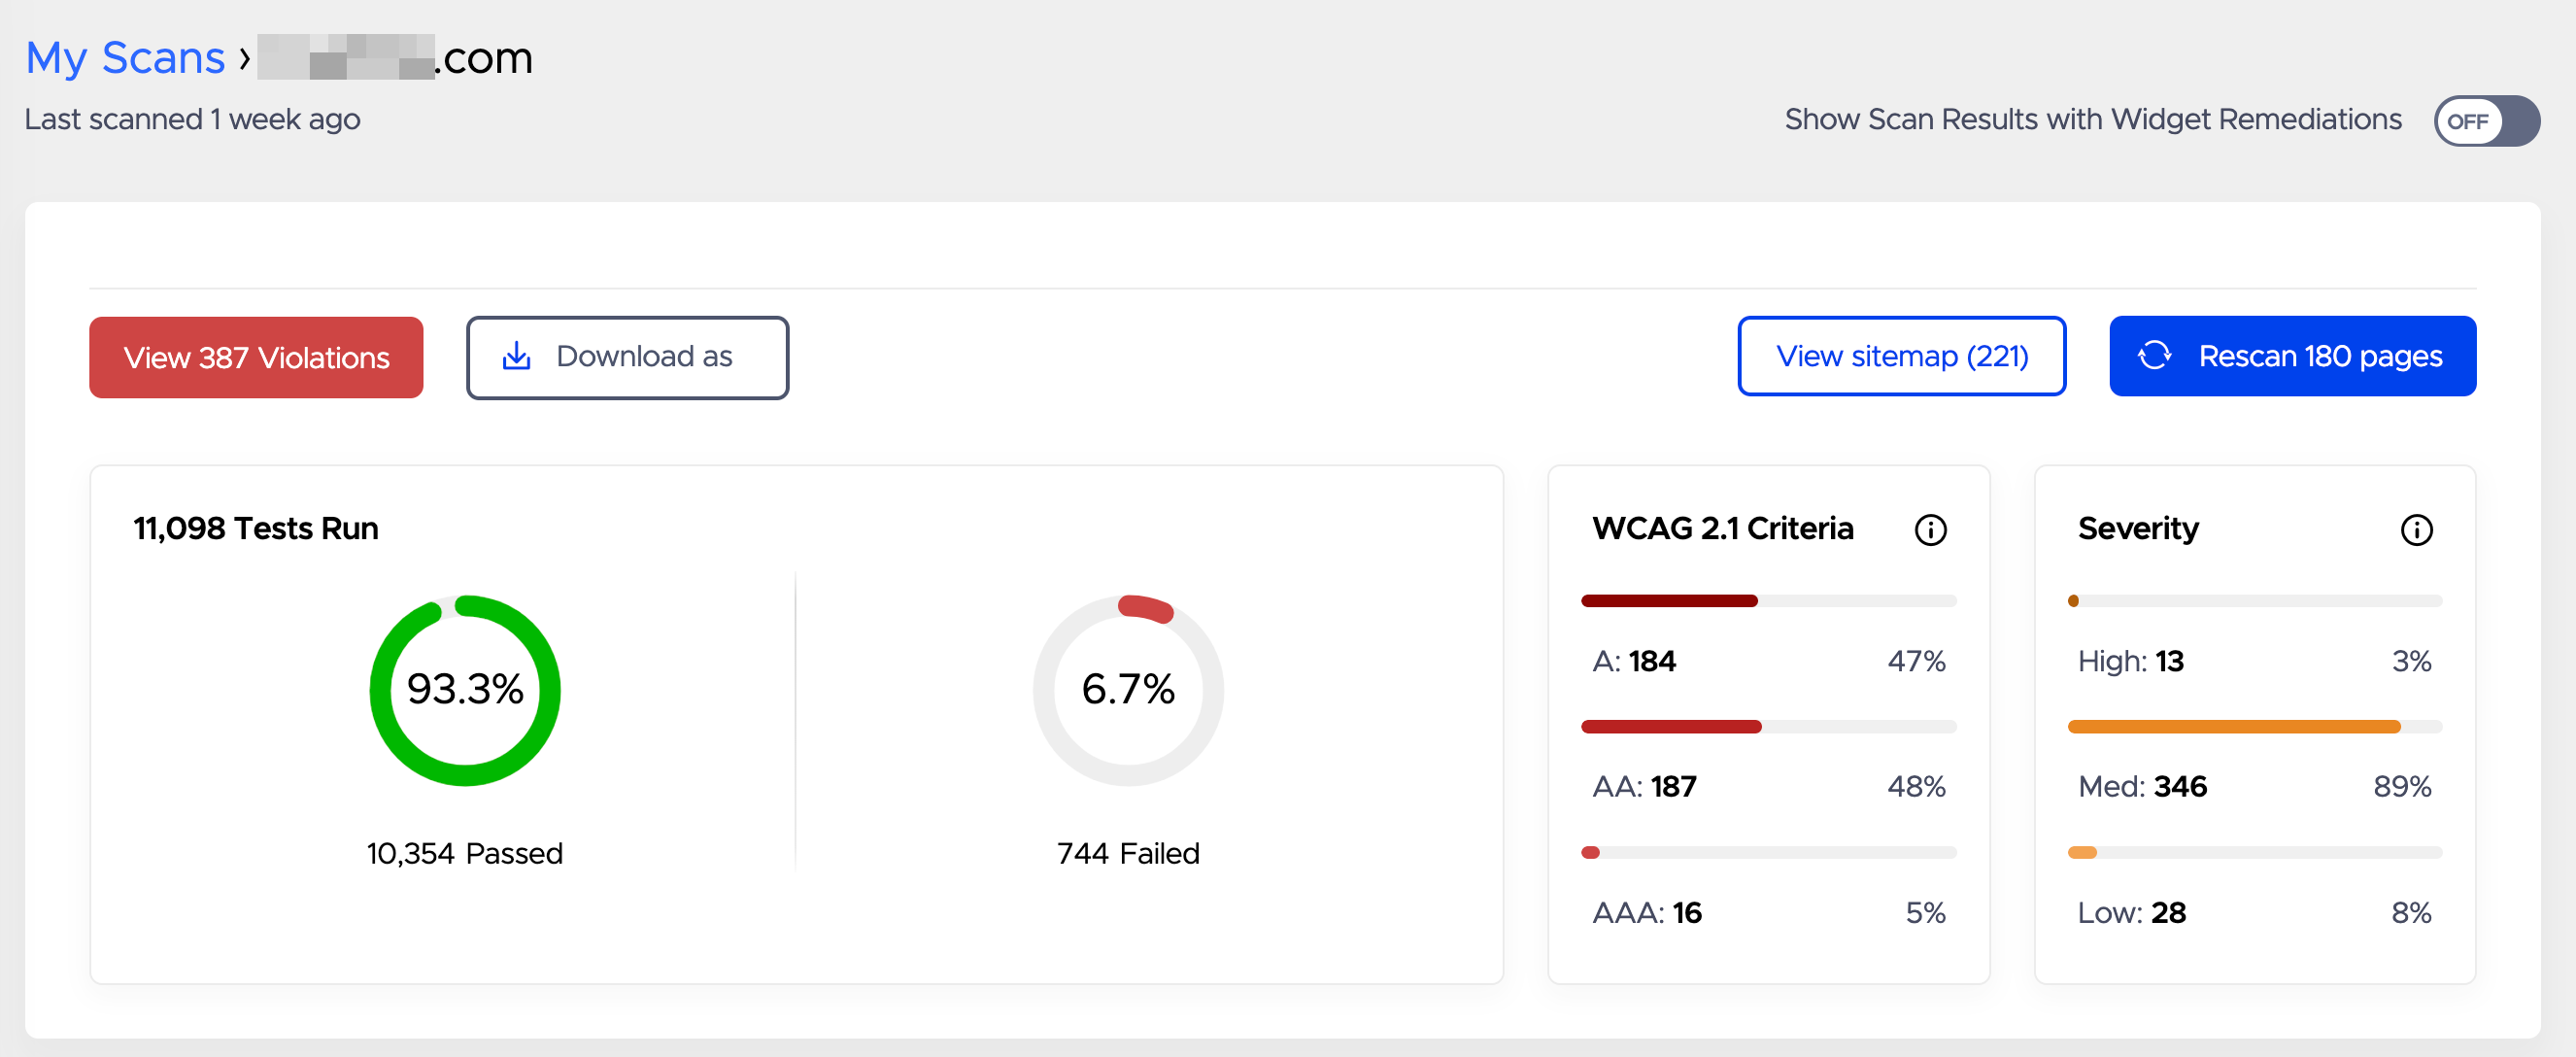
Below this switch are four buttons. On the left, the “View Violations” directs you to the violations breakdown section. This section is found at the bottom of the page.
Next to it, the “Download as” button allows you to download a PDF report of a scan.
On the right, there are two more buttons:
- View Sitemap (returns you to the Sitemap screen)
- Rescan pages (starts a new scan)
Next, the Tests Run chart shows the ratio of passed to failed tests. These are displayed as a percentage and illustrated in doughnut charts. For a more detailed breakdown, see the bar charts to the right.
WCAG 2.1 Criteria breaks down the number of violations found during the tests by the level of compliance:
- A: Average (the lowest standard, resolved with relatively easy fixes)
- AA: Above Average (an intermediate standard, with some more difficult enhancements needed)
- AAA: Excellence (the highest standard, which, while being the most difficult to achieve, results in the greatest accessibility for the largest number of users)

To its right, the Severity chart breaks down violations found into high, medium, and low, based on how severe an impact the violations may have on user experience.

Below the test summary is the Violation History chart.

This is a line graph that shows how many violations were found on your site over a specific period of time, including:
- One week
- Two weeks
- One month
- Three months
- Six months
The final section on the Dashboard is your violations breakdown, which includes three sections:
- Site-Wide (Template-Level) Violations: Impact the entire website
- Homepage violations: Impact only the home page
- Site Page violations: Impact only individual pages, excluding the home page

In each section, you can find:
- The page name
- The Last Scanned date
- Number of violations by level of compliance (A, AA, and AAA)
To view a complete list of violations, click the “View Violations” button on the right side of the corresponding row.
Violations
The Violations report lists all of the instances of failed accessibility checks found during a scan. These can be filtered by WCAG 2.1 compliance level or by severity using the drop down menu on the right.

Violations are broken down into five tabs:
- Violations (all issues found)
- Important (any issues that you prioritize)
- Resolve (any issues you mark as completed)
- Dismissed (any issues you declined to fix)
- Ignored (any issues related to ignored rules)
Here, you’ll find a list of violations found during your website scan. Click on the name of a violation to see a list of the specific issues found.
An issue is a specific instance of a violation. For example, you might have the same violation in four different areas of your website. Each one of these will be an issue, grouped by violation.
On the right, beside each violation, you’ll see a gear shaped settings icon. If you click on this, a box will appear, where you can opt to ignore this rule on future scans.
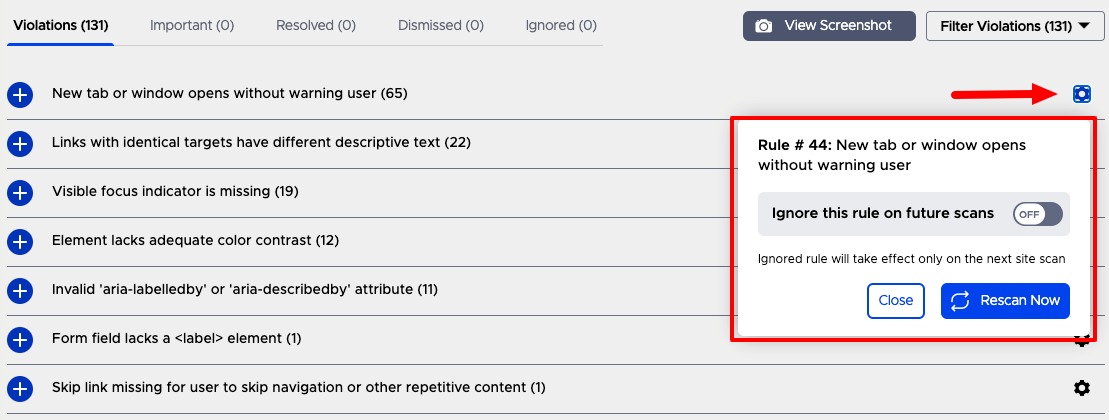
If you toggle this button, this type of violation will not be included in the results in the future. Instead, you’ll find it in the Ignored tab. Click “close” to dismiss the box without rescanning, or “Rescan now” to run a new scan accordingly.
When an issue is collapsed, you’ll be able to see:
- An issue number for identification purposes
- How many pages were impacted by the issue
- Screenshots of the issue location
- The level of compliance
Click on any issue to expand it.

In the top right of the issue details, you can find a few buttons:
- Important: Flag an issue as high priority
- Resolve: Mark that you’ve already addressed the issue
- Dismiss: Decline to address the issue
- View Screenshot: View images of the violation on your website (choose between mobile and desktop)
Nex, you’ll find more information about this issue, including:
- Description: Tells you what the violation was, and why it matters
- Recommended Action: The suggested change to make on your website
- Affected Code: The line of code where this issue is located
- WCAG Standard: A link to WCAG documentation that applies to this issue
- Notes: A text field for your convenience
Frequently Asked Questions
The Accessibility Scan & Monitor App scans are based on the number of pages, not the number of websites. The tool can conduct up to 30,000-page scans on mobile and desktop and will display template-level violations (those impacting the whole website) first. As such, there is no upper limit in the number of websites you can add.
A violation in Accessibility Scan & Monitor is an issue that conflicts with the WCAG 2.1 guidelines. These are divided into three categories (A, AA, and AAA) based on the level of complexity.
Please note that you might find the same violation in multiple places on your website. Each individual instance of a violation is called an “issue".
A, AA, and AAA violations in Accessibility Scan & Monitor are tiered based on the level of complexity of the fix and the impact it might have on user experience:
- A (Average): The lowest level, representing the bare minimum of accessibility standards. These changes are relatively easy to make
- AA (Intermediate): Enhancements that are more difficult than A but also provide greater accessibility to users
- AAA (Excellent): The highest standard of accessibility. These are the most difficult to execute but also result in the highest accessibility for users
Accessibility Scan & Monitor checks for website accessibility issues related to motor impairment, blindness, color blindness, dyslexia, visual impairment, cognitive impairments, epilepsy, and ADHD.
Accessibility Scan & Monitor generates a sitemap based on your website’s sitemap.xml file.
If a page is missing, make sure that the sitemap.xml file is present on all pages, and then reindex. Or you could enter the URL manually.
