Want to learn how to use Facebook Business Manager?
In this guide, we’ll walk you through getting started with Business Manager, share common setup mistakes you can easily avoid, and explain why you should use the tool to help grow your business.
What Is Facebook Business Manager (aka Meta Business Manager)?
Facebook Business Manager (now called Meta Business Manager) is a free tool for small and large businesses to organize, manage, and control their business assets on Facebook.
For example, business pages, ad accounts, and apps.
Think of Business Manager as a one-stop dashboard to manage the marketing and advertising of your business on Facebook.
The tool allows admins to control user access. This ensures that only the right people have permission to manage aspects of your business.
For example, you could have one level of access for employees who manage budgets and billing. And another for third-party vendors or agencies without access to settings.
To use Meta Business Manager, you need a Facebook Business Page.
A regular Facebook account (i.e., your personal profile) won’t have access to Business Manager.
Because the tool is only for managing business-related activities on Facebook. Which are only permitted using a Facebook Business Page.
What’s the Difference Between Facebook Ads Manager and Business Manager?
Meta Ads Manager is part of the Business Manager toolkit.
Ads Manager lets you create and track your Facebook and Instagram ads and allocate a budget for your ad campaign.
Use Business Manager to access assets for campaigns, like images, catalog items, and videos.
Who Should Create a Meta Business Manager Account?
You should consider creating a Facebook Business Manager account if:
- You have a marketing or social media team. Use Business Manager to allocate campaign assets and track performance. Each team member can easily access what they need to create a campaign or report on the latest updates.
- You’re an agency managing multiple clients. Manage each Facebook account from one location and grant clients access to upload assets or check on reporting
- You’re a vendor helping run or manage ads. Use Business Manager to allow access to only the assets needed for vendors to run campaigns
- You need to control who has access and permission to your Facebook page. If you work with contractors, you can control the amount of access they have to sensitive materials
Key Features of Facebook Business Manager
Here are the fundamental features of Facebook Business Manager:
- Manage multiple pages and ad accounts from one dashboard
- Grant different types of employee permissions and access
- Onboard third-party vendors, agencies, and partners to manage Facebook pages and ads
- Manage billing details and payments
- Access reporting and analytics
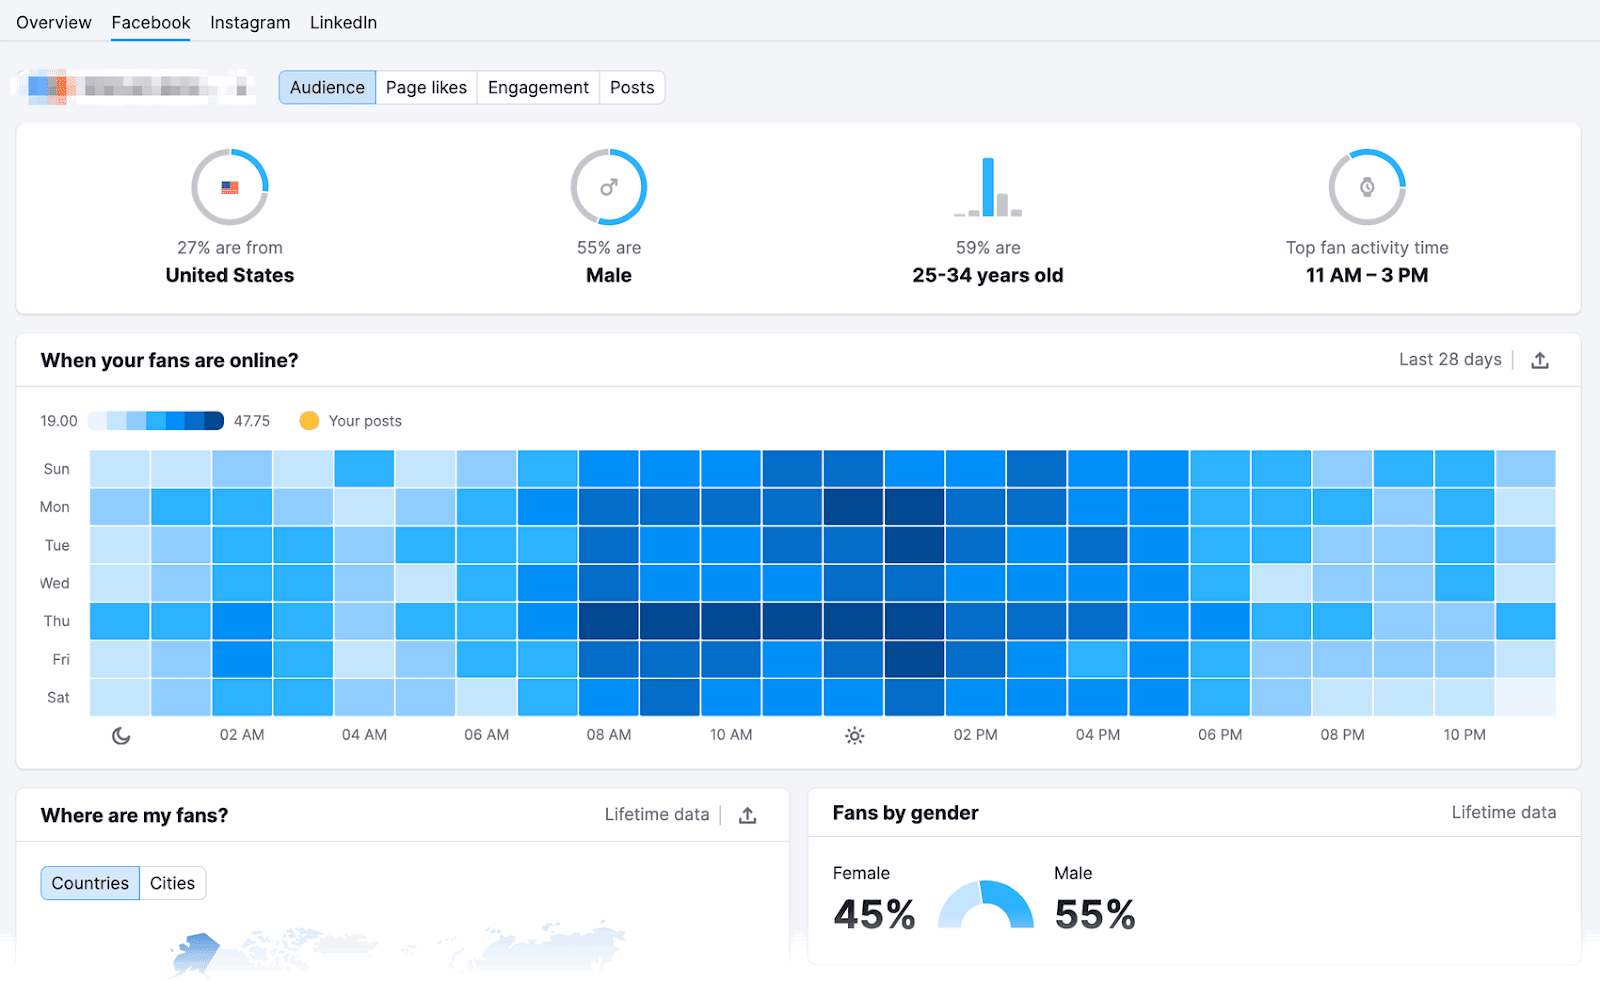
For detailed insights on how your Facebook campaigns perform, use Semrush Social to see metrics such as post reach, engagement rate, audience demographics, and more.
To set up:
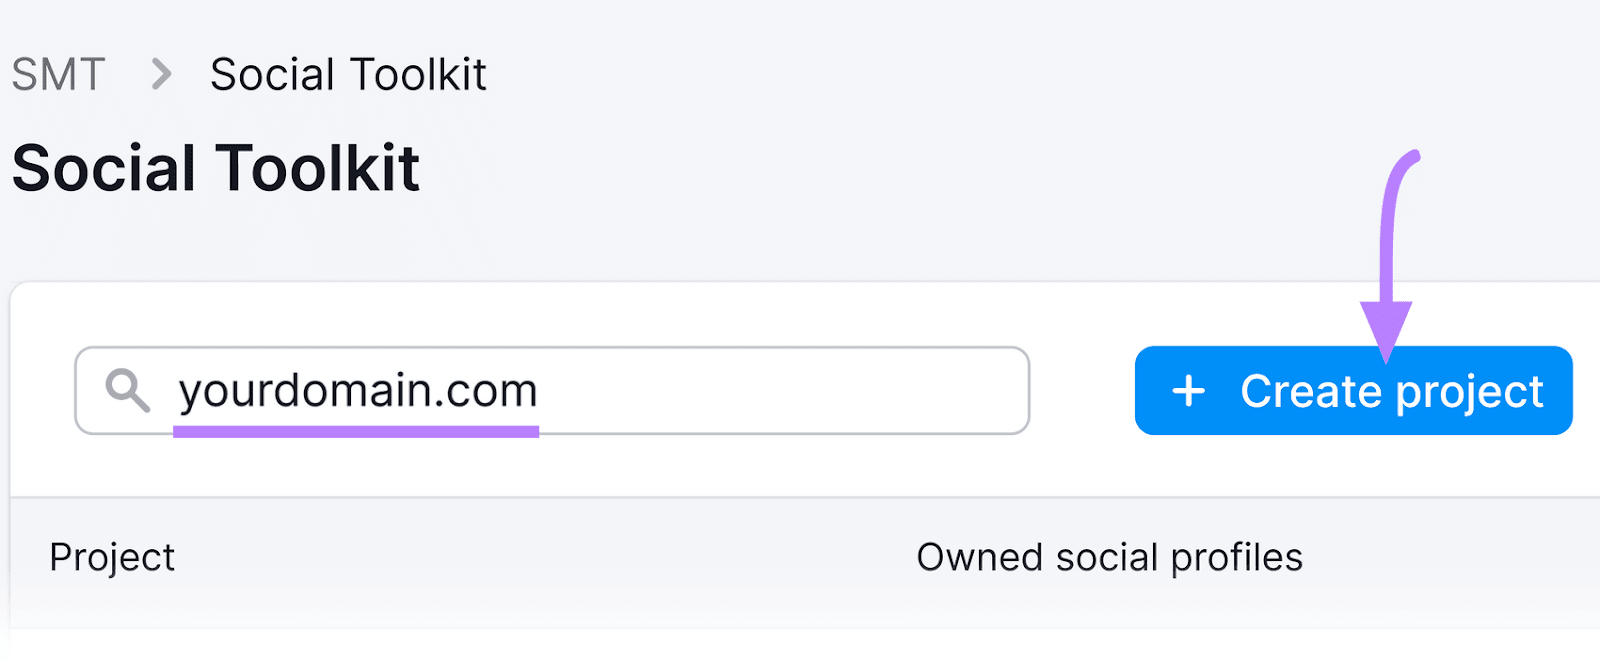
Launch Semrush Social and click “Create project.”
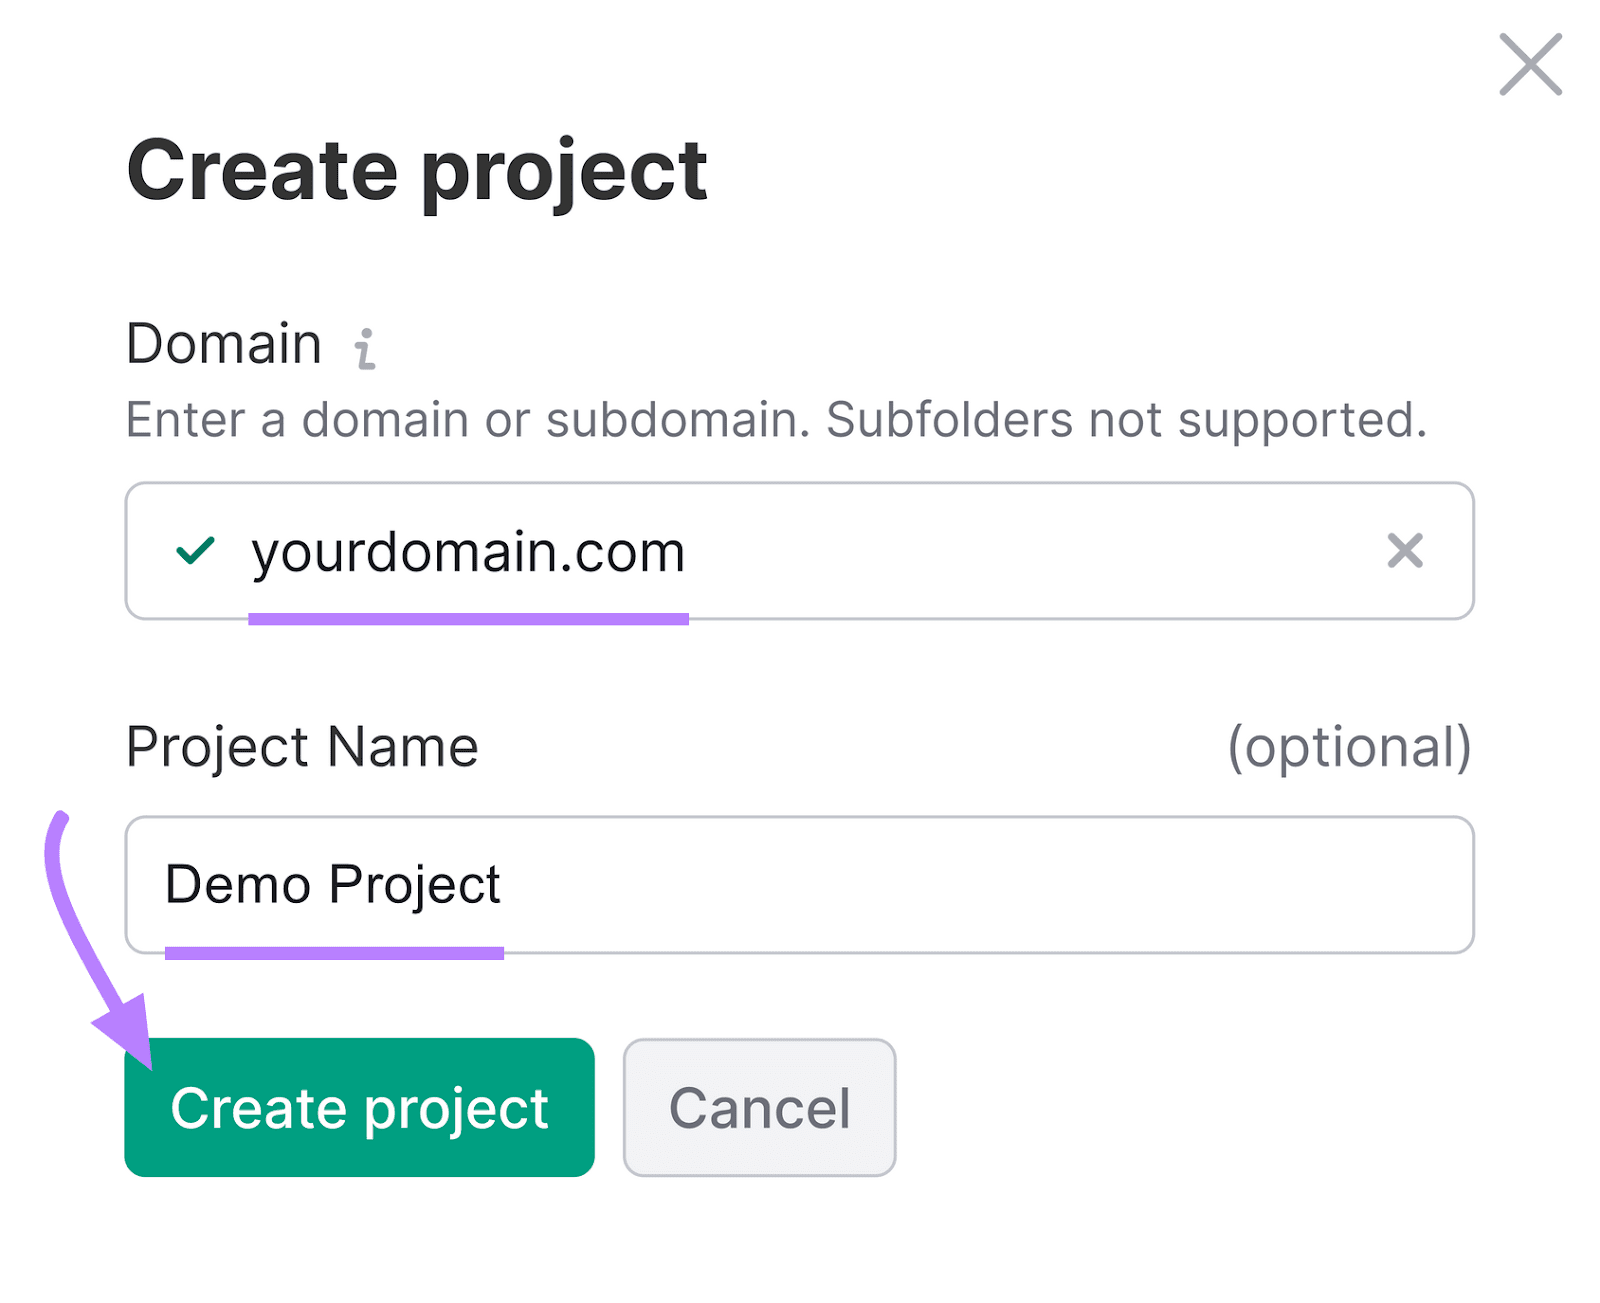
Enter your domain name and project name. Then, click “Create project”.
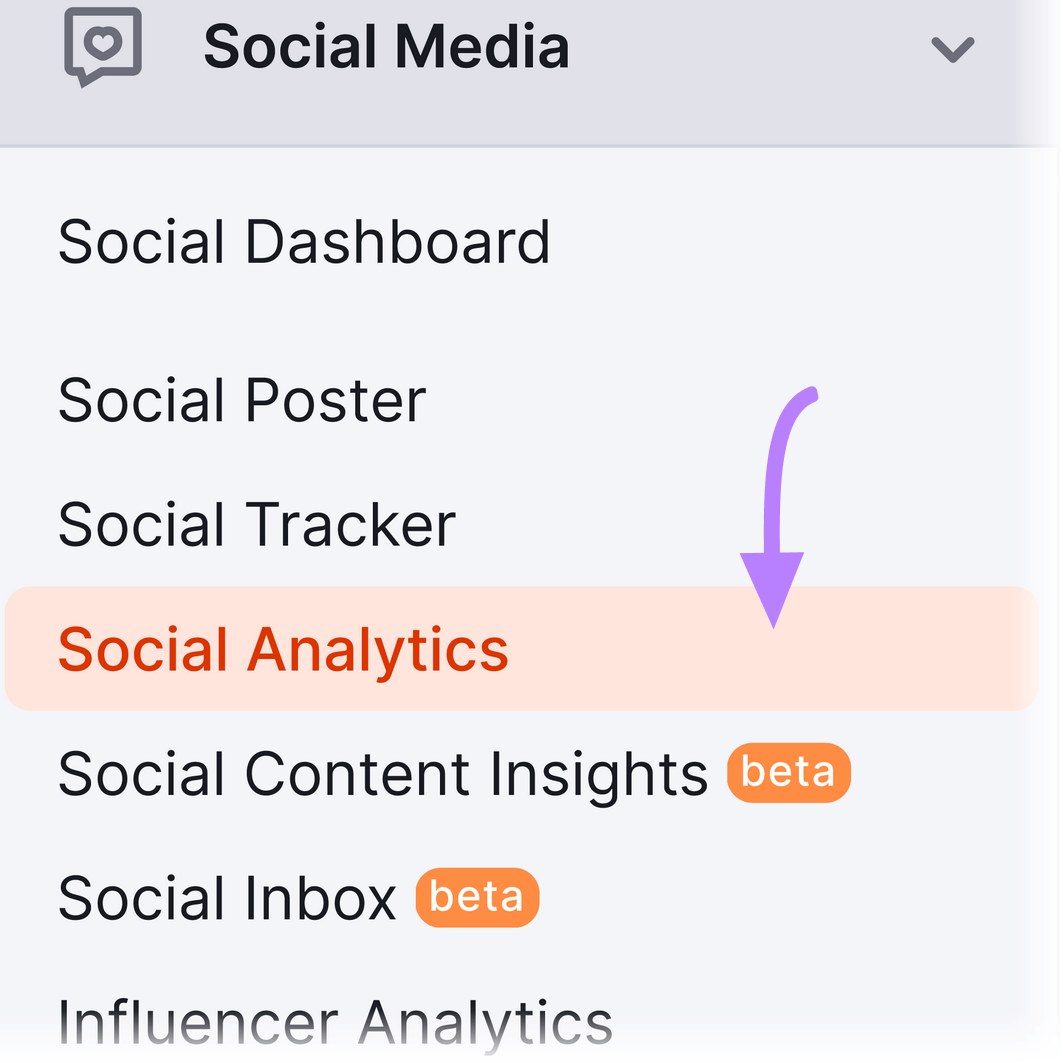
Next, navigate to the left hand of the screen and click “Social Analytics.”
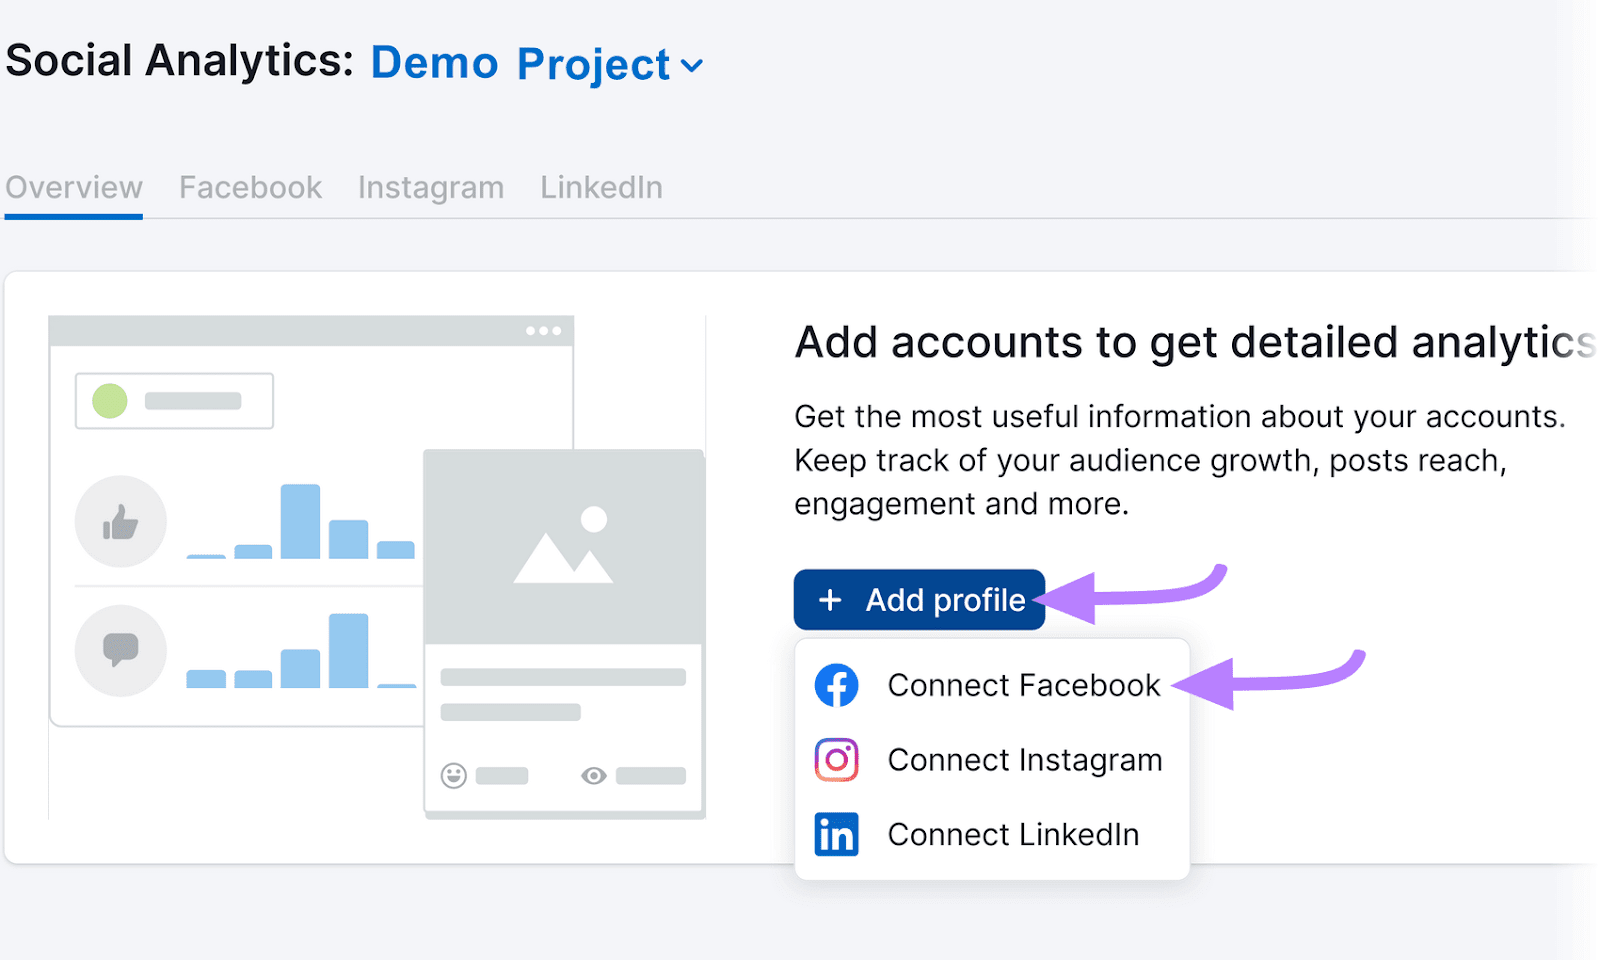
Then, click “Add Profile” and “Connect Facebook.”
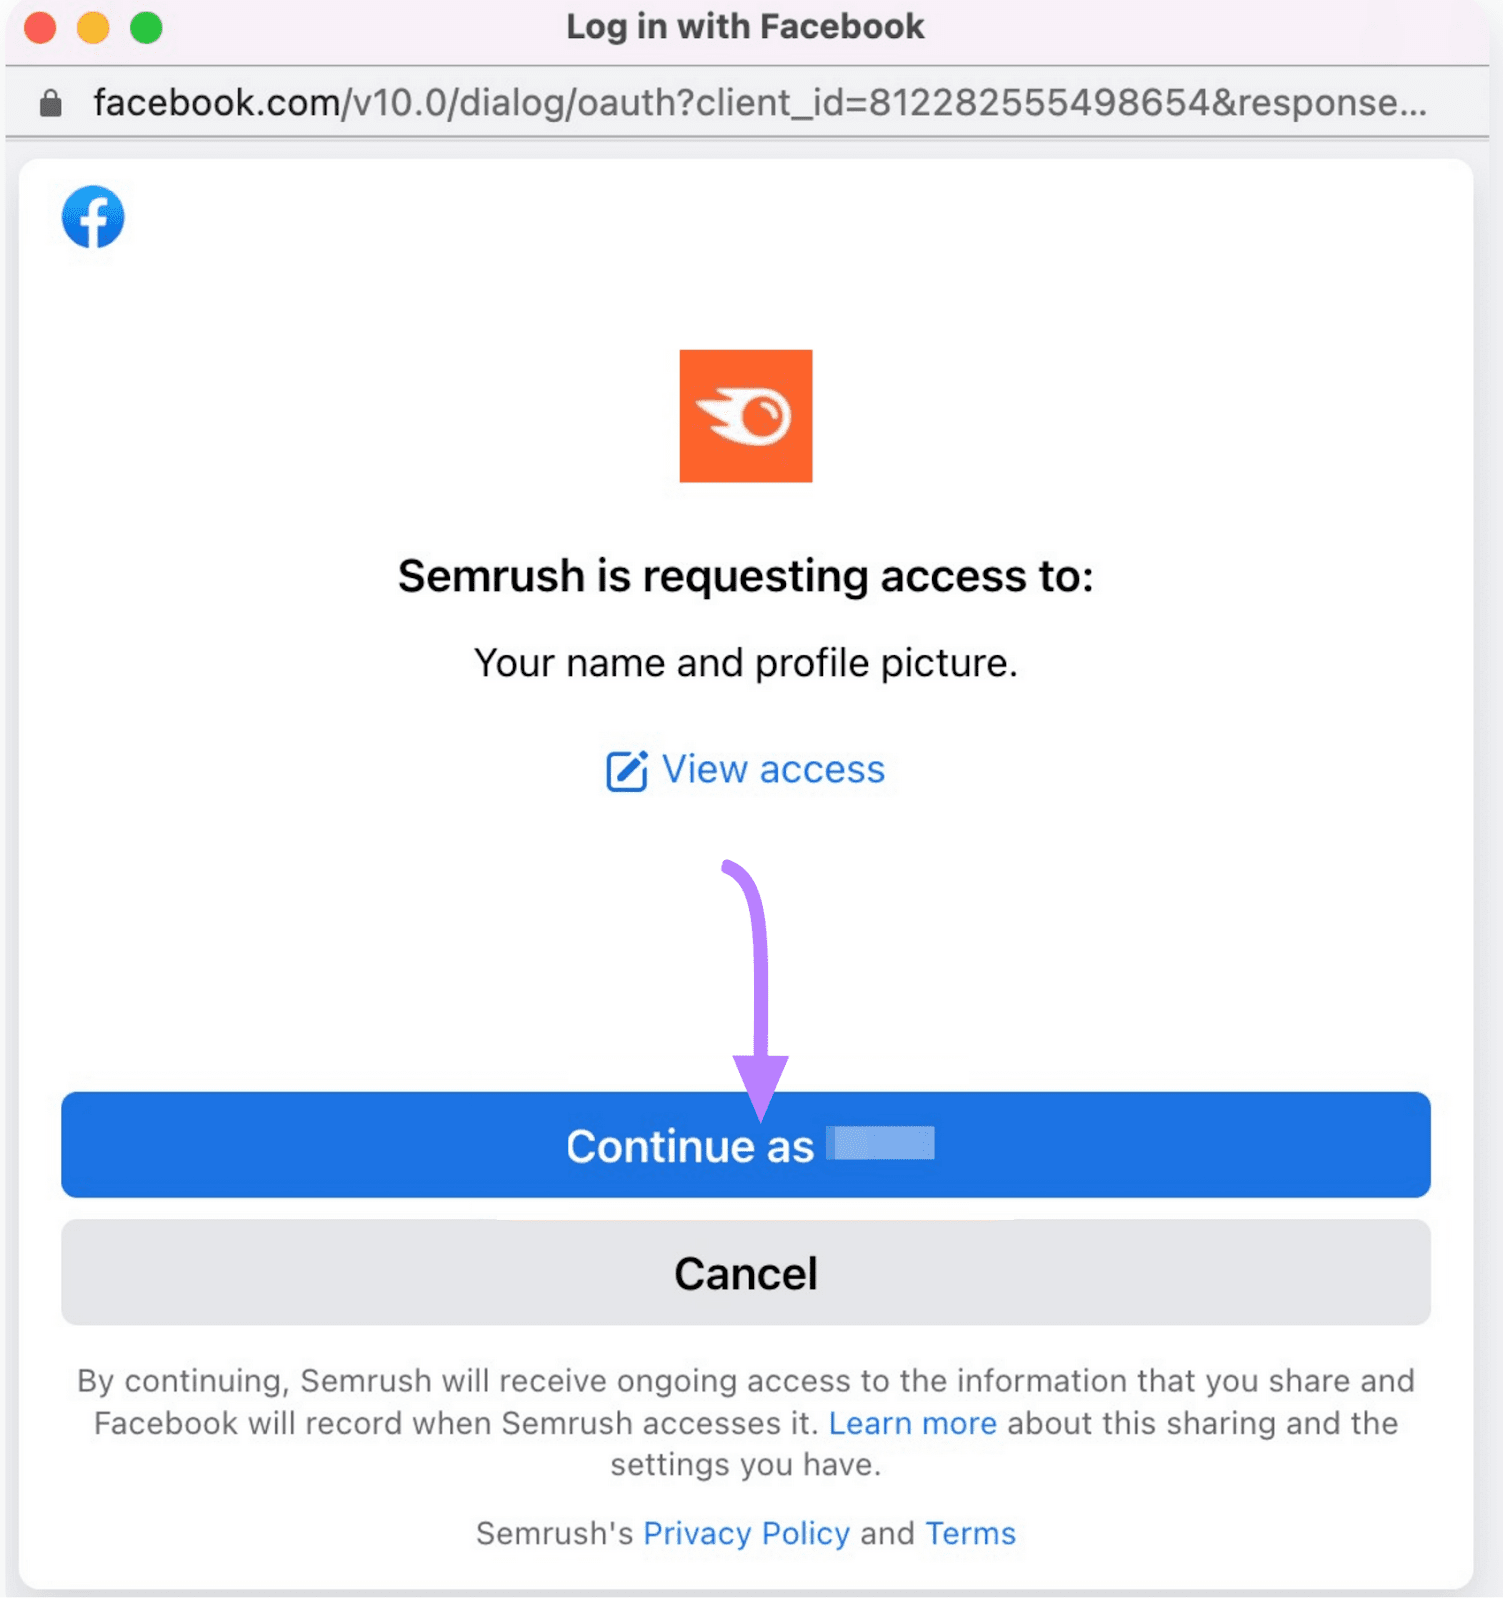
Next, log into your Facebook account and authorize Semrush to access it:
Then, select the Business pages you want to connect to Social Analytics.
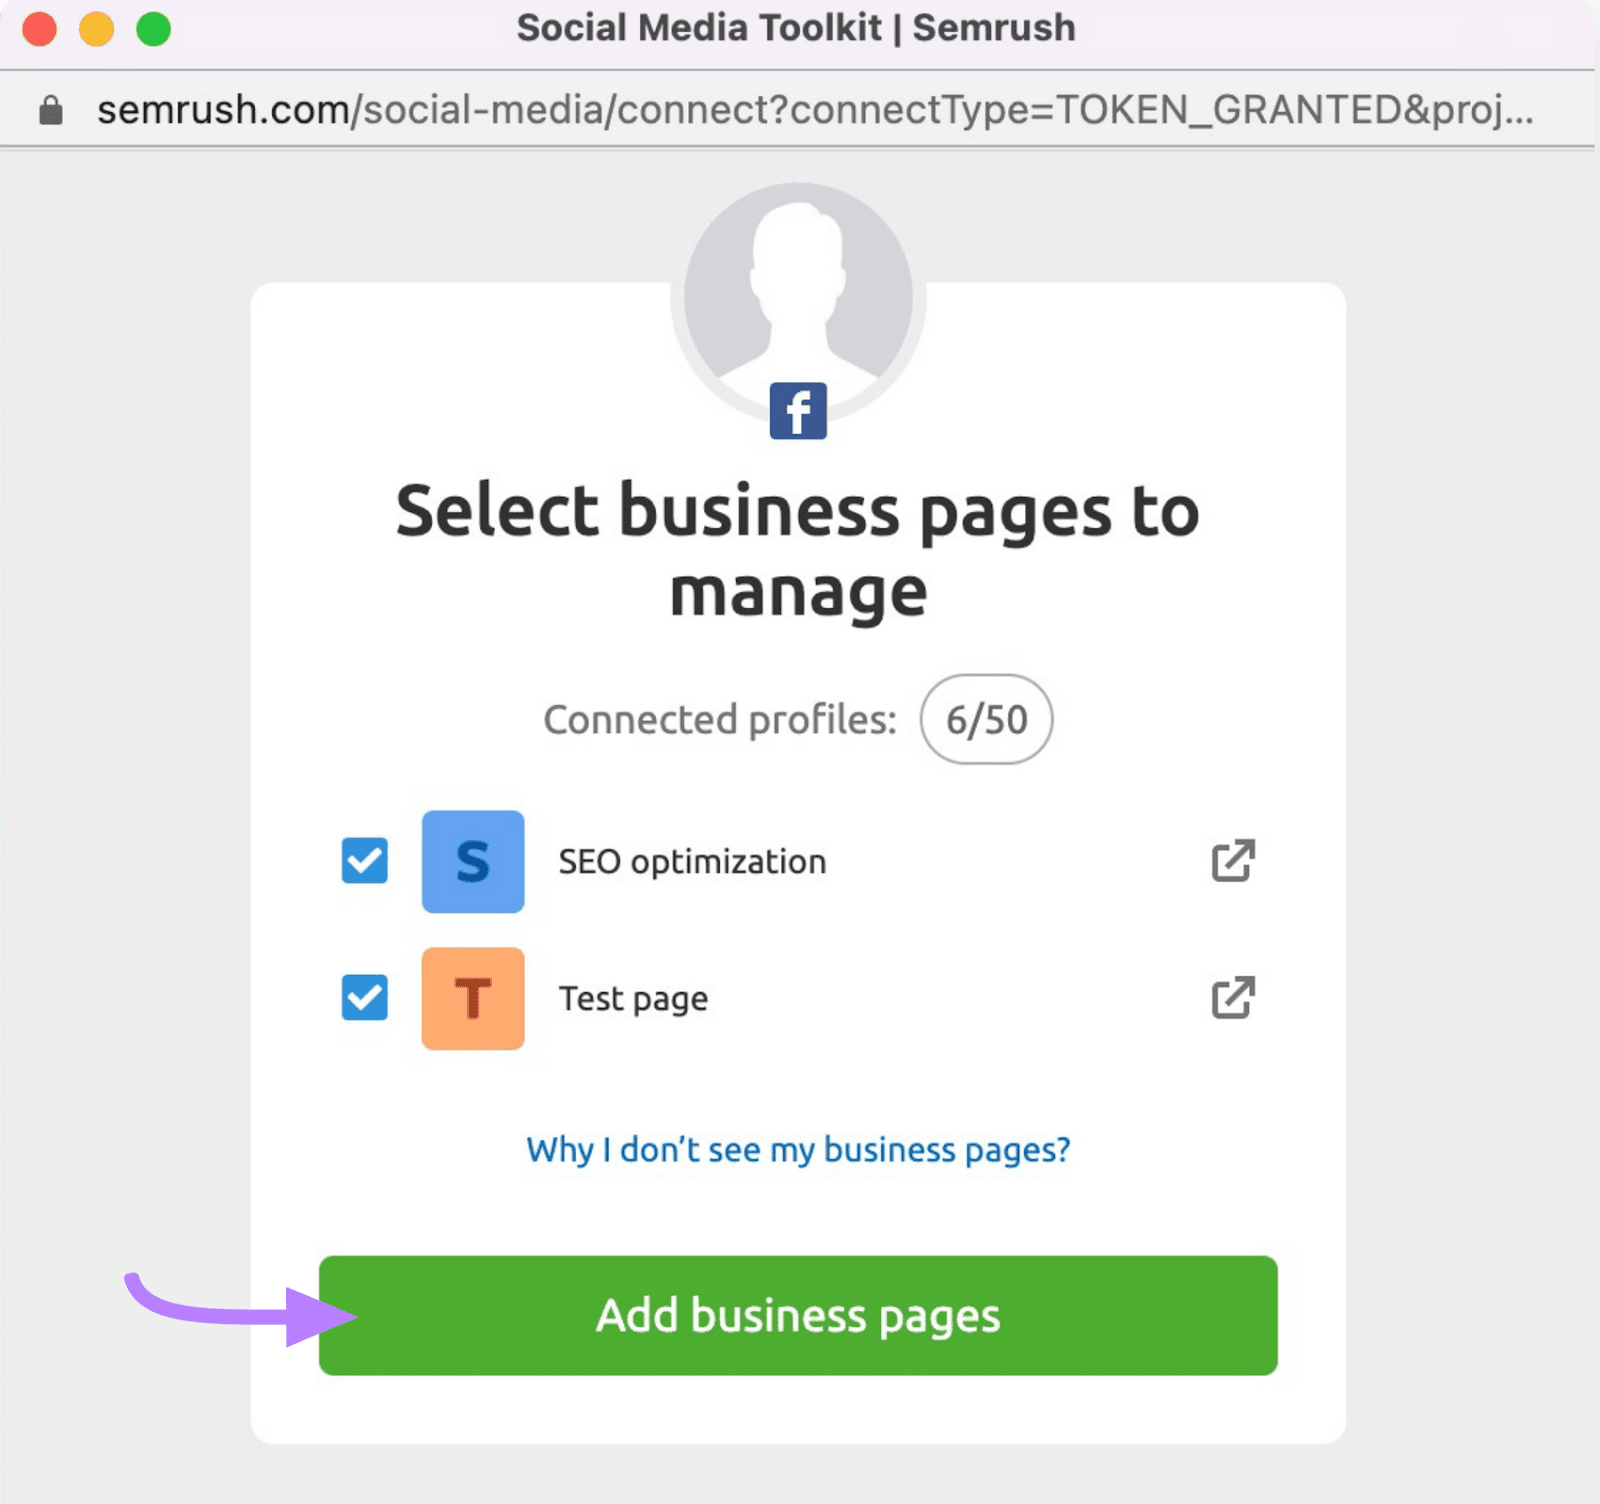
Then, click “Add business pages” and confirm by clicking “Continue.”
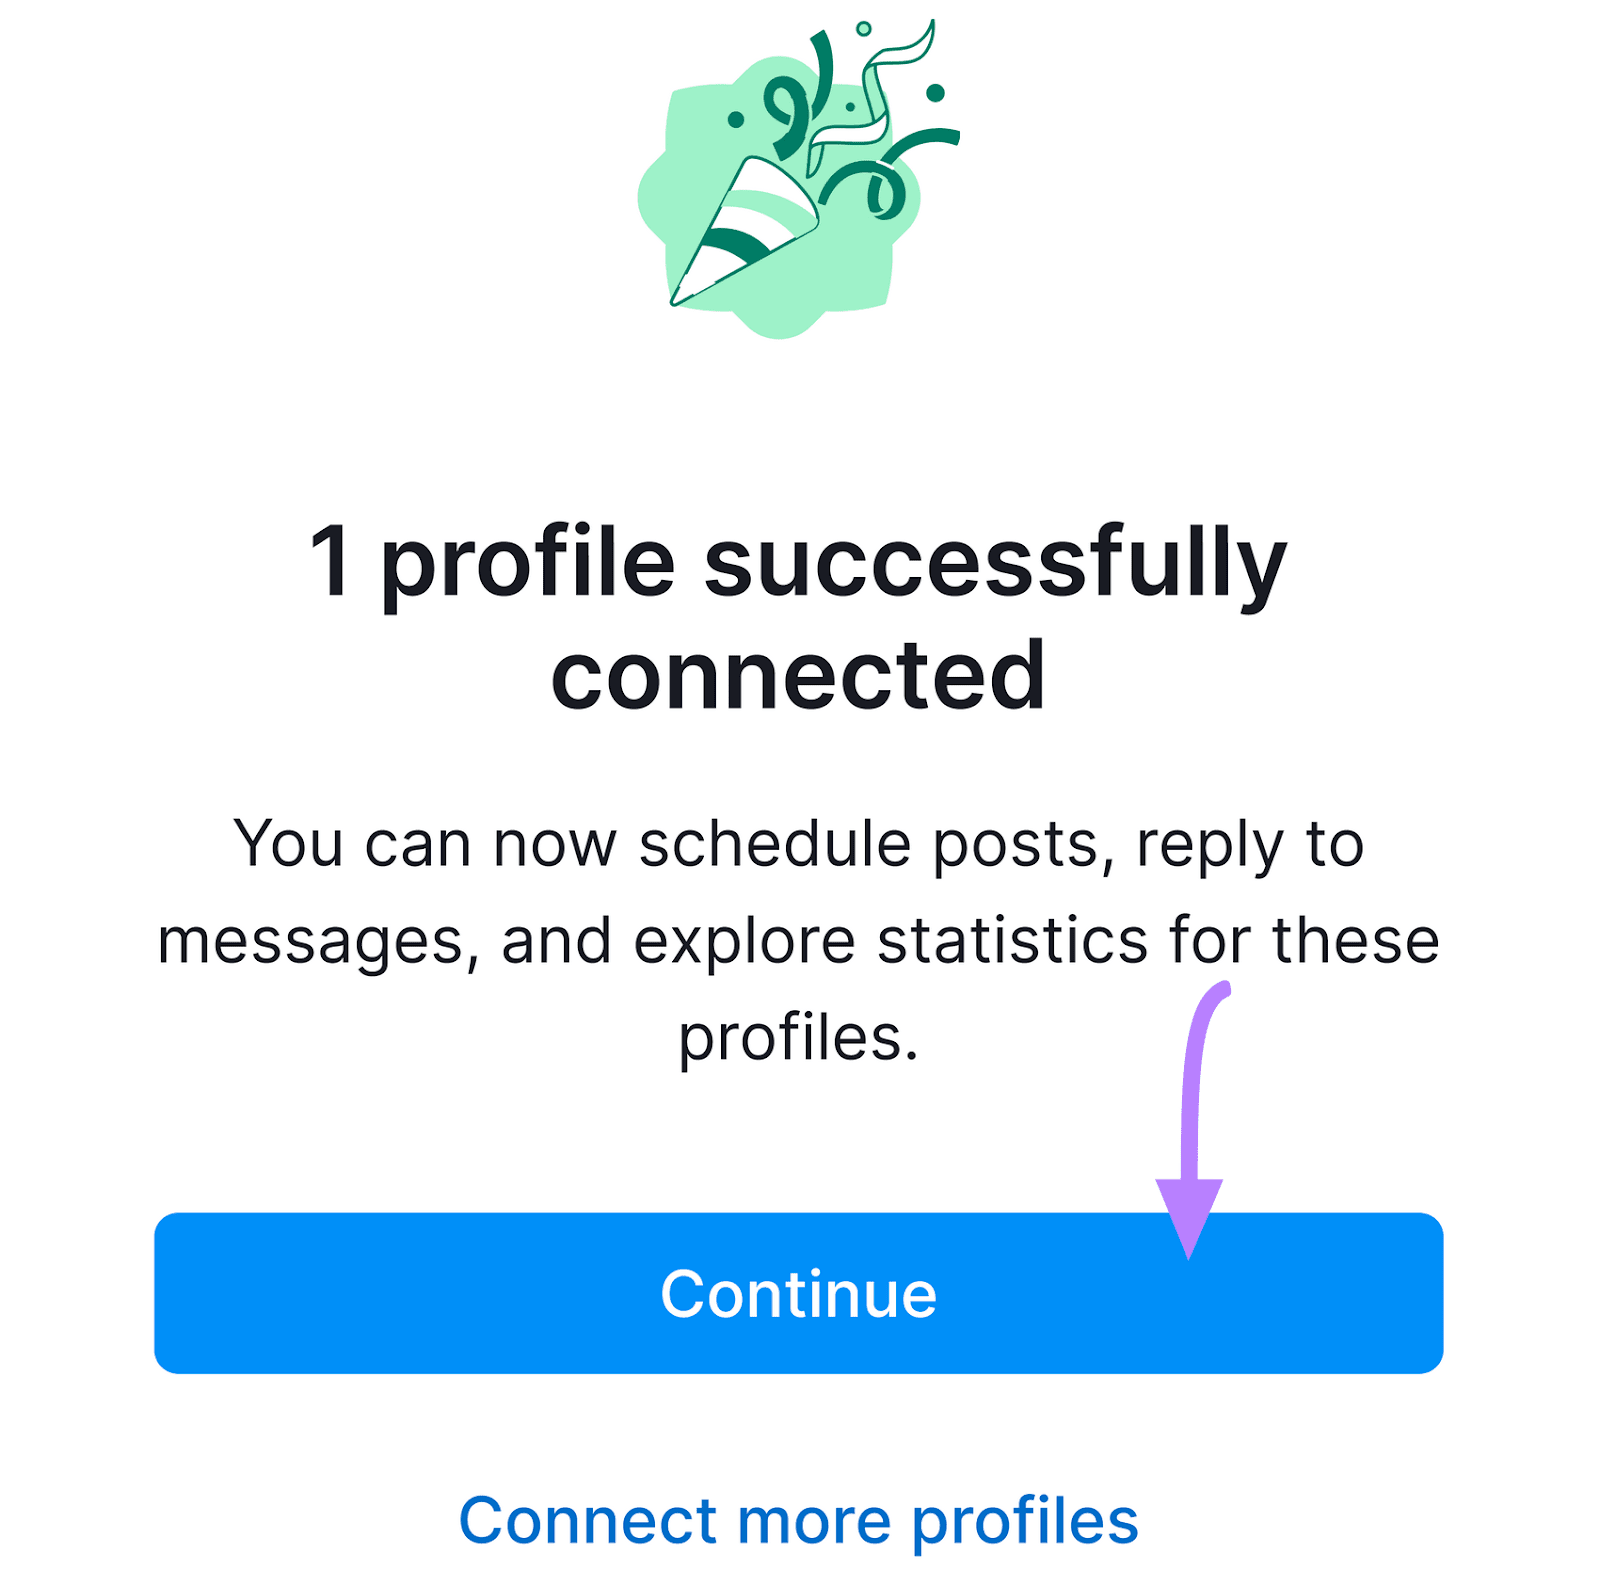
Navigate to the Social Analytics screen to see data and insights from your Meta Business Pages.
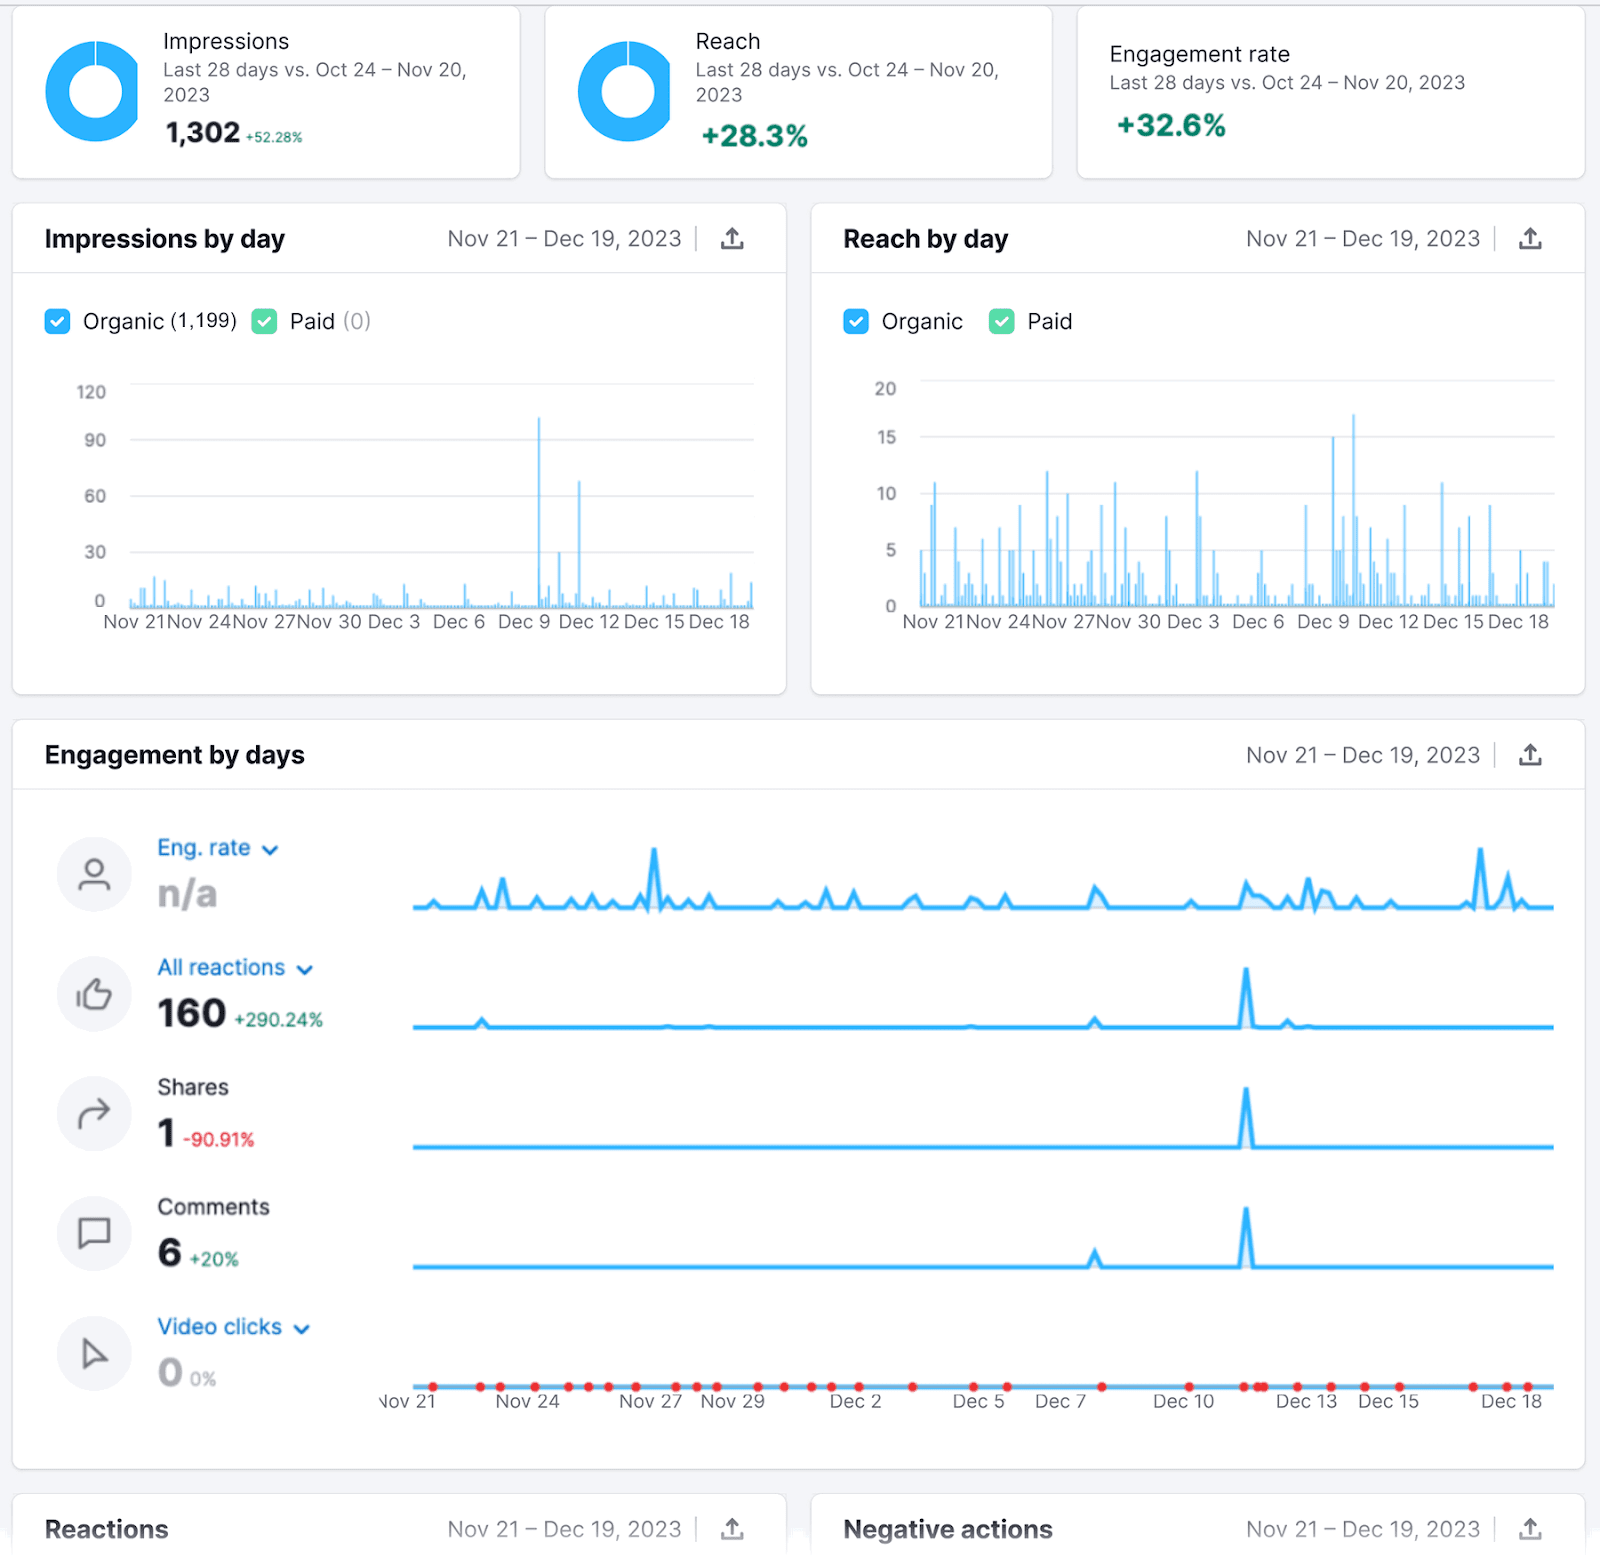
You can even use Semrush Social to schedule Facebook posts and look at the best time to post, helping ensure your Facebook campaigns get seen when your audience is more engaged.
How to Get Started with Facebook Business Manager
Let’s get you set up on Meta Business Manager.
Step 1: Create a Facebook Business Manager Account
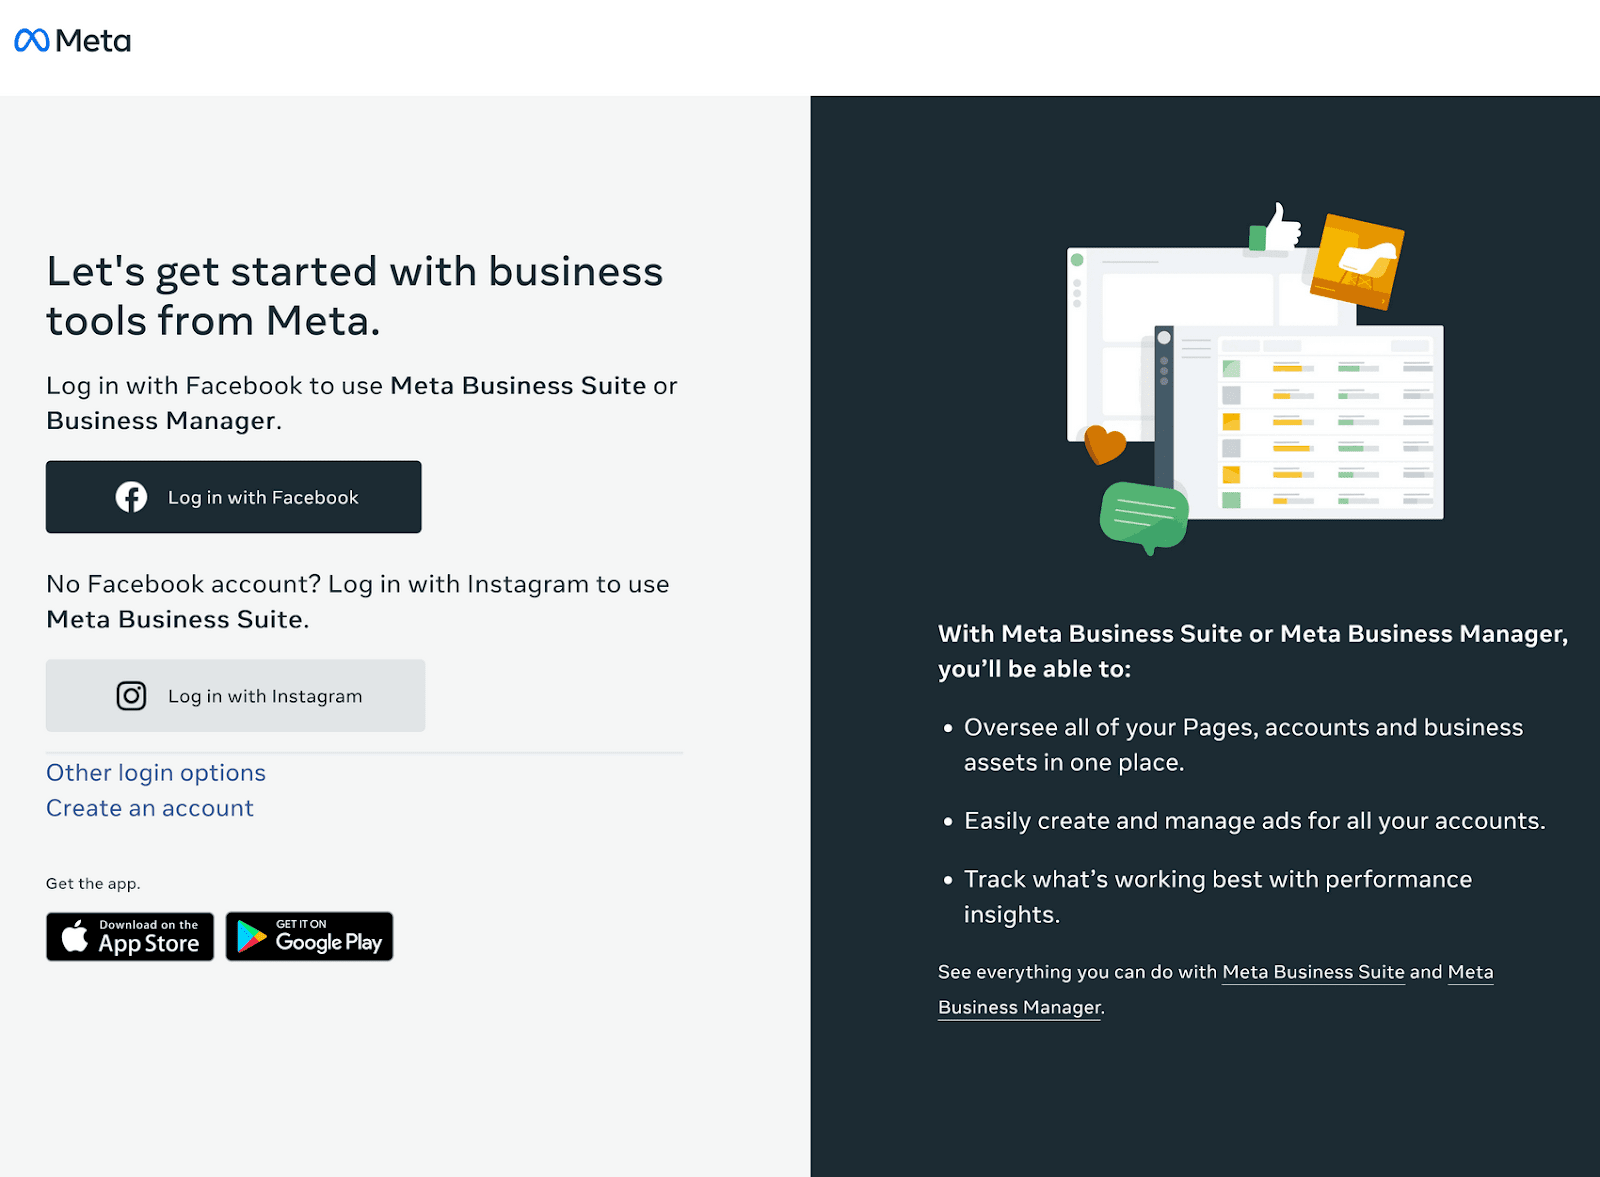
Visit Meta Business Manager and choose your login option: with Facebook, with Instagram, or create a new Facebook account.
For this walk-through on how to set up Business Manager, we’ll click “Log in with Facebook.”
Step 2. Log Into Your Facebook Account
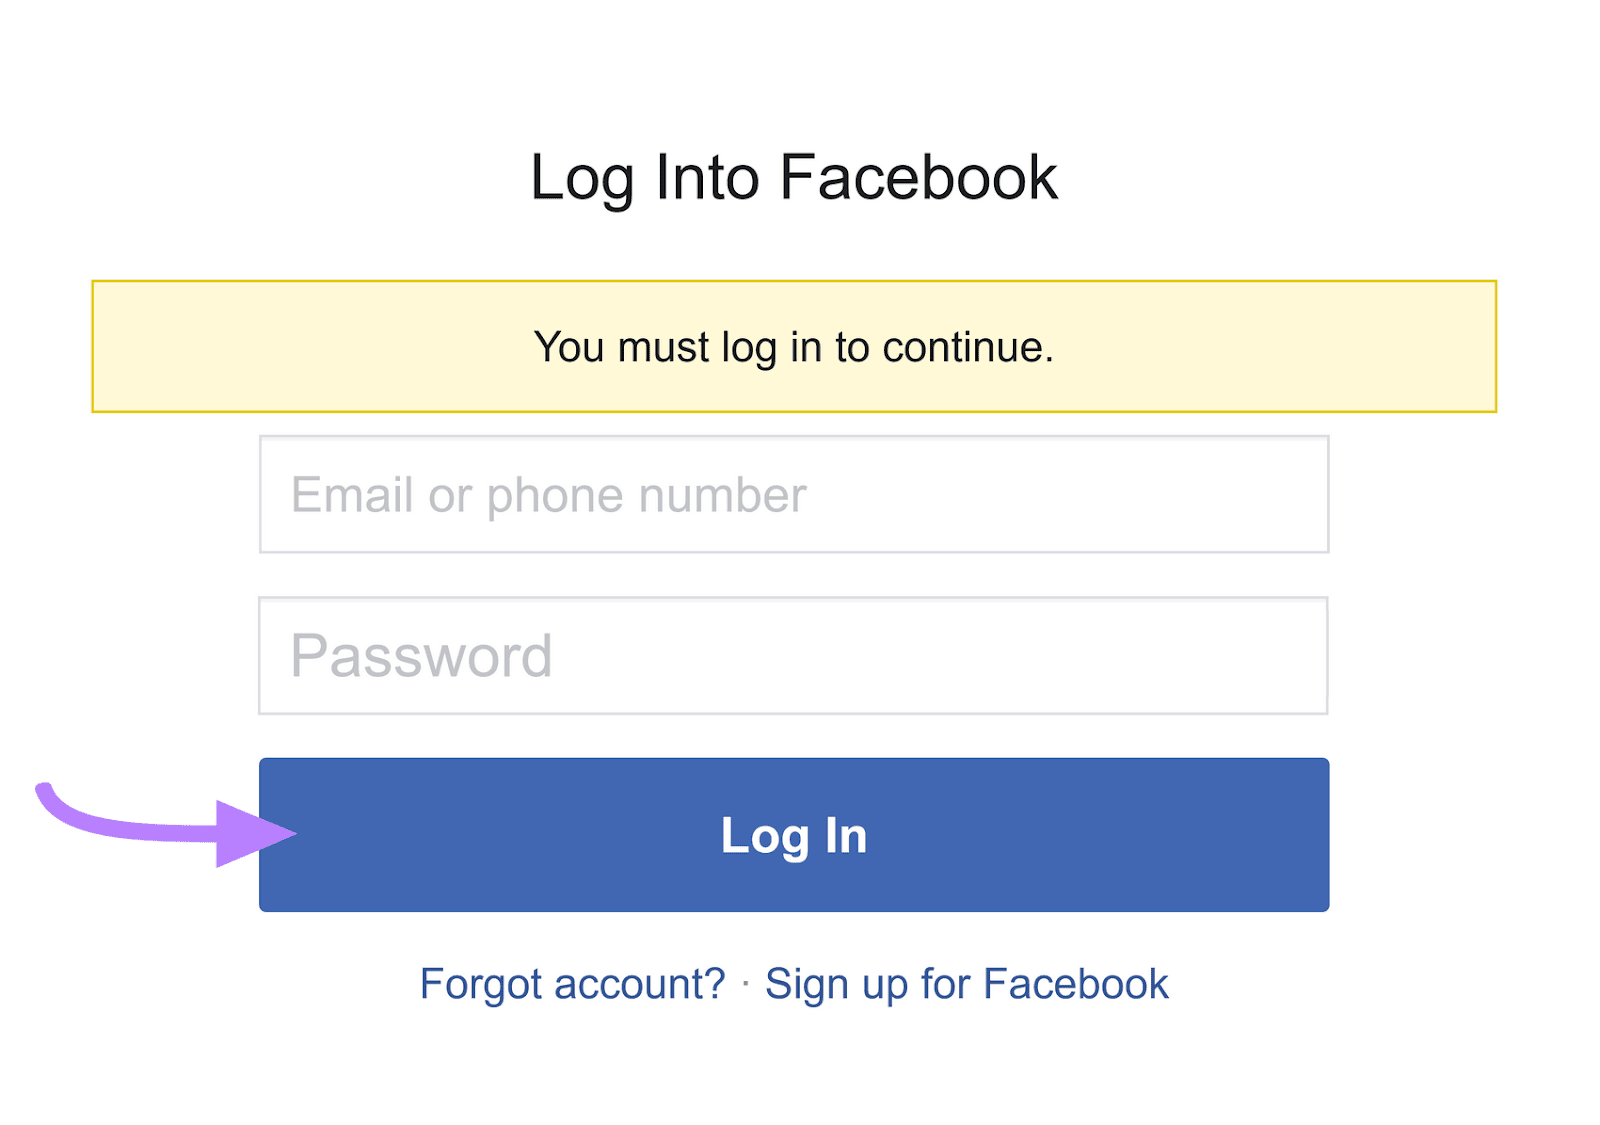
Enter your Facebook account information and click “Log in.”
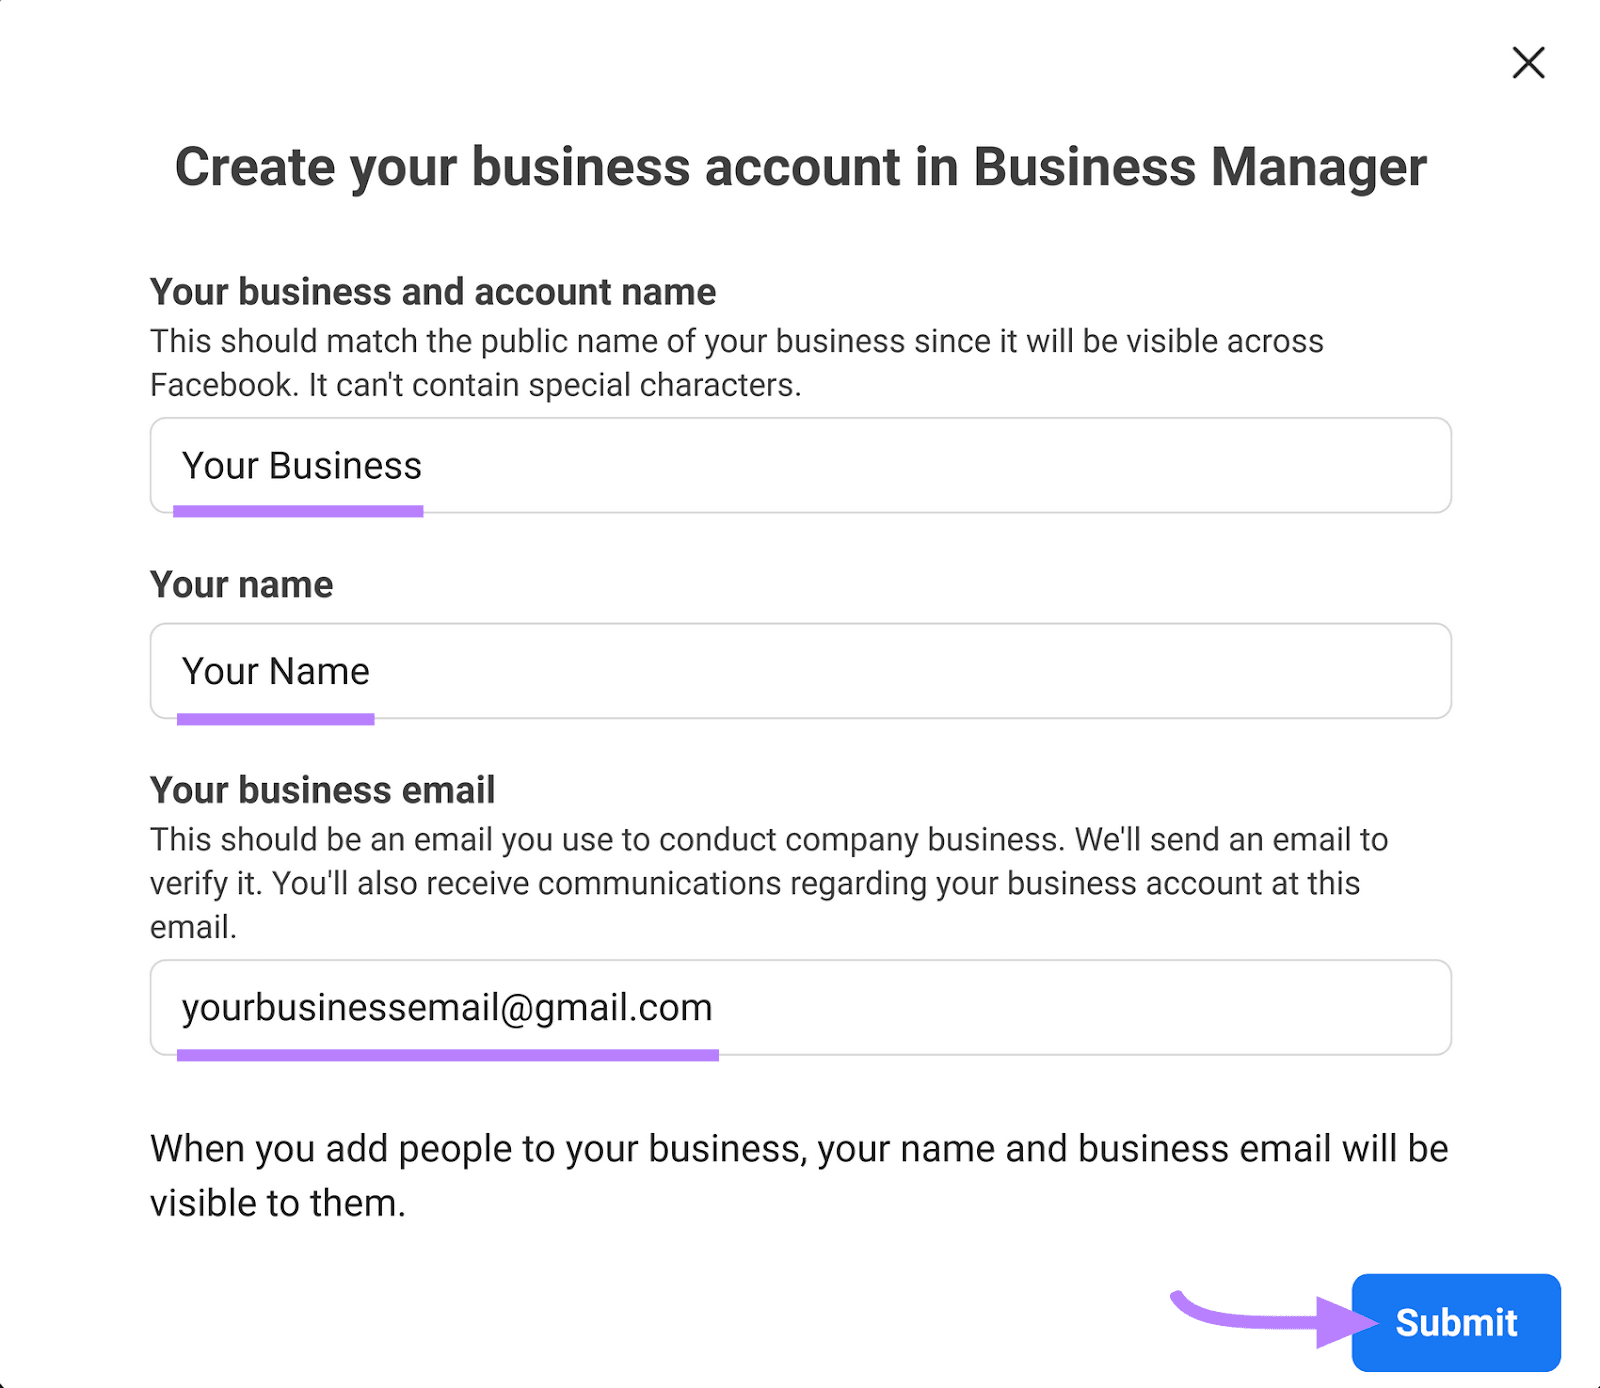
Step 3: Enter Your Business Information
Add your business and account name and your business email address.
Next, click “Submit.”
Then, check your email account to confirm your email address.
And add the rest of the required information. For example, address, business legal name, and website.
Step 4: Add Your Facebook Business Page
Navigate to “Settings” then “Business assets.”
Click “Add assets” and select “Facebook Page.”
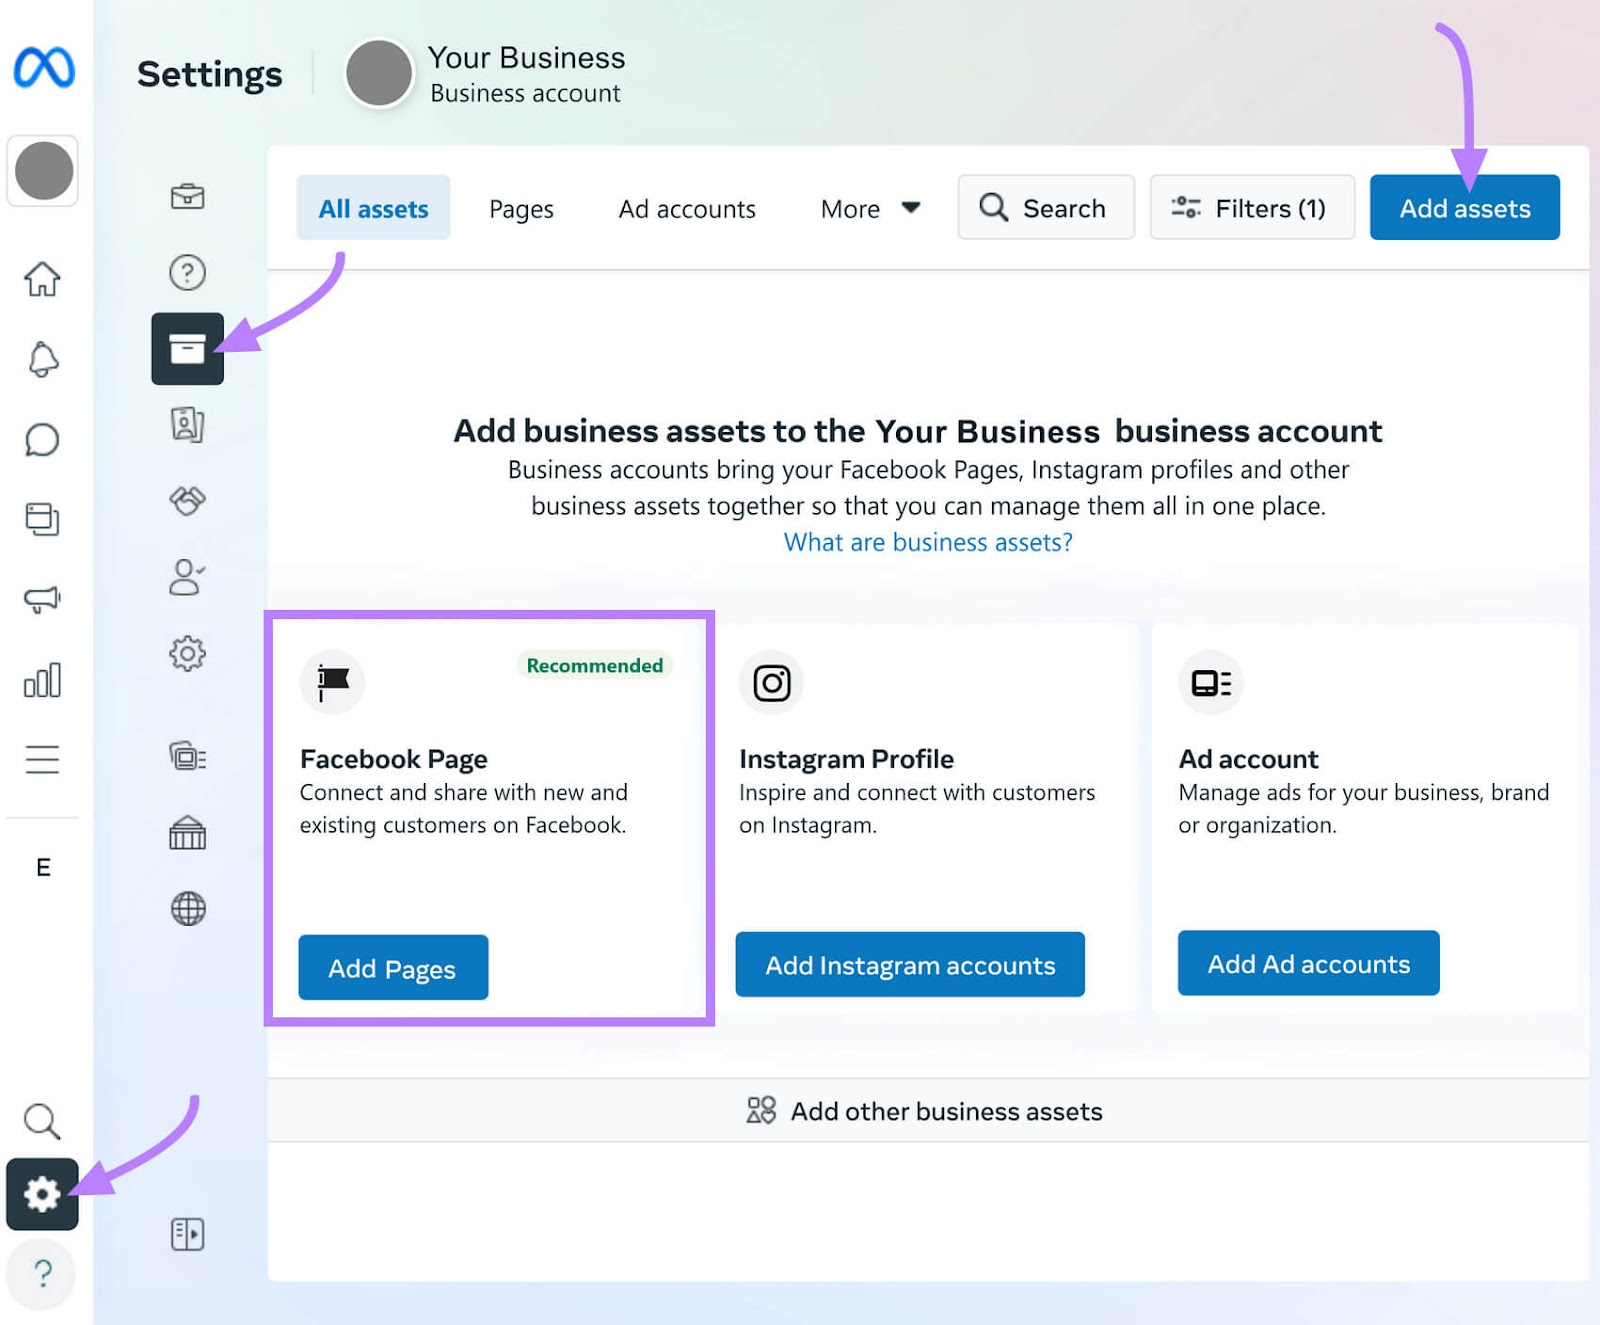
You have three options:
- “Create a new Facebook Page”: Creates a new Facebook Page to manage

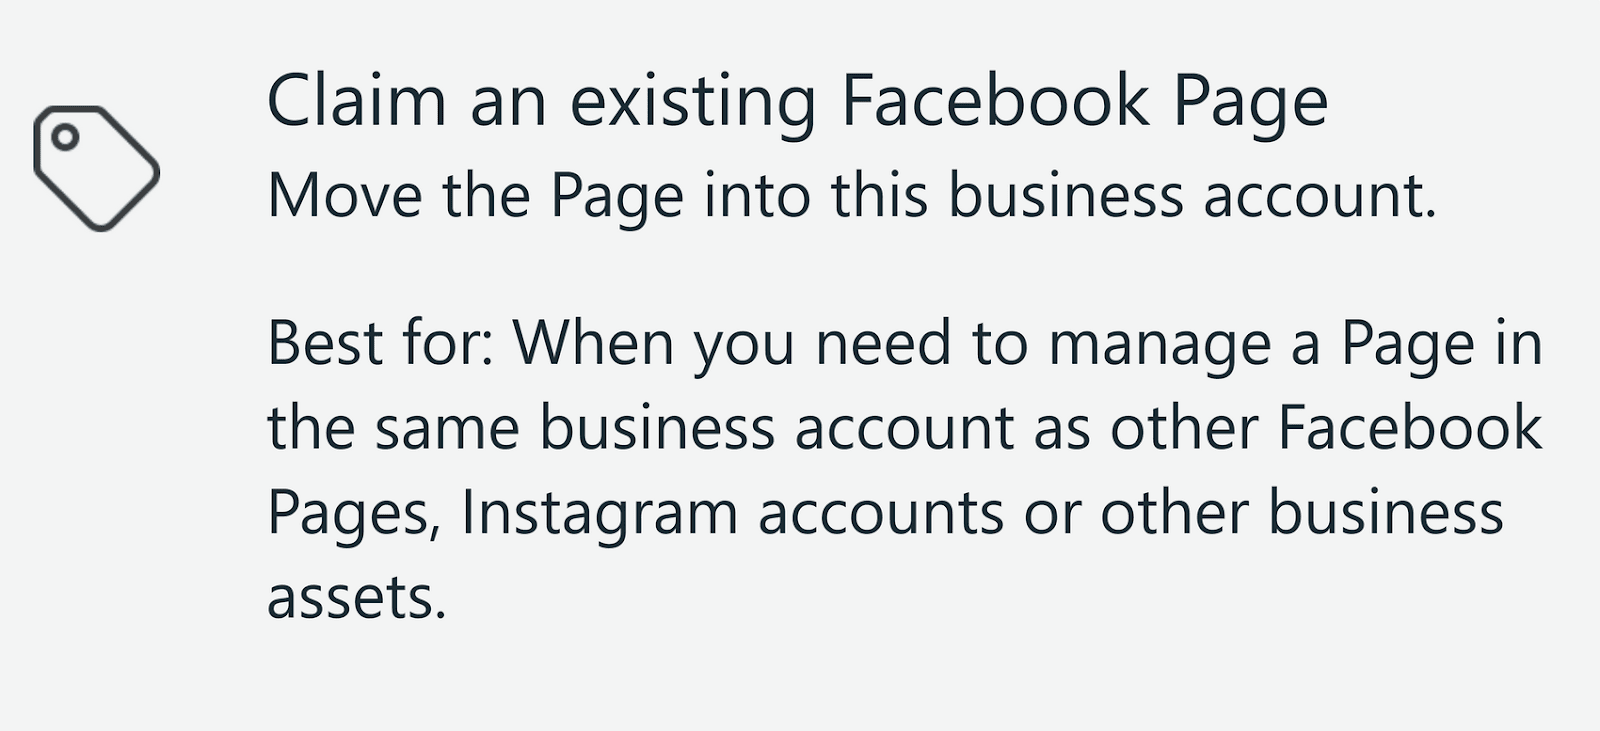
- “Claim an existing Facebook Page”:Claims an existing Facebook Page you manage
- “Request to share a Facebook Page”: Asks for permission to another person’s Page. For example, if you’re an agency, you would use this option to request access to a client’s Facebook page. And vice-versa.

Select the option that’s right for you.
In this example, we’ll click “Claim an existing Facebook Page” and enter our page name in the drop-down menu. Then, click “Next.”
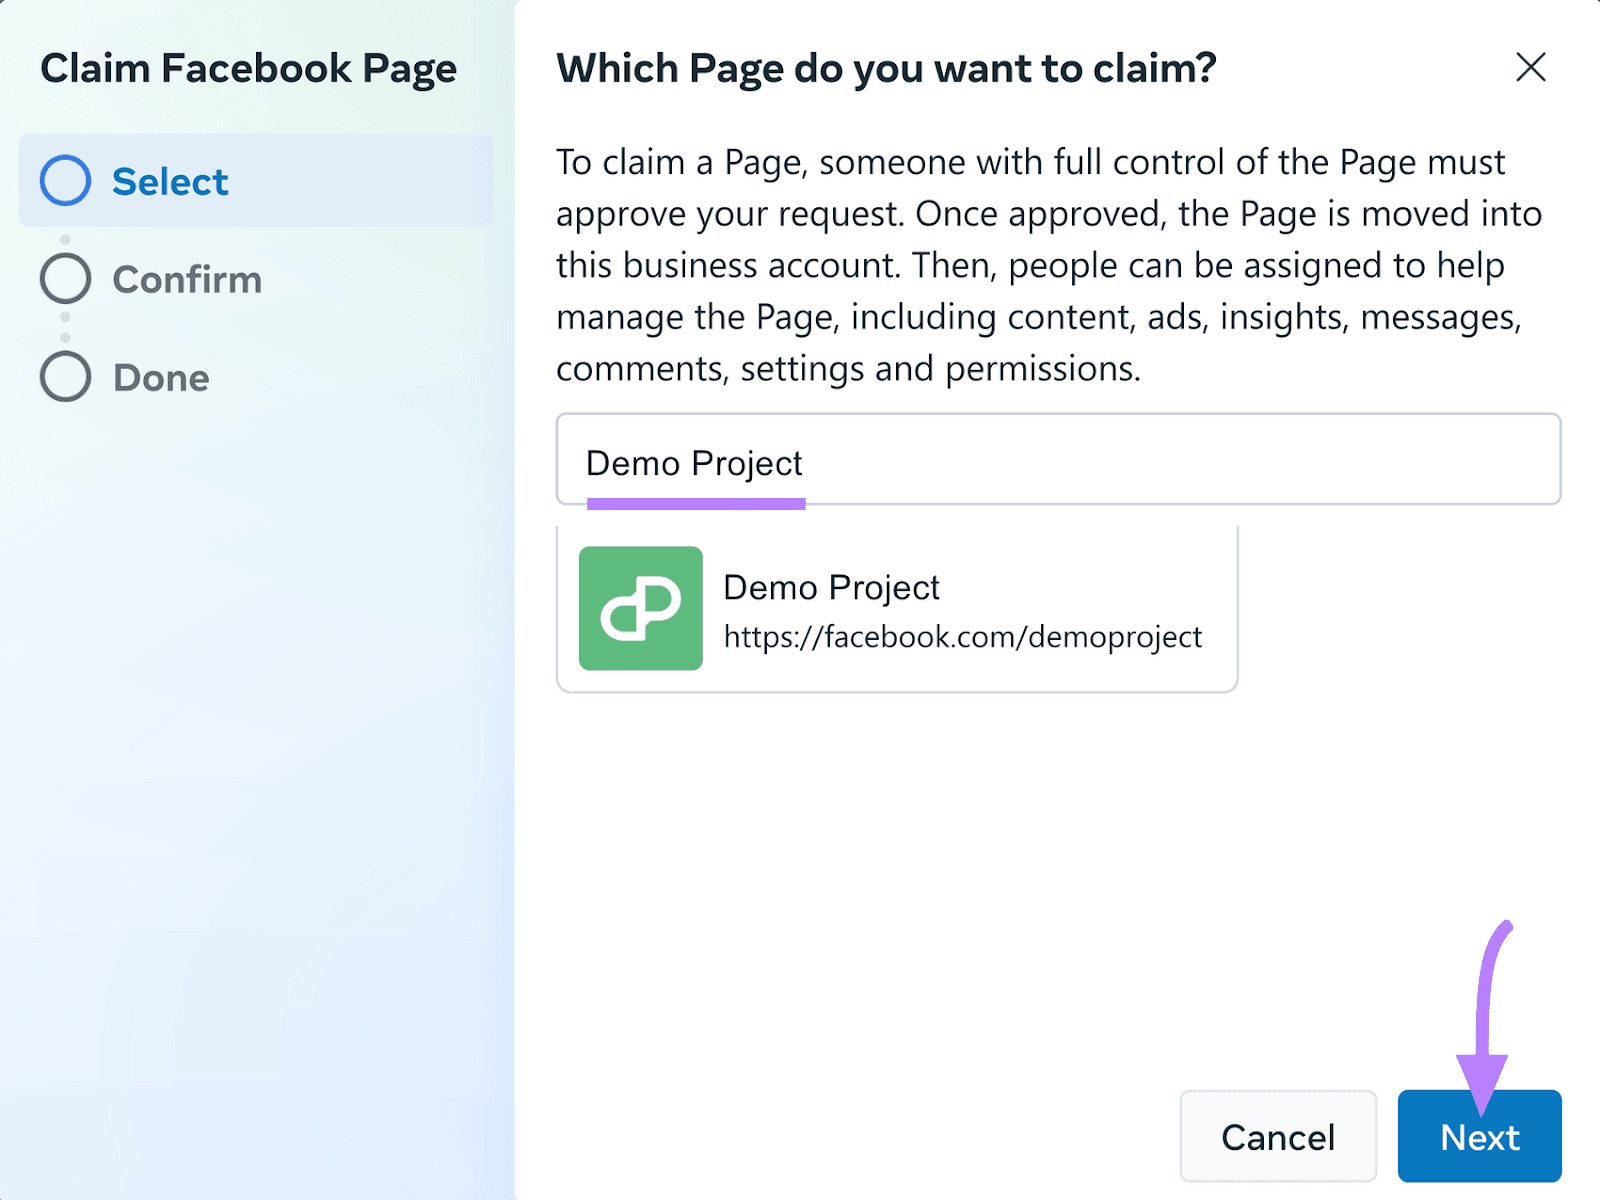
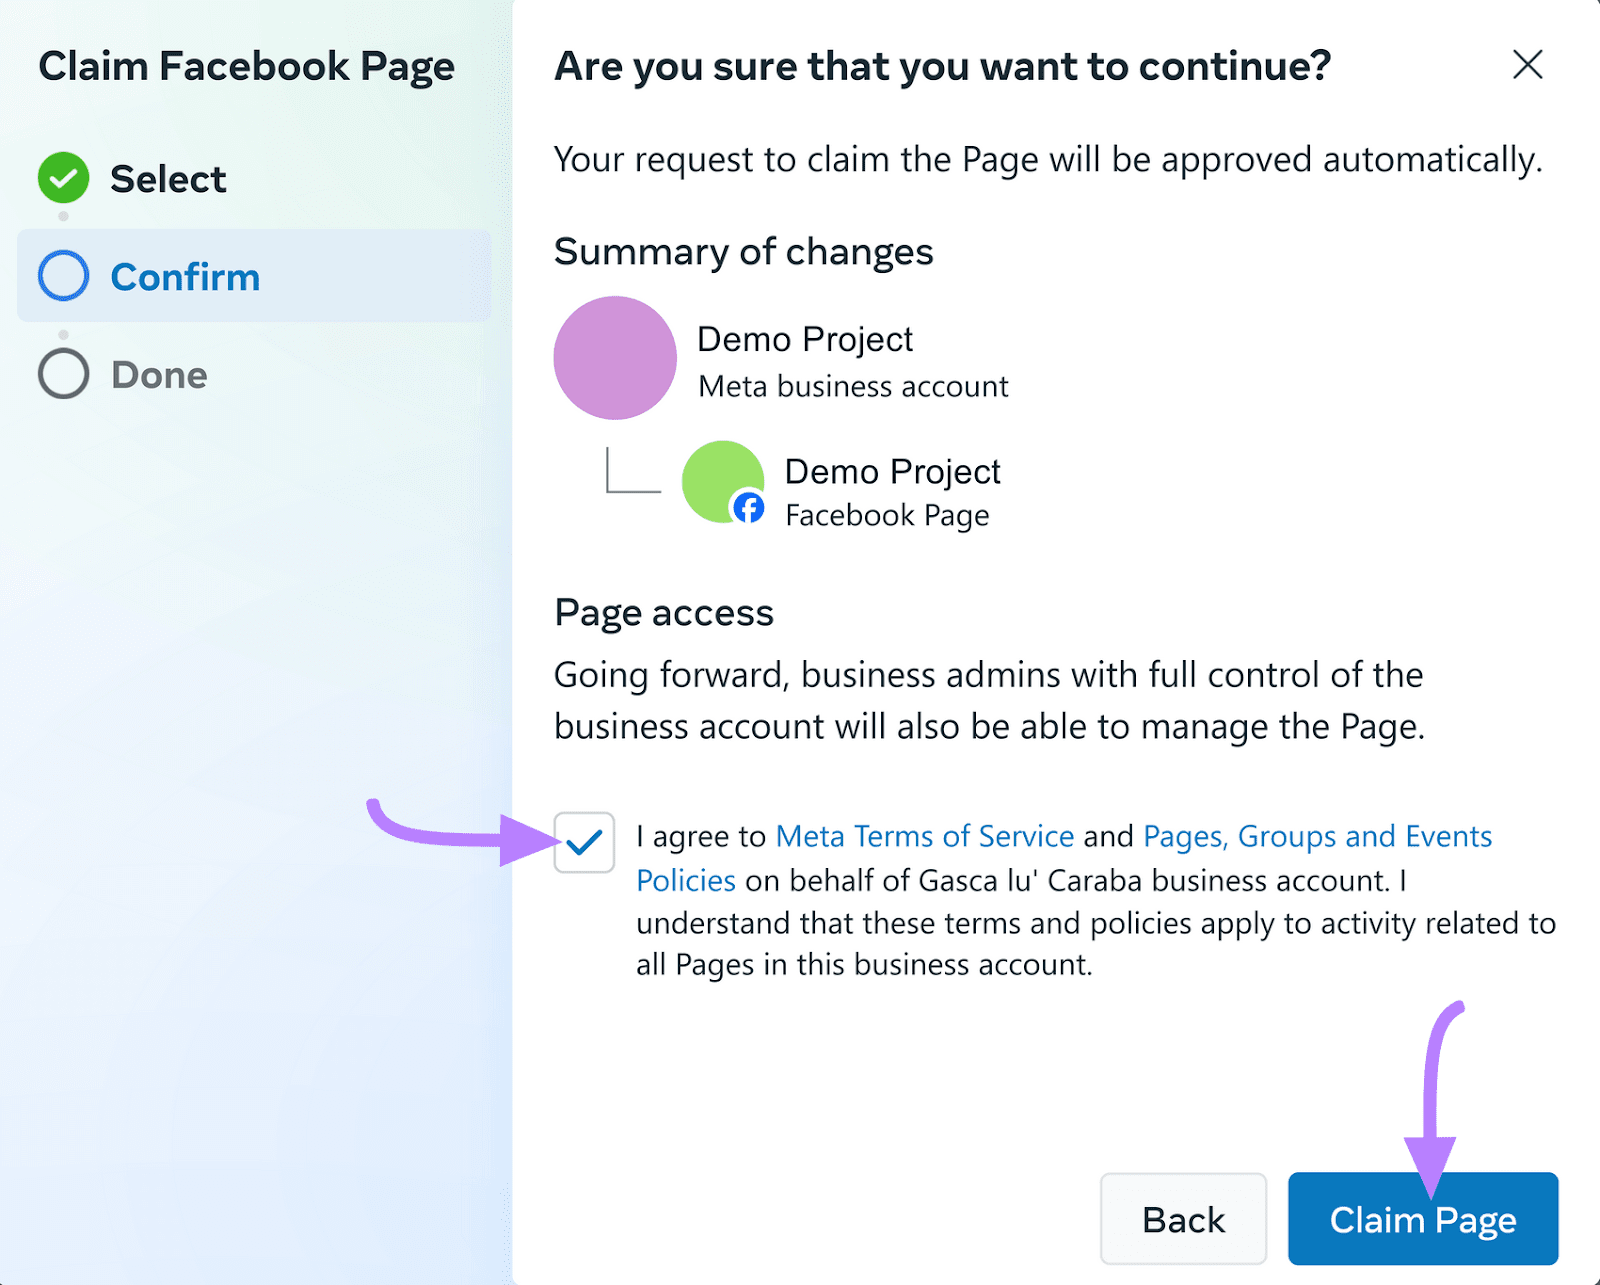
Confirm the terms and conditions and the Facebook Page you want to claim. Then, click “Claim Page.”
Step 5: Invite Other Users
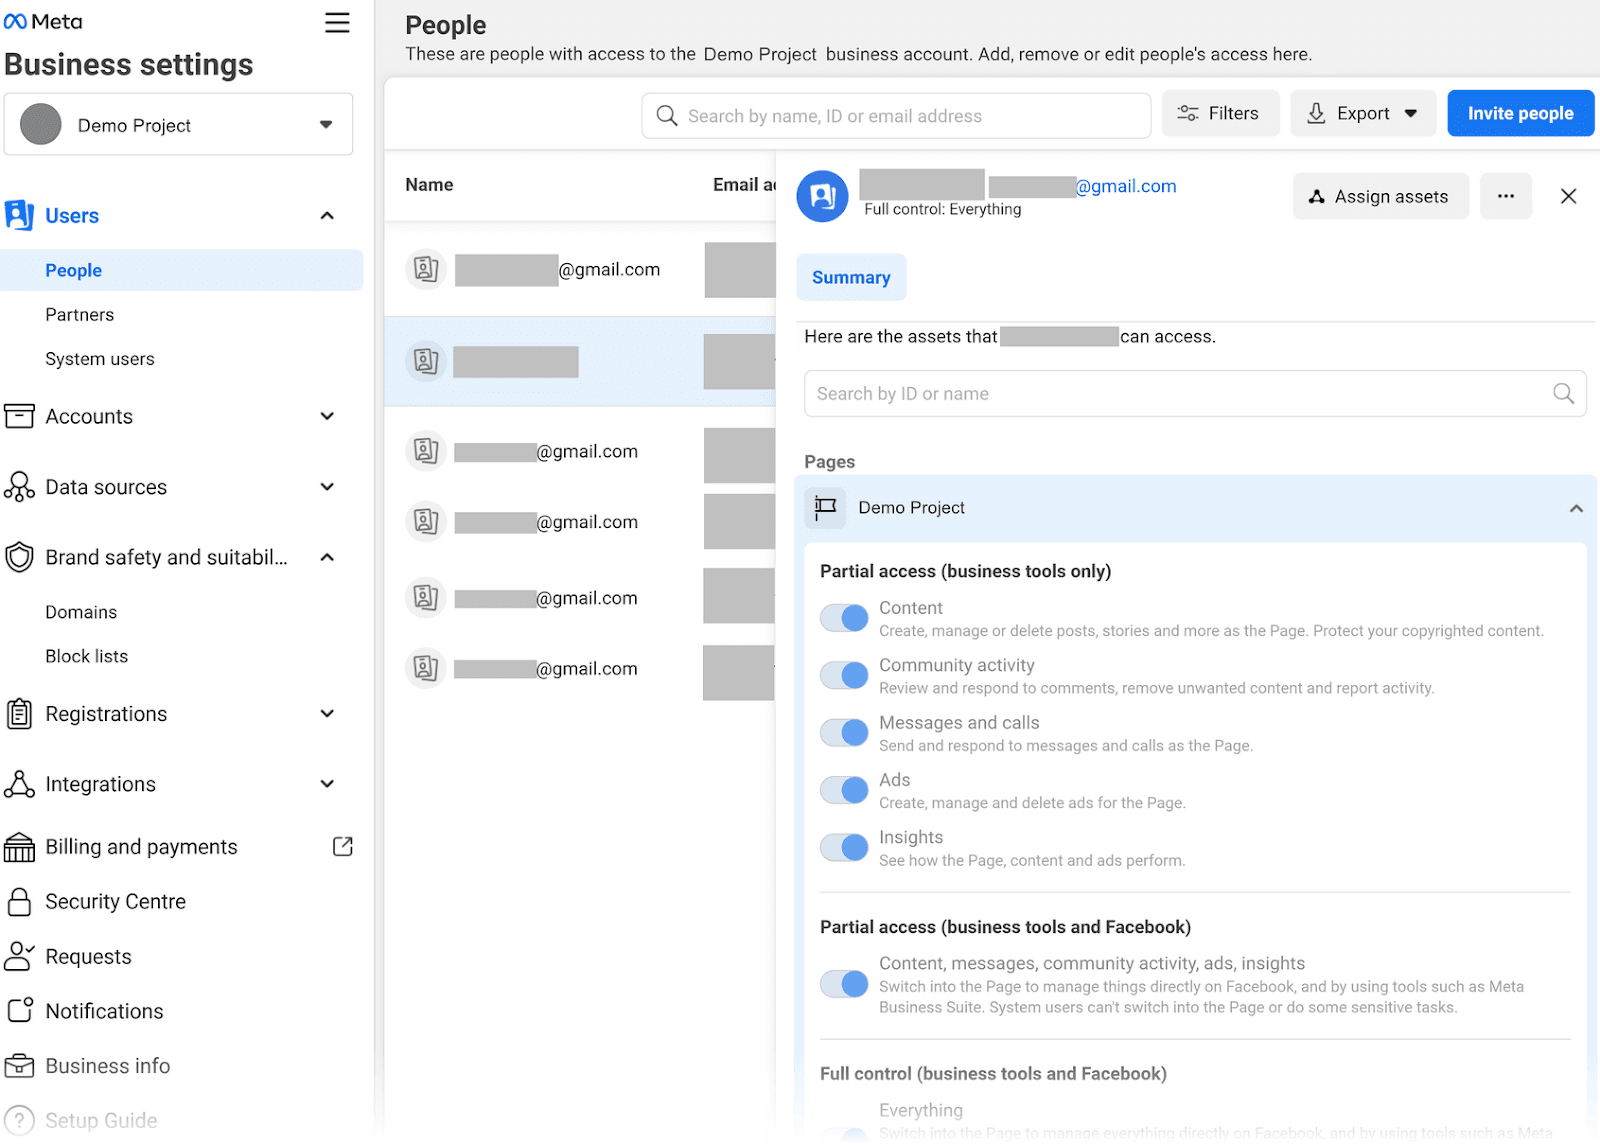
Follow along for how to add someone to Facebook Business Manager:
Click on “Settings,” then click on “Invite people.”
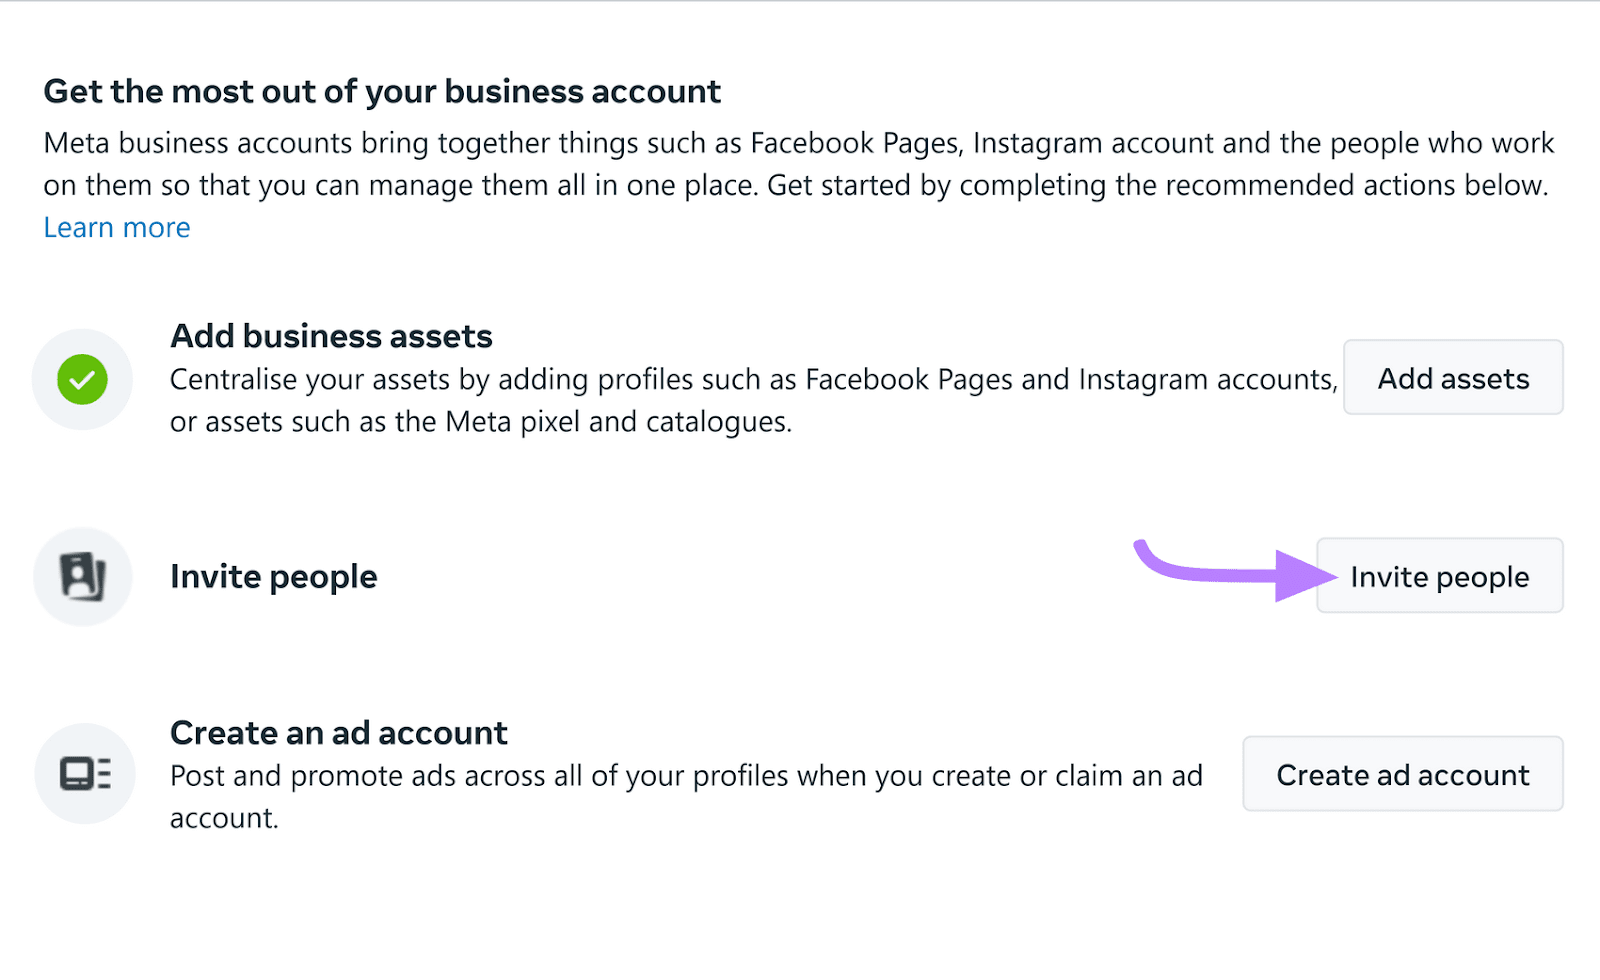
Then, click “Invite people” in the top right corner.

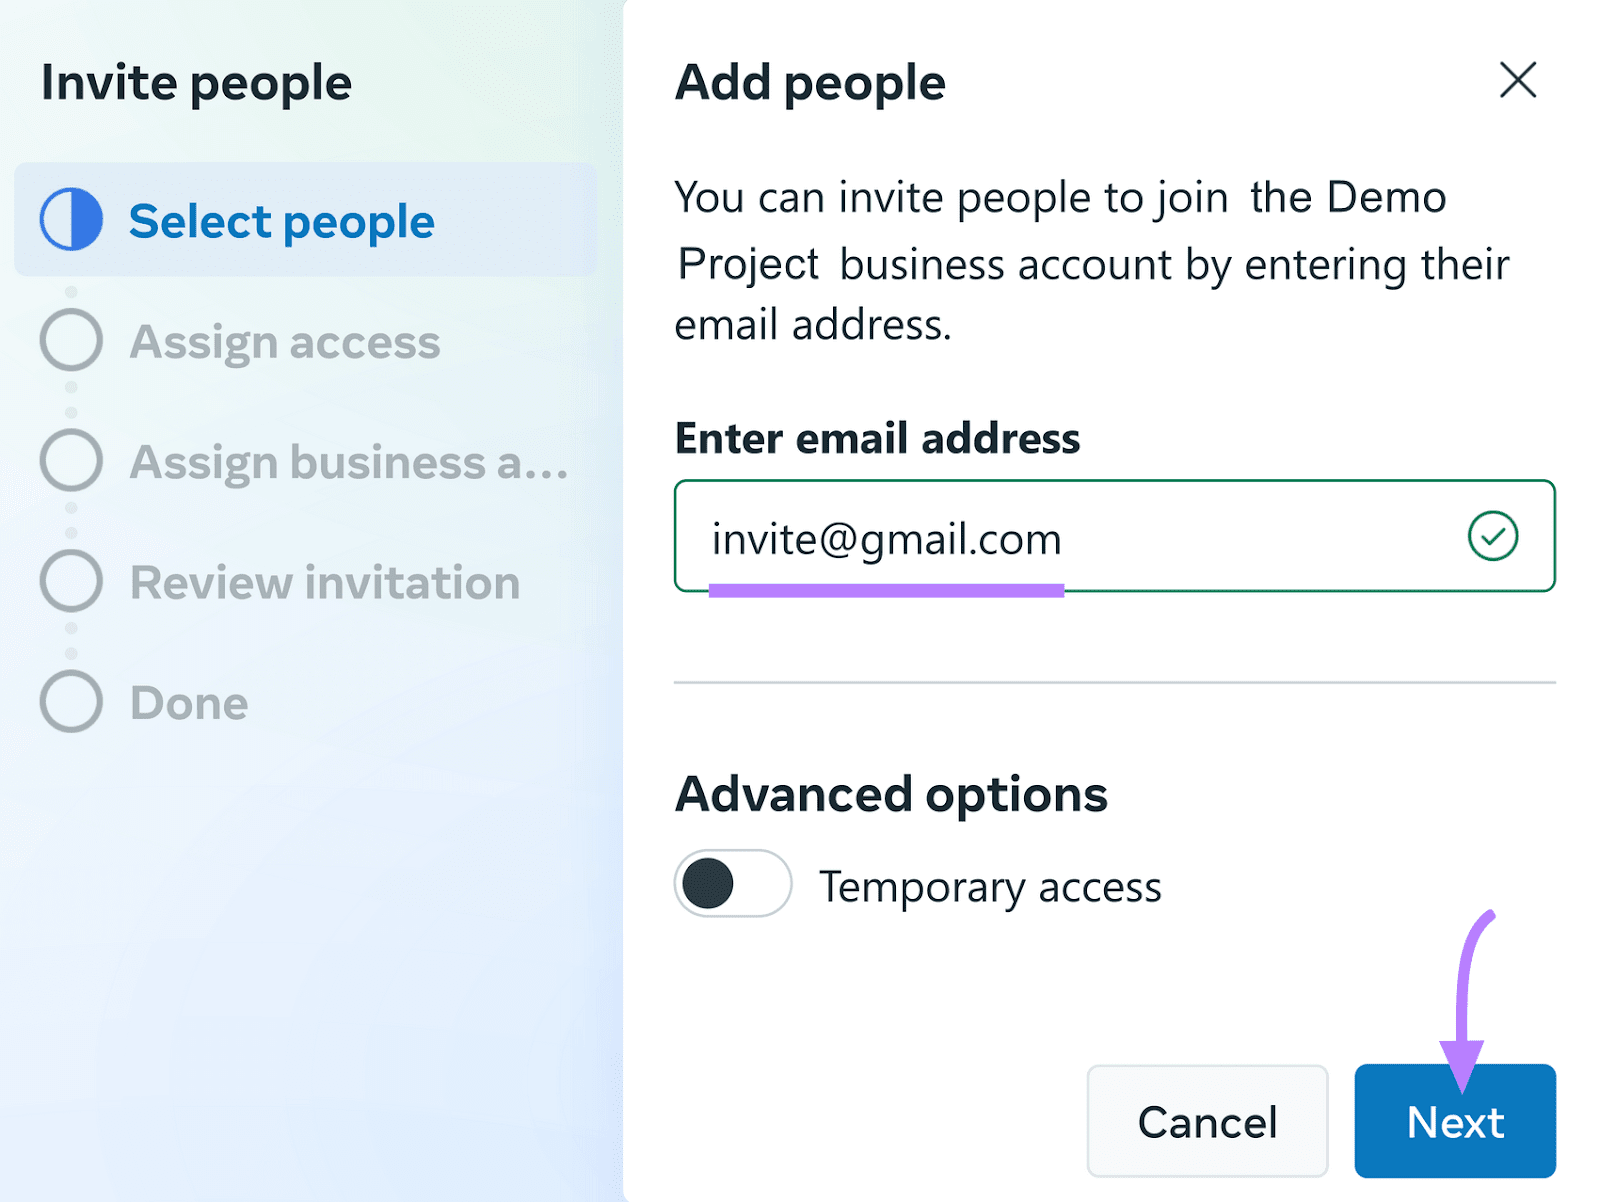
Add the email address of the person you want to invite. Then, click “Next.”
To set their access level:
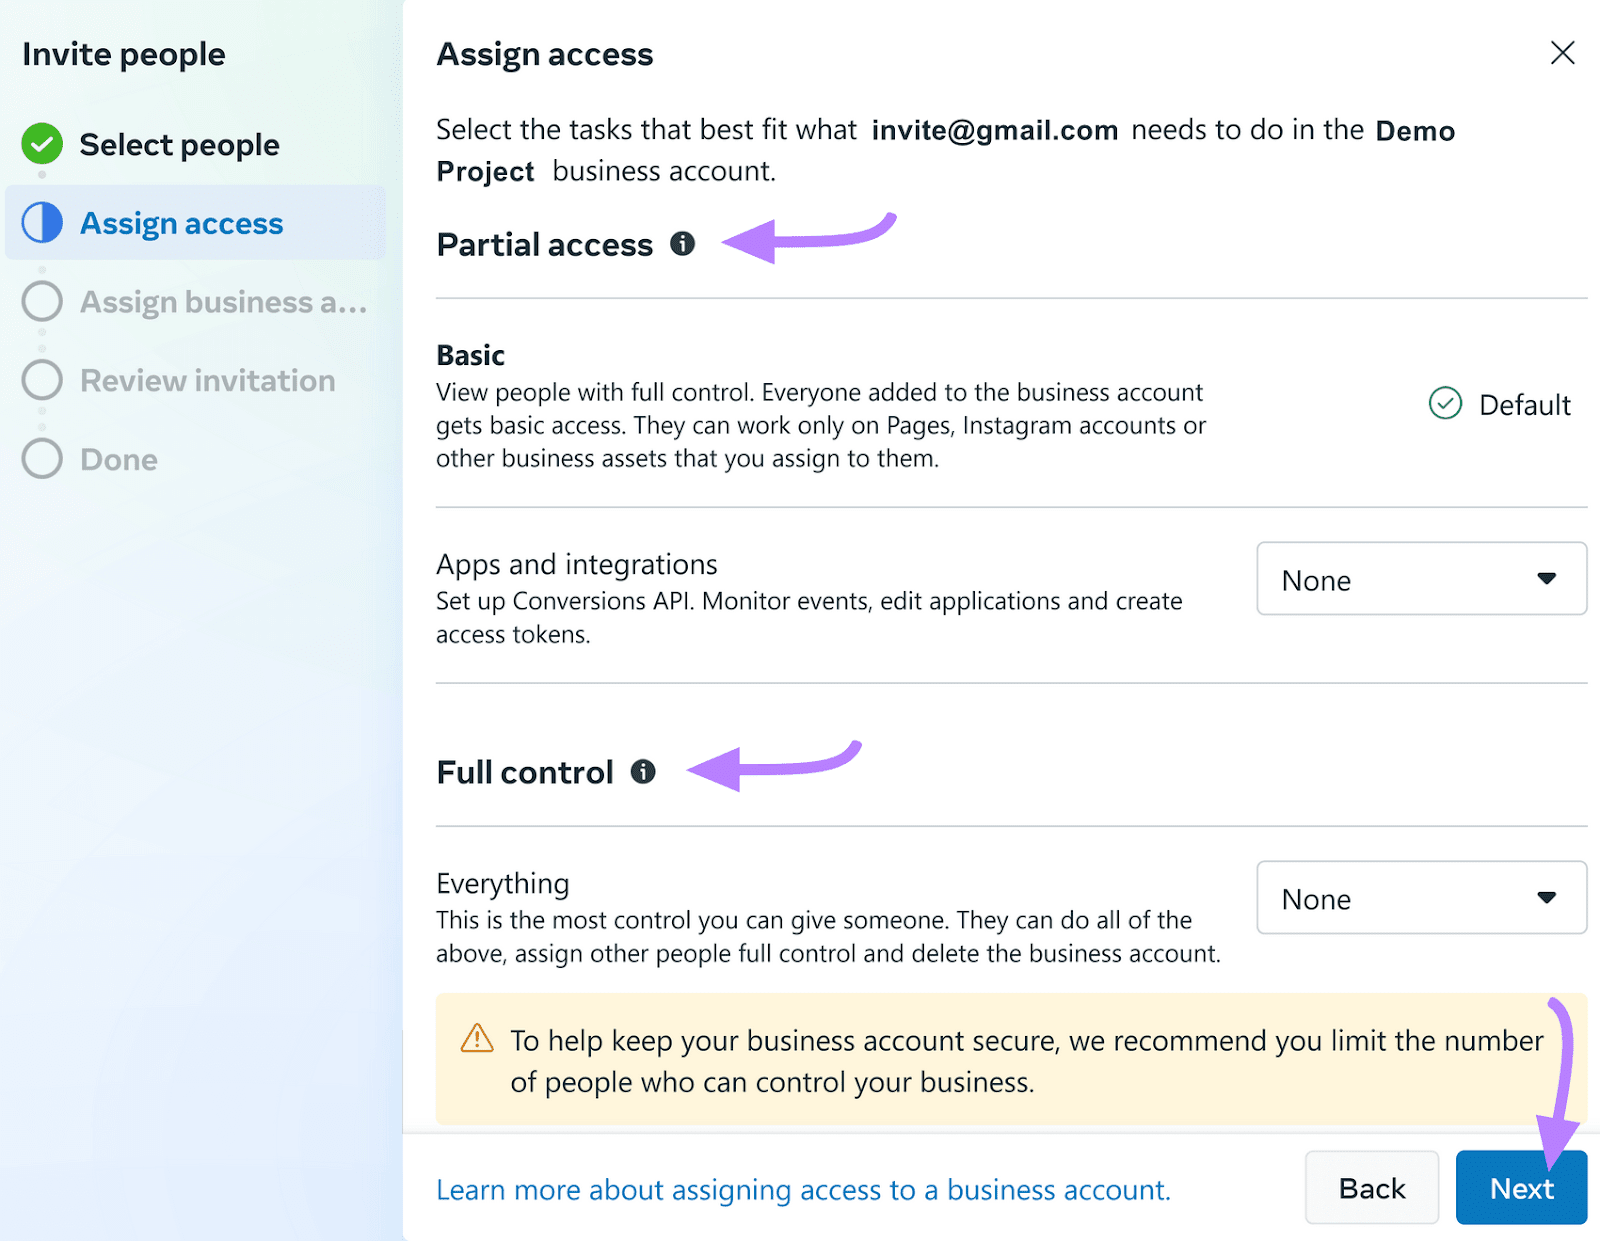
For example, if you’re a social media manager, you likely want to give yourself full control.
But if you use contractors you might want to limit how much access they have to your Facebook Business account.
You can also assign specific duties to different people. Like creating content or moderating comments.
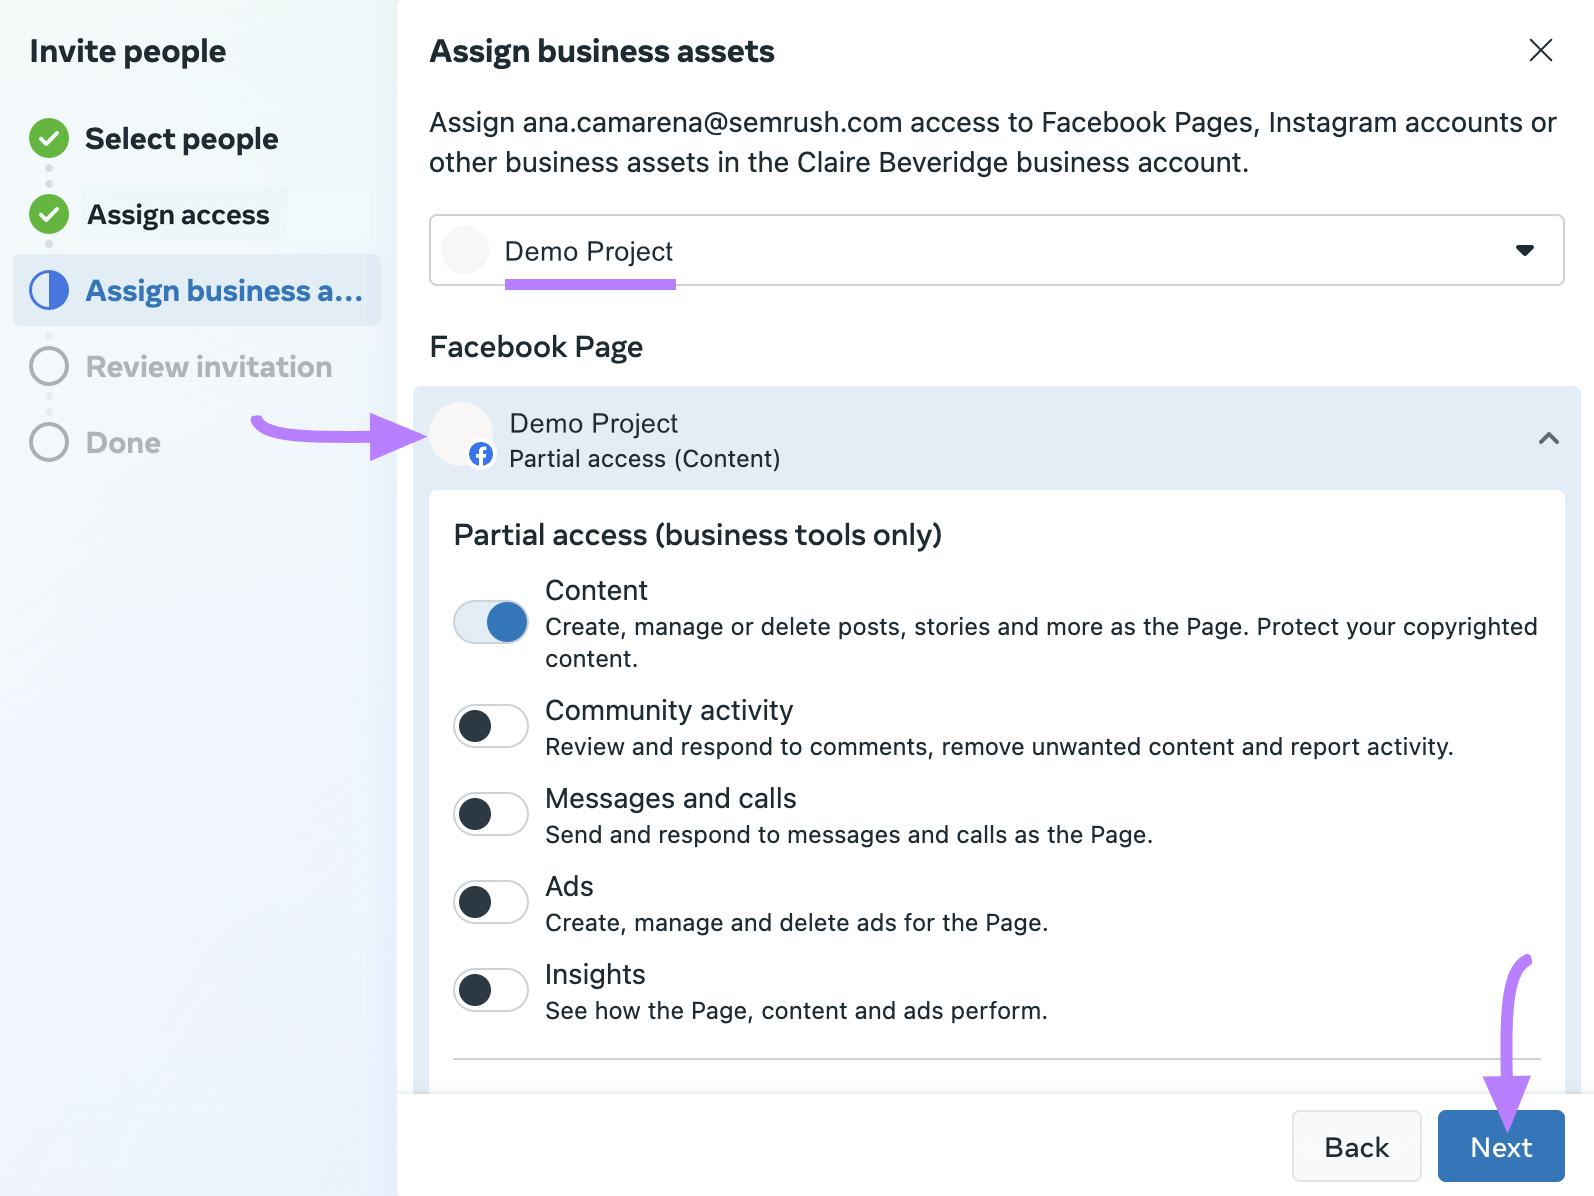
Then, assign a Facebook Business Page or other assets and control access levels:
Click “Next.”
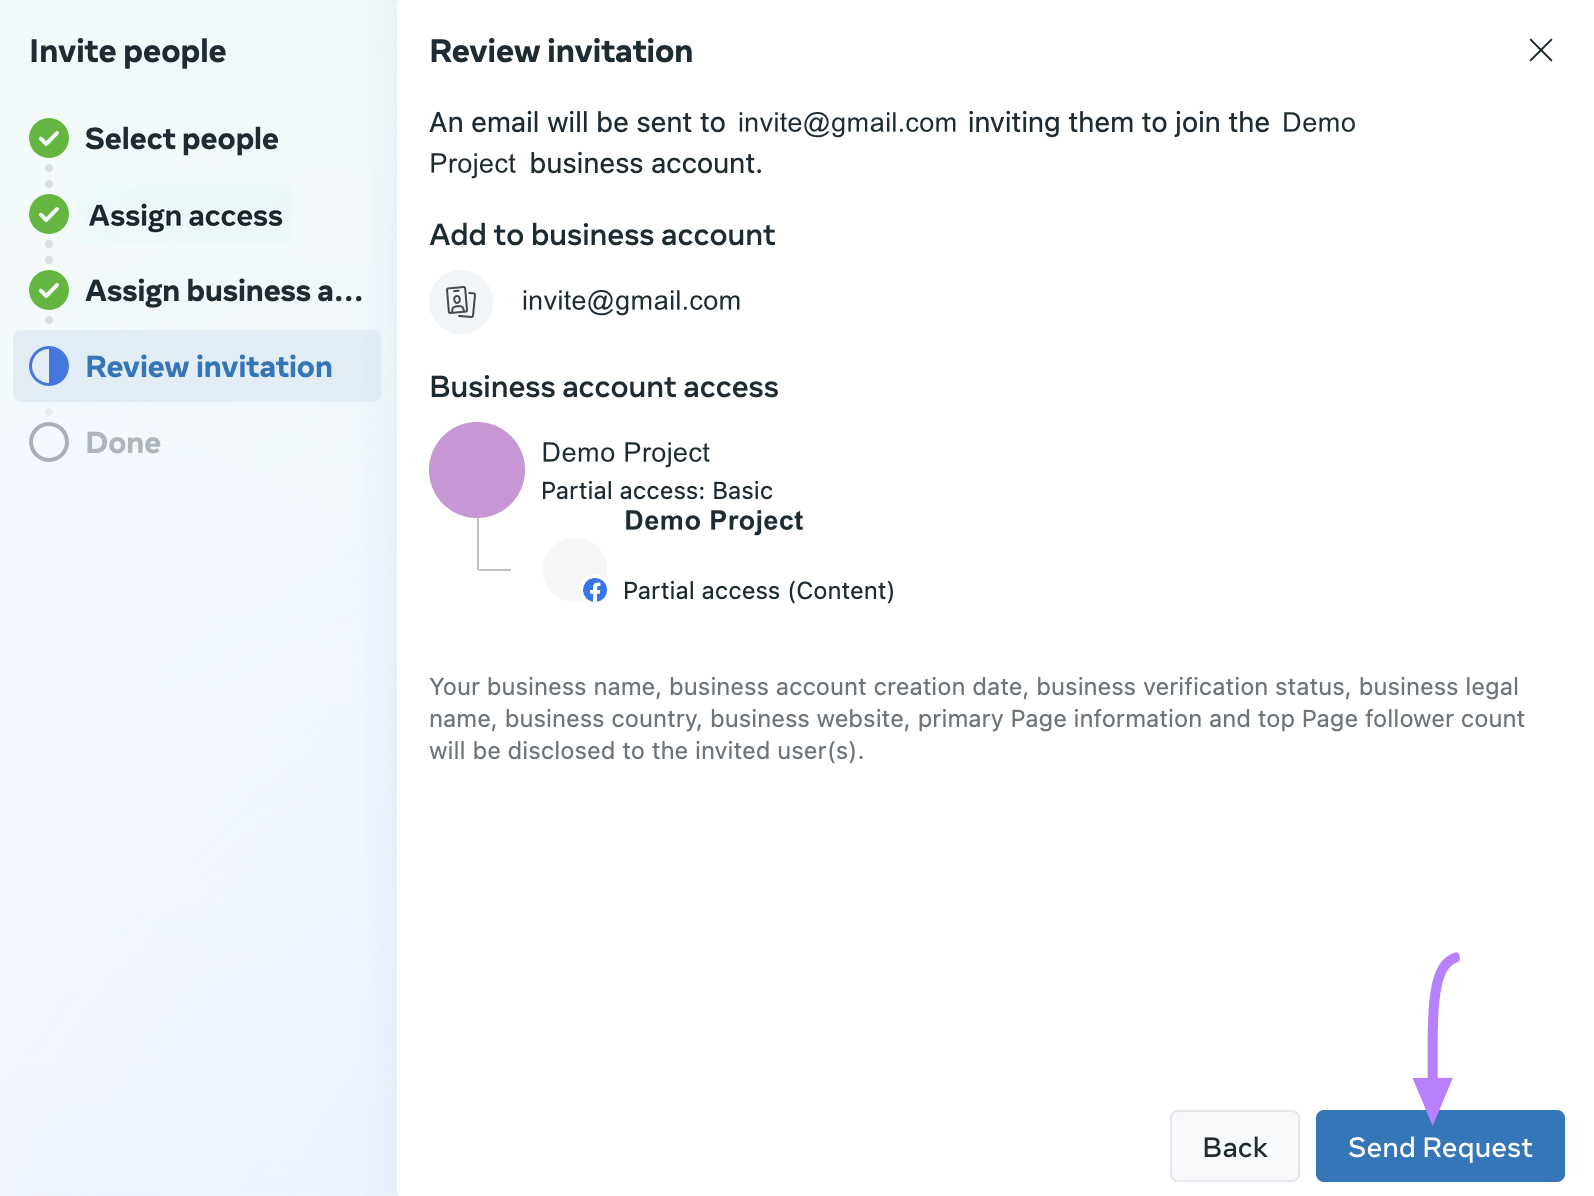
Now, review your invitation. If you’re happy with the settings, click “Send Request” to add another user to your Business Manager account.
Step 6: Add Your Ads Manager Account
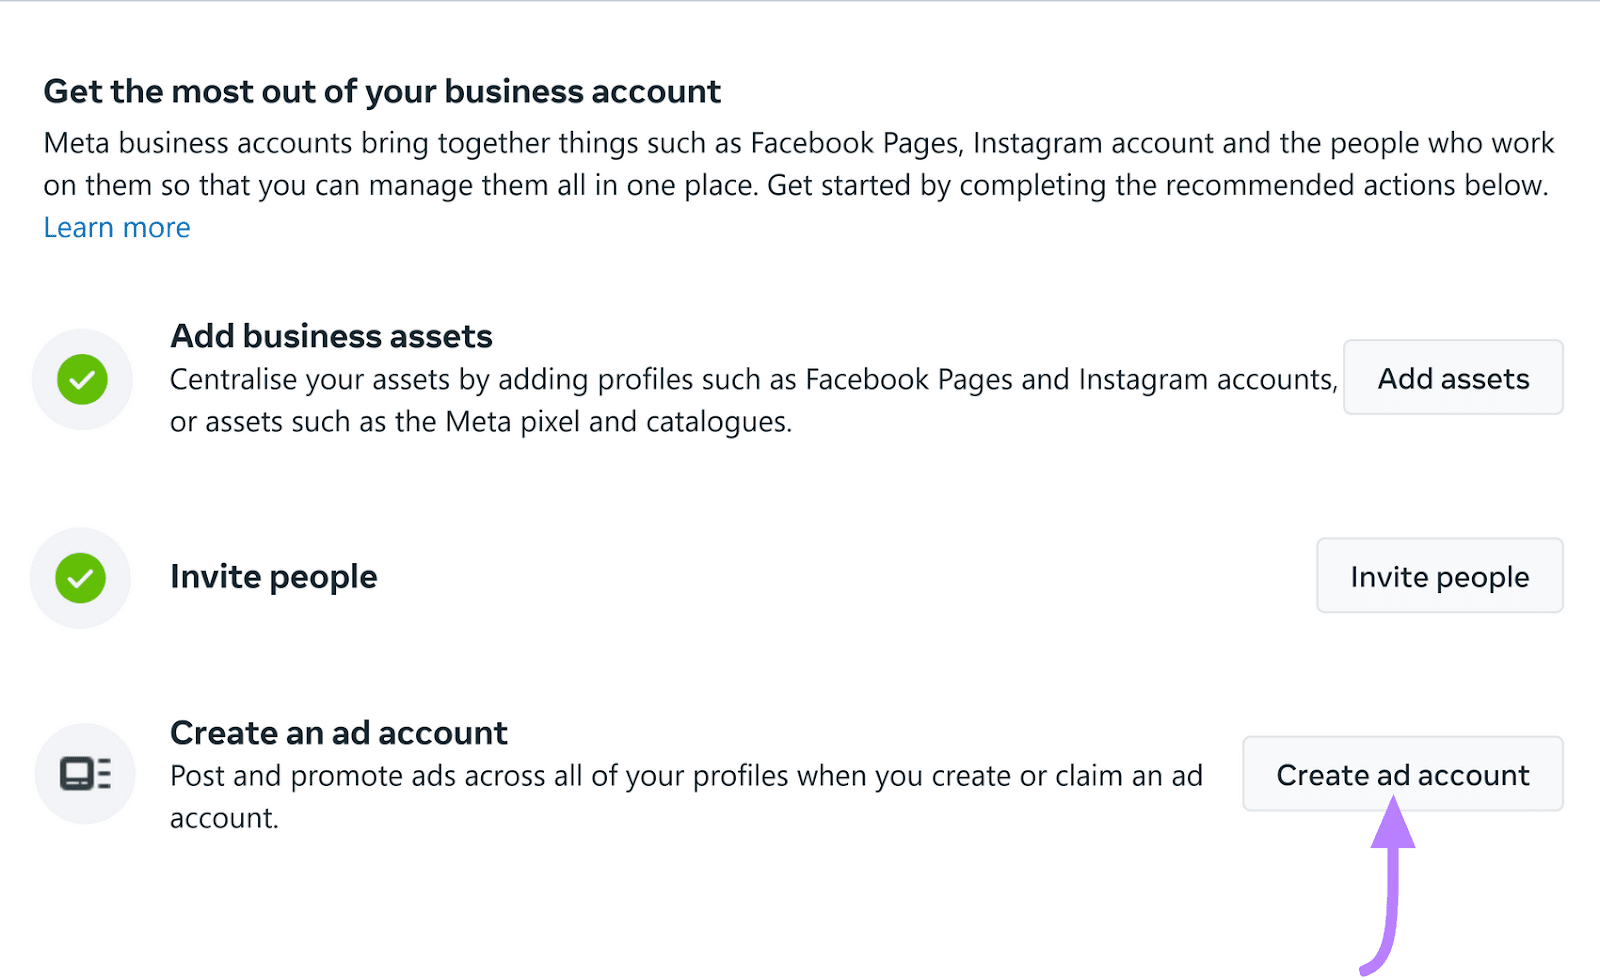
Navigate back to your dashboard. Then, click on “Create ad account.”
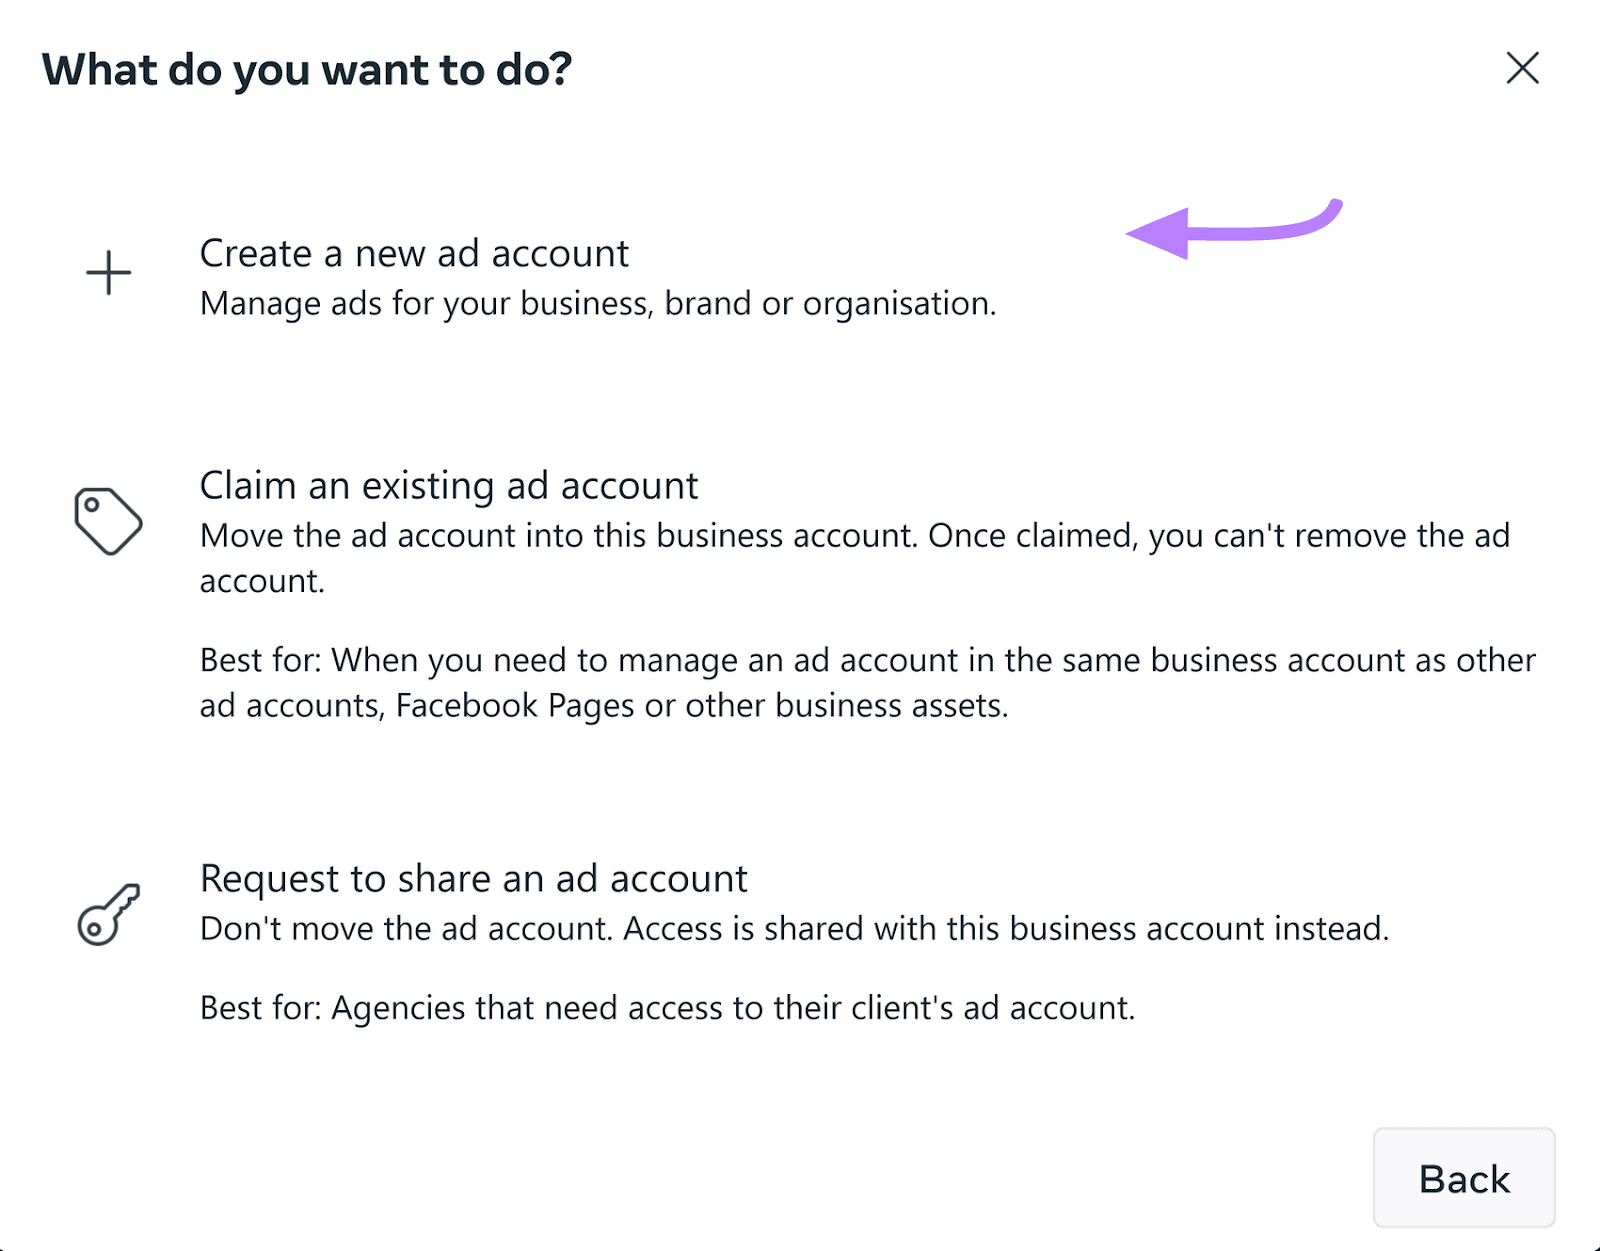
Select if you want to create a new ad account, claim an existing ad account, or request to share an ad account. We’ll click “Create a new ad account.”
Next, enter your ad account details, including account name, time zone, and currency. Click “Next."
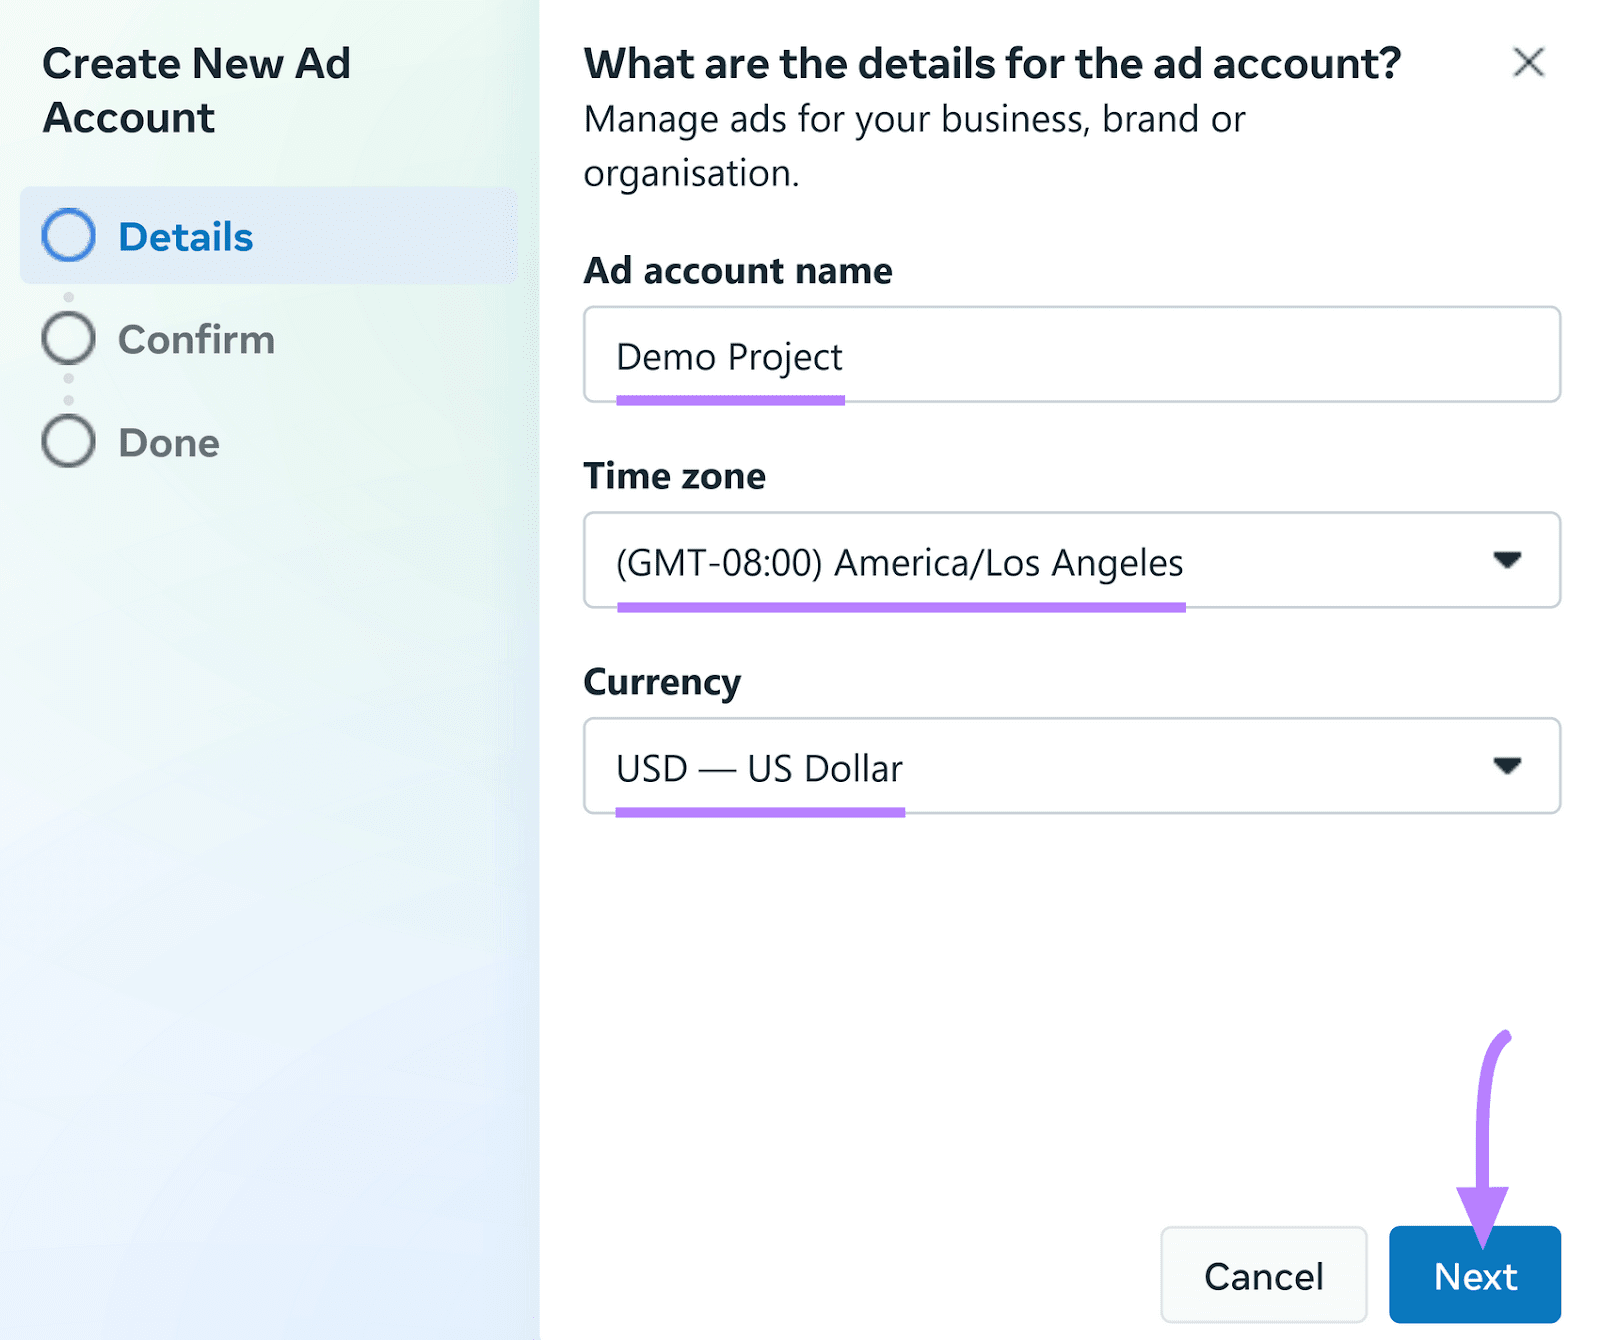
Then, agree to the terms and conditions and click “Create Ad Account” to enter your payment information:
Then, click “Done.”
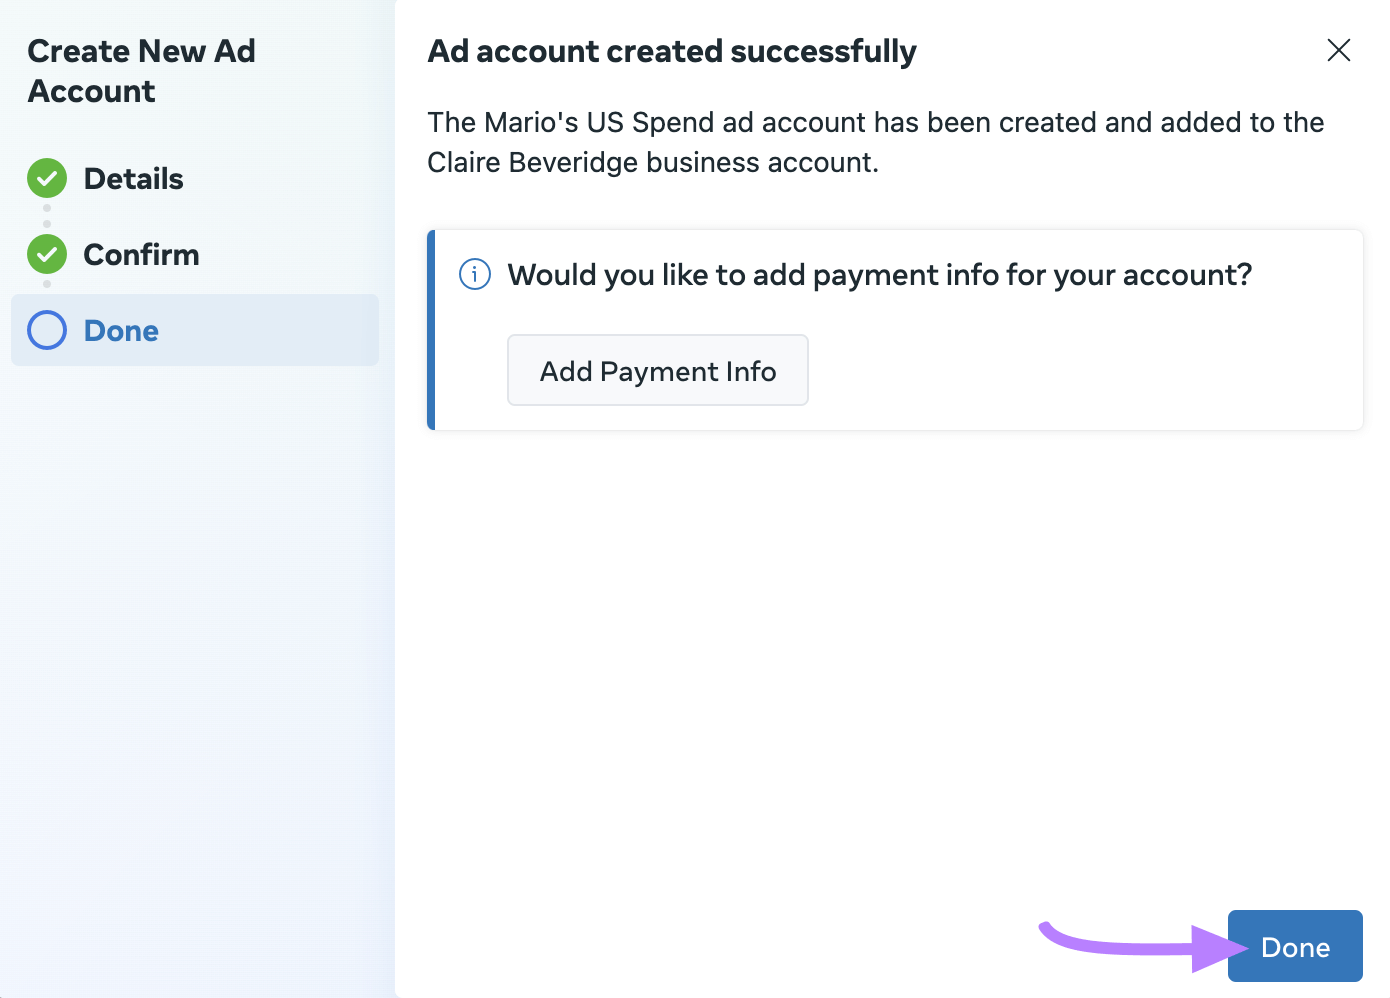
Congratulations! You’ve created a Facebook ad account.
Step 7: Set up Your Meta Pixel
A Meta Pixel is a snippet of code that lives on a website.
It tracks conversions and helps you optimize Facebook ads, build targeted audiences for your ads, and remarket to leads.
Use the Meta Pixel to:
- Get your ads shown to the right people: Uncover new, potential customers and people who have taken a specific action on your website (e.g., add to cart, click on a product image, or make a purchase)
- Increase sales: Use automatic bidding to reach customers who are more likely to buy
- Measure your results: Understand the quality of your Facebook ads by measuring the actions people take when they see them
Here’s how to set up your Meta Pixel:
On the “Business settings” page, click “Data sources” > “Datasets.” Then, click the “Add” button.
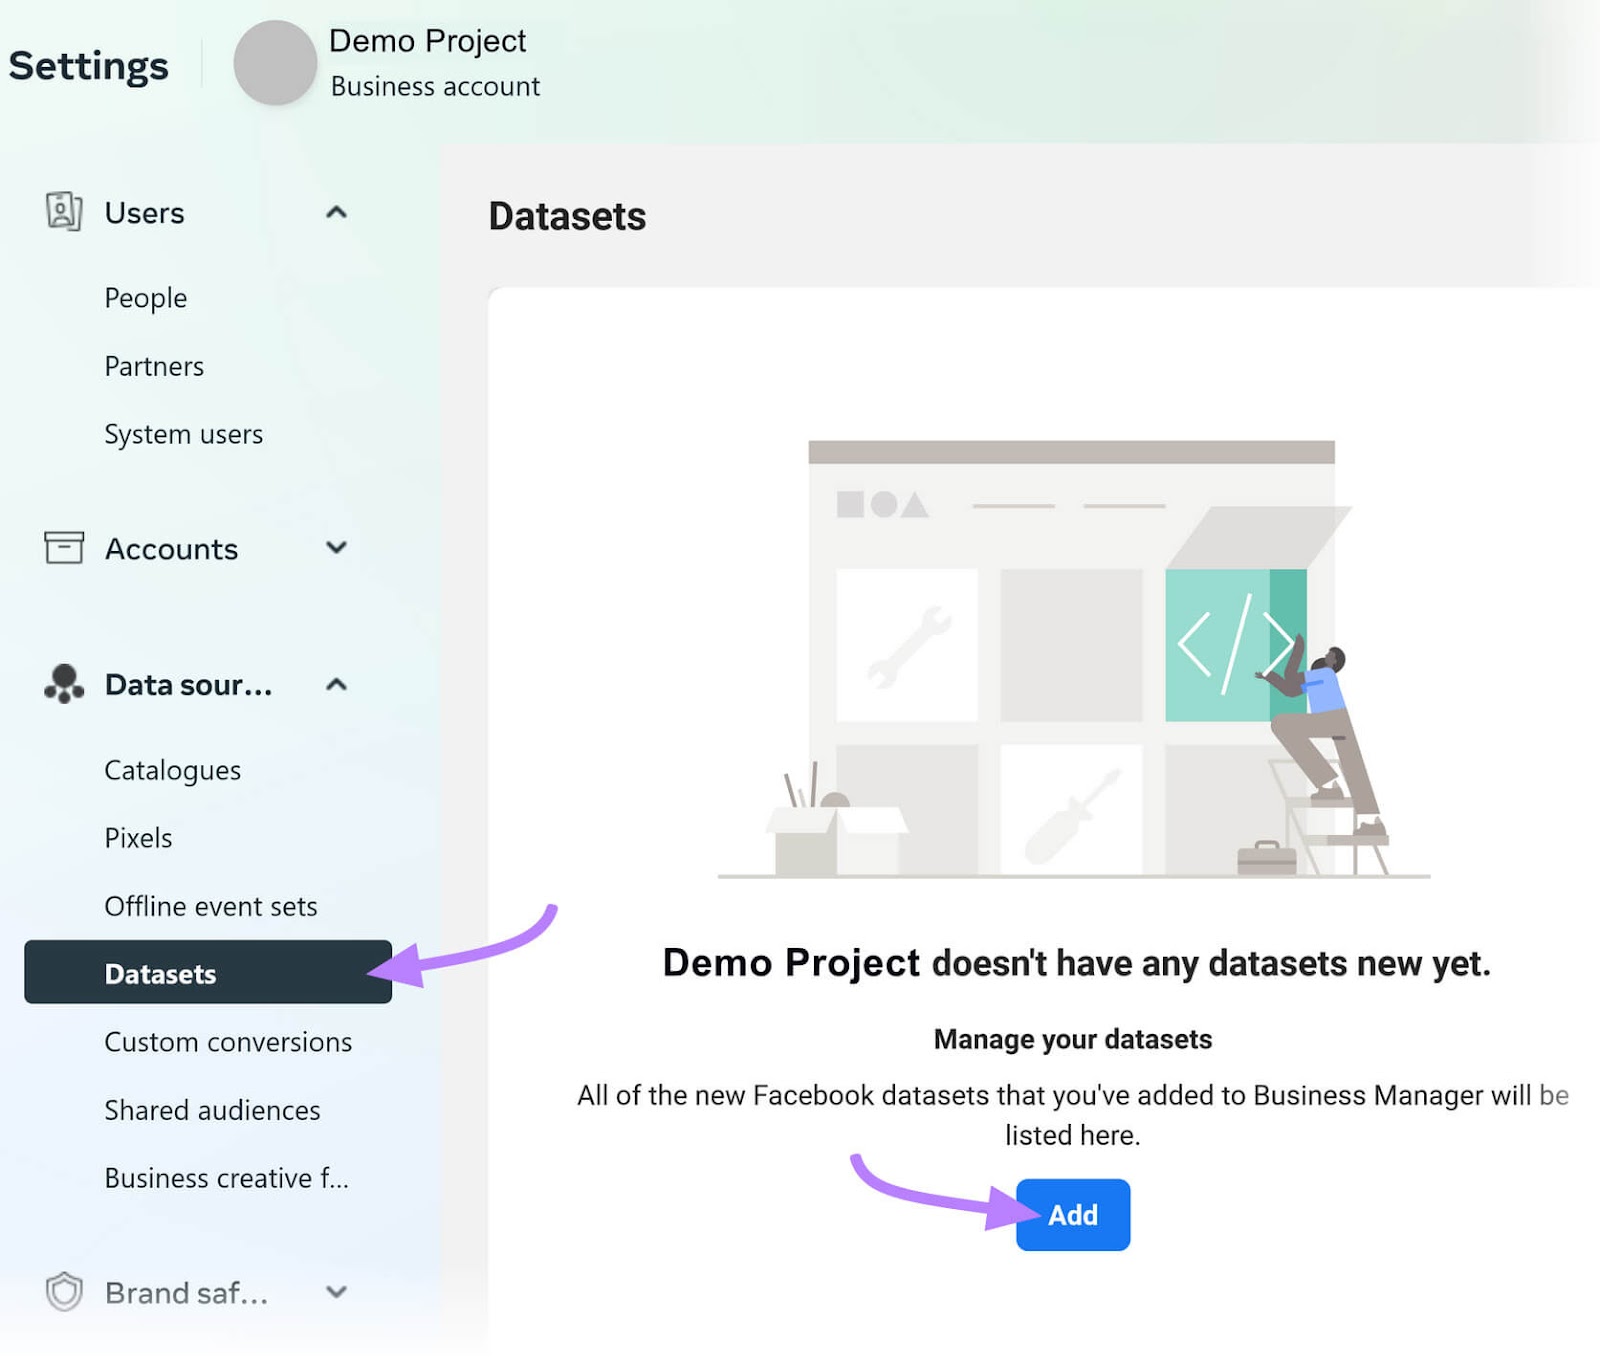
Next, click the “Add” button at the top of the page to open up a window labeled “Create a new dataset.”
You’ll want to name your dataset. And once you’re done, click “Create.”
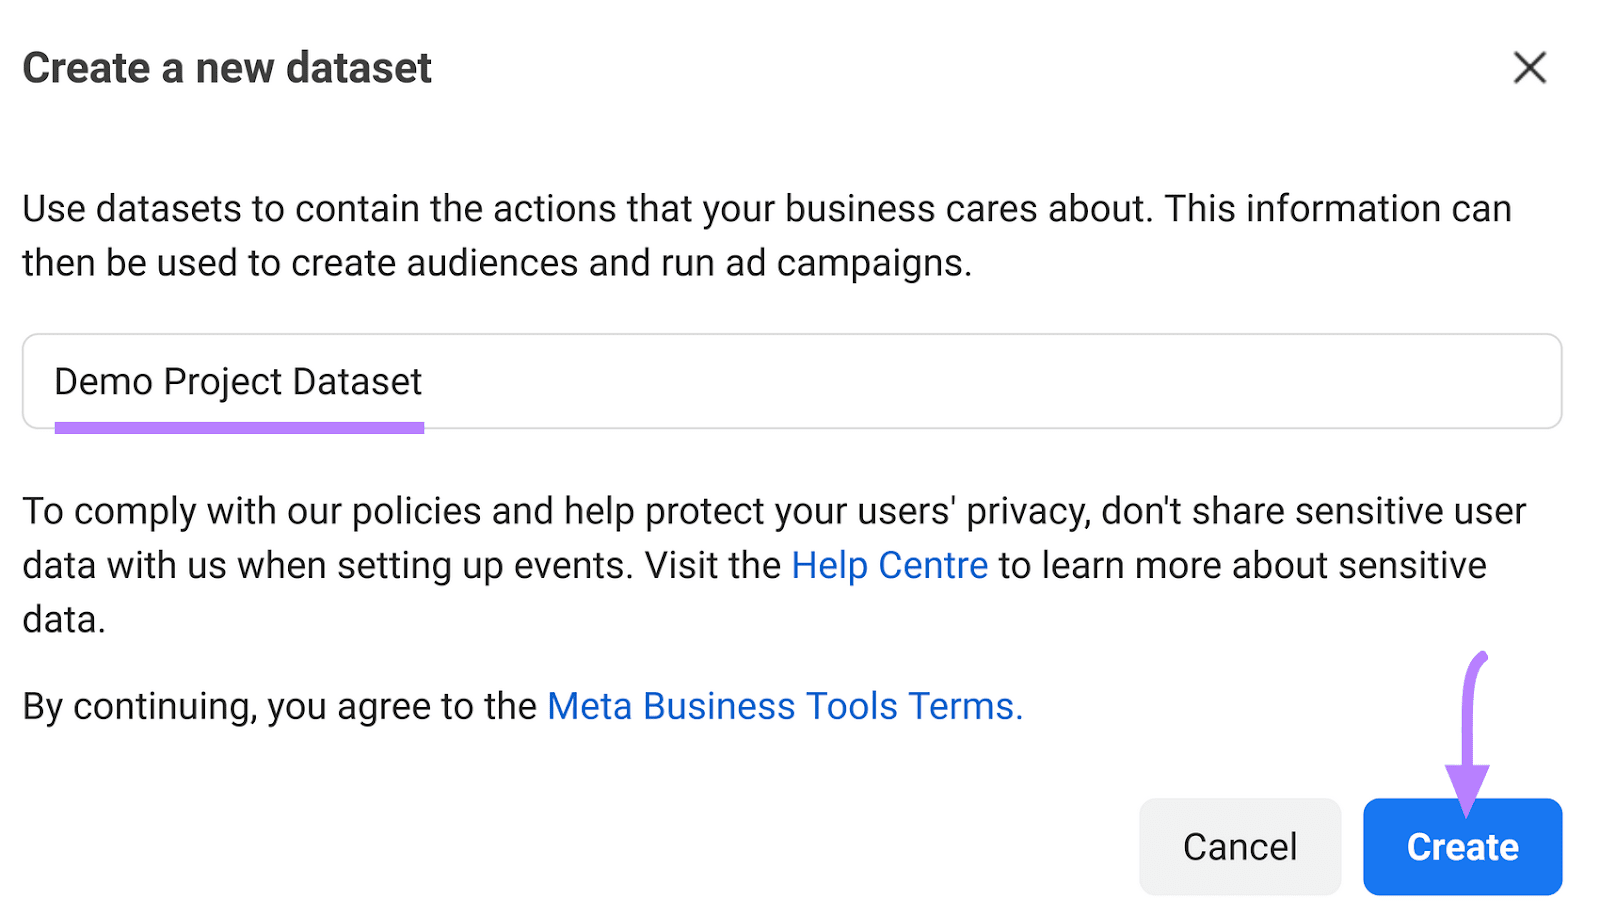
It’ll now appear in the “Datasets” column.
Select it and click “Open in Events Manager” at the top of the screen.
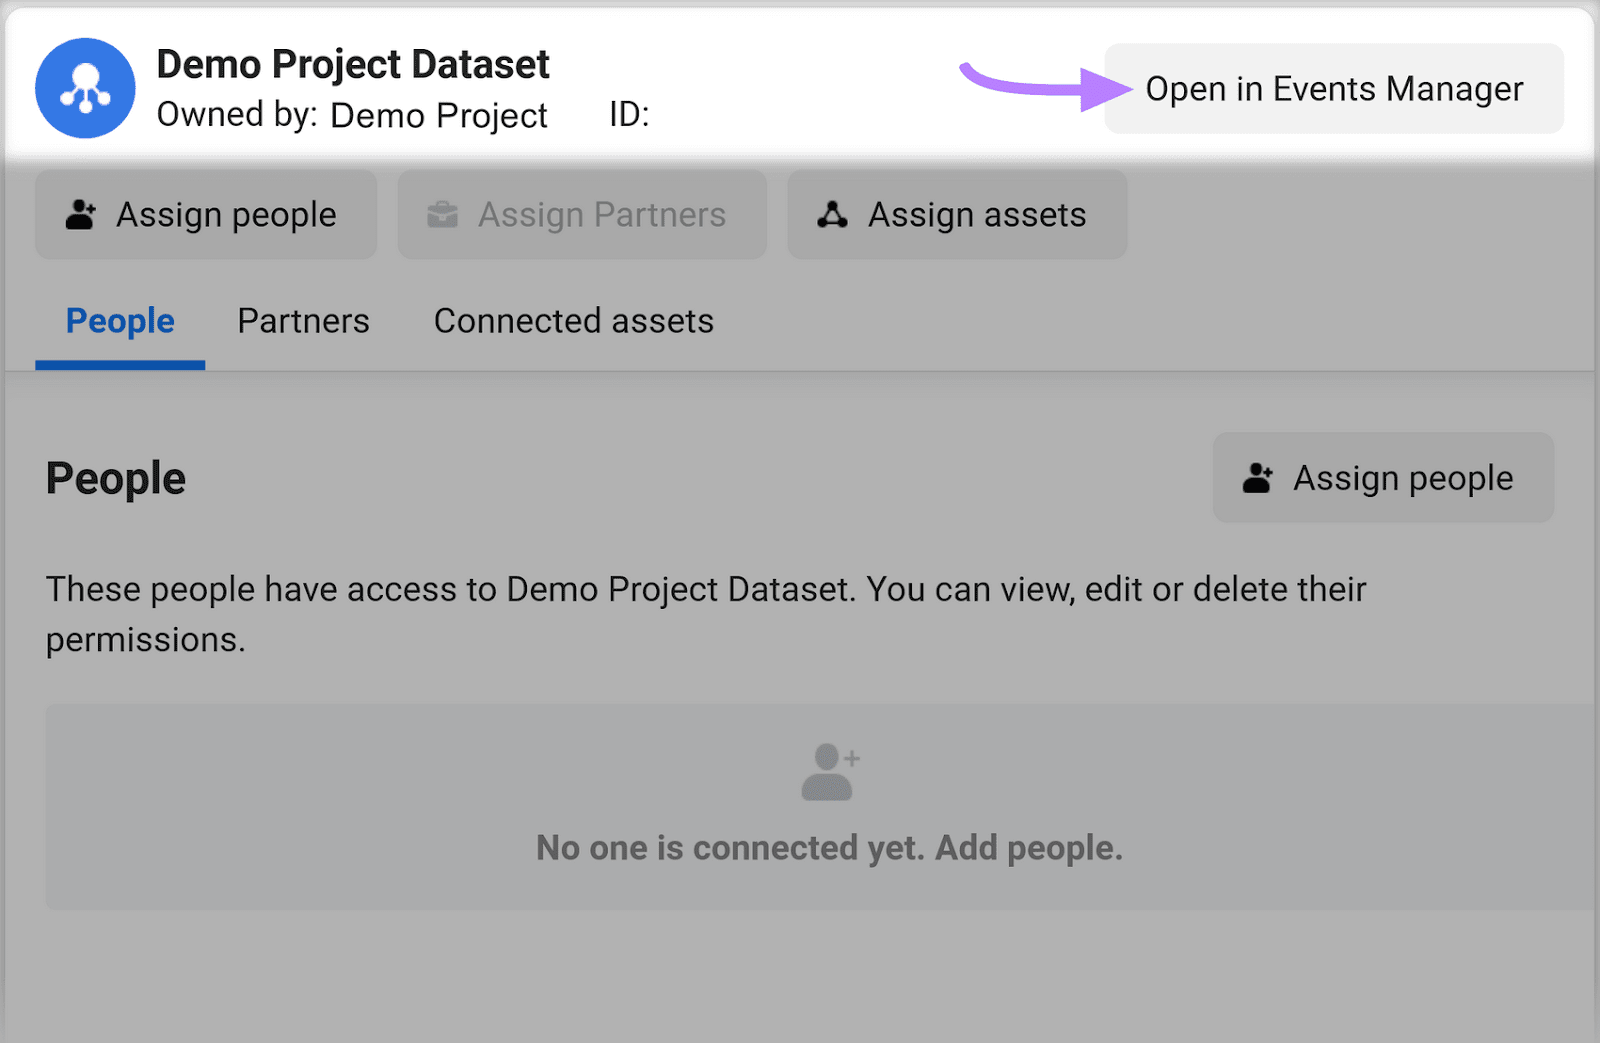
You’ll now be taken to Events Manager.
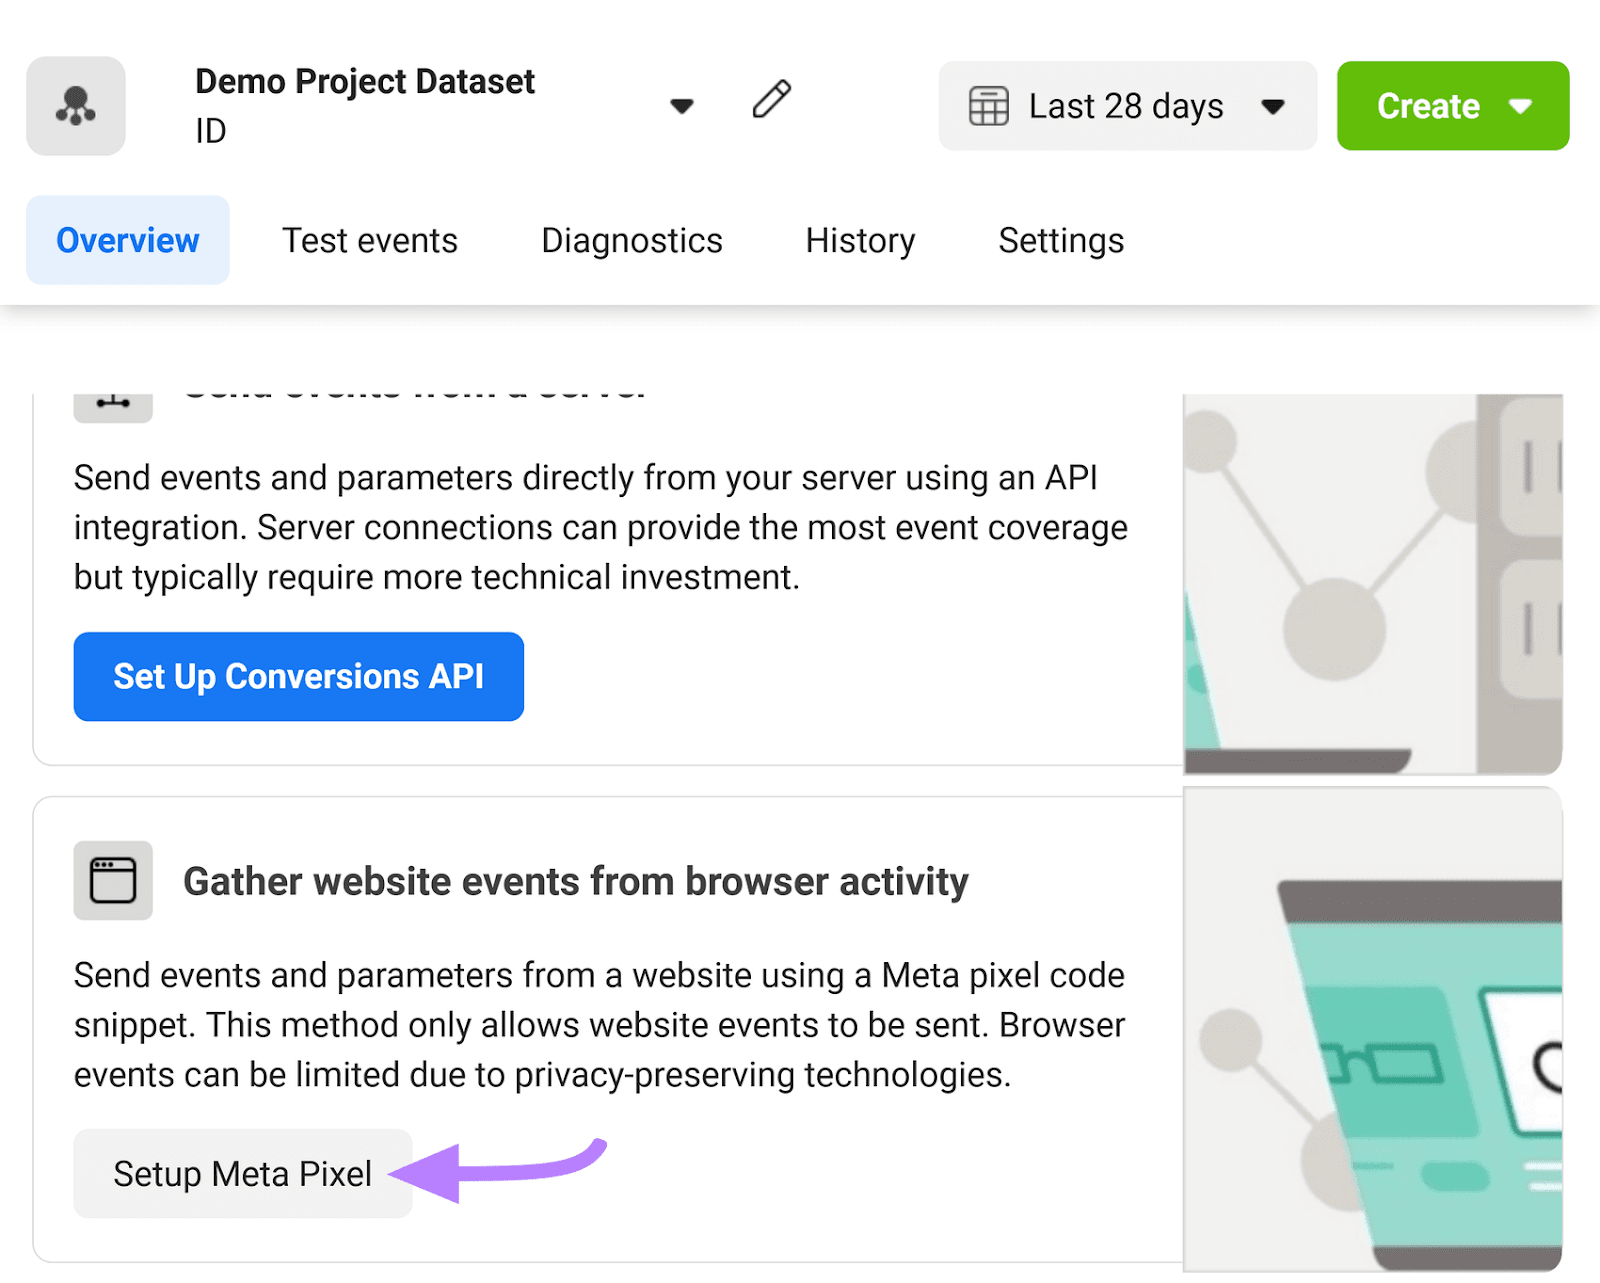
Scroll down to the “Gather website events from browser activity” module and click the “Setup Meta Pixel” button.
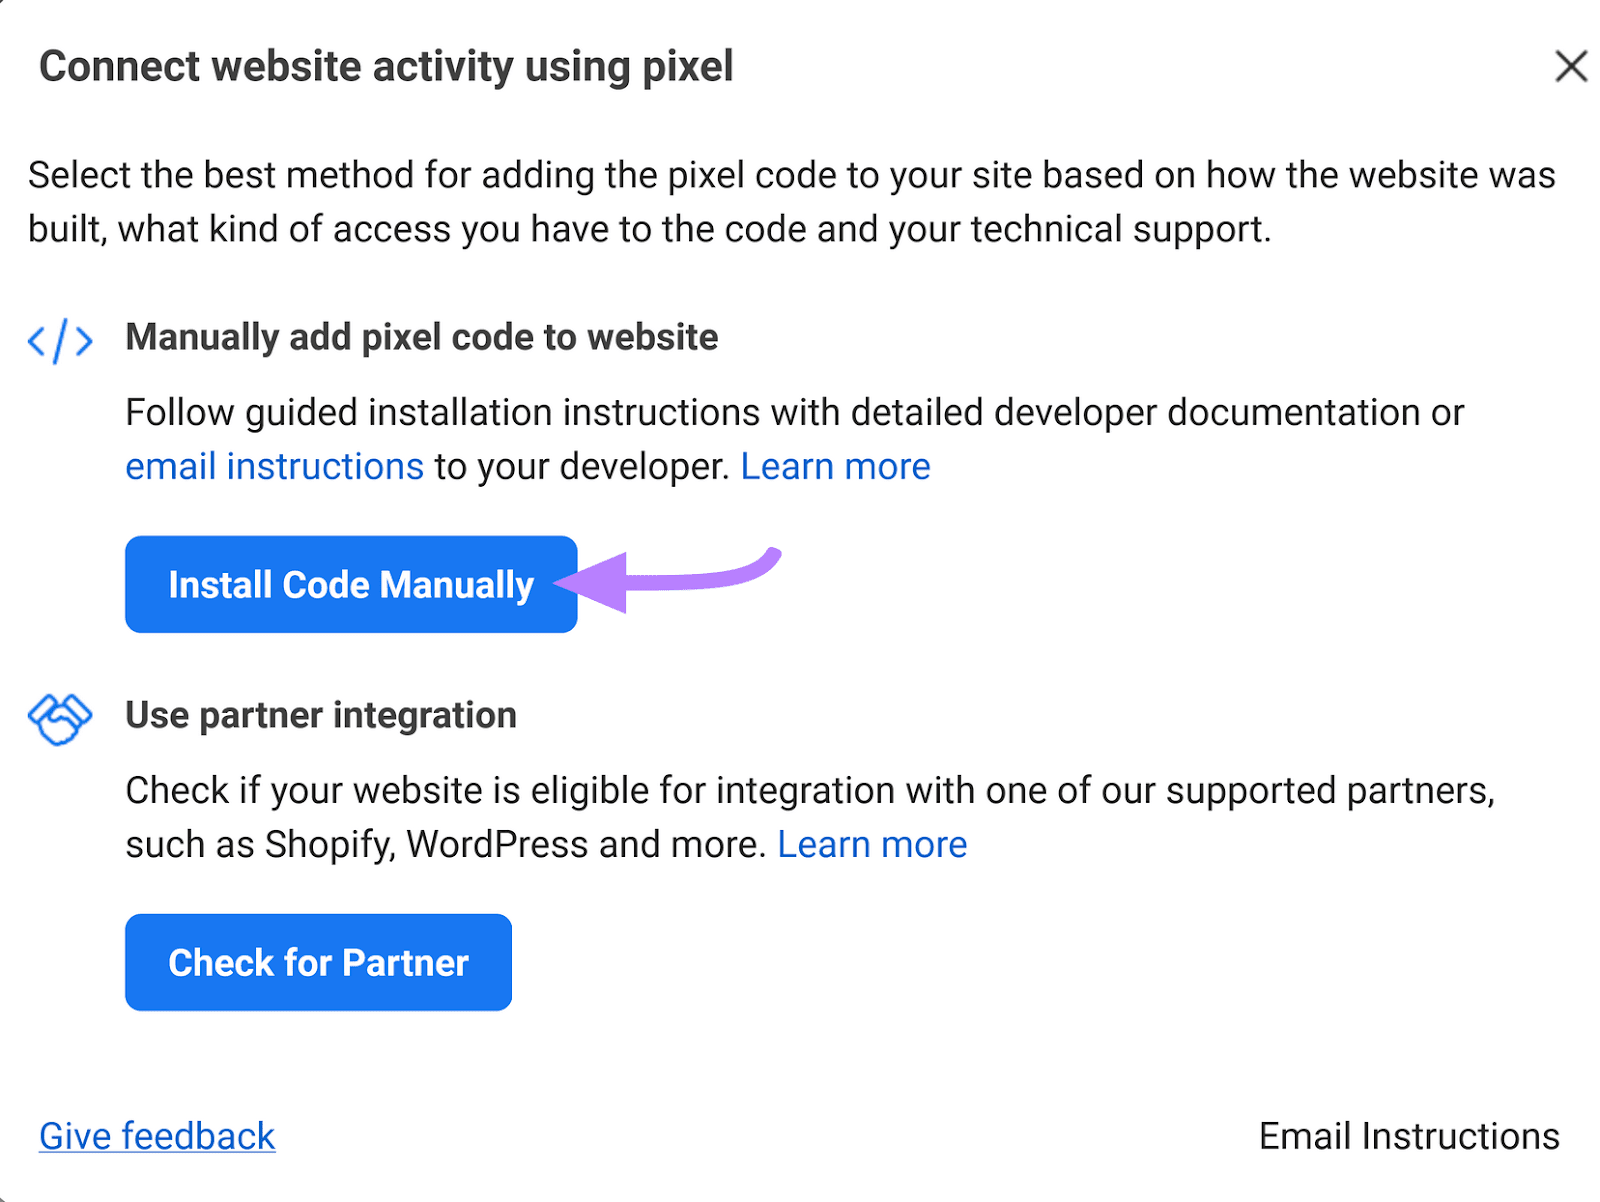
You’ll see two options to add the code to your website.
“Install Code Manually” allows you to copy the code and manually add it to your site. The “Check for Partner” option lets you use an integration (if available) to install the Meta Pixel in WordPress, Shopify, etc.
Here, we’ll select “Install Code Manually.”
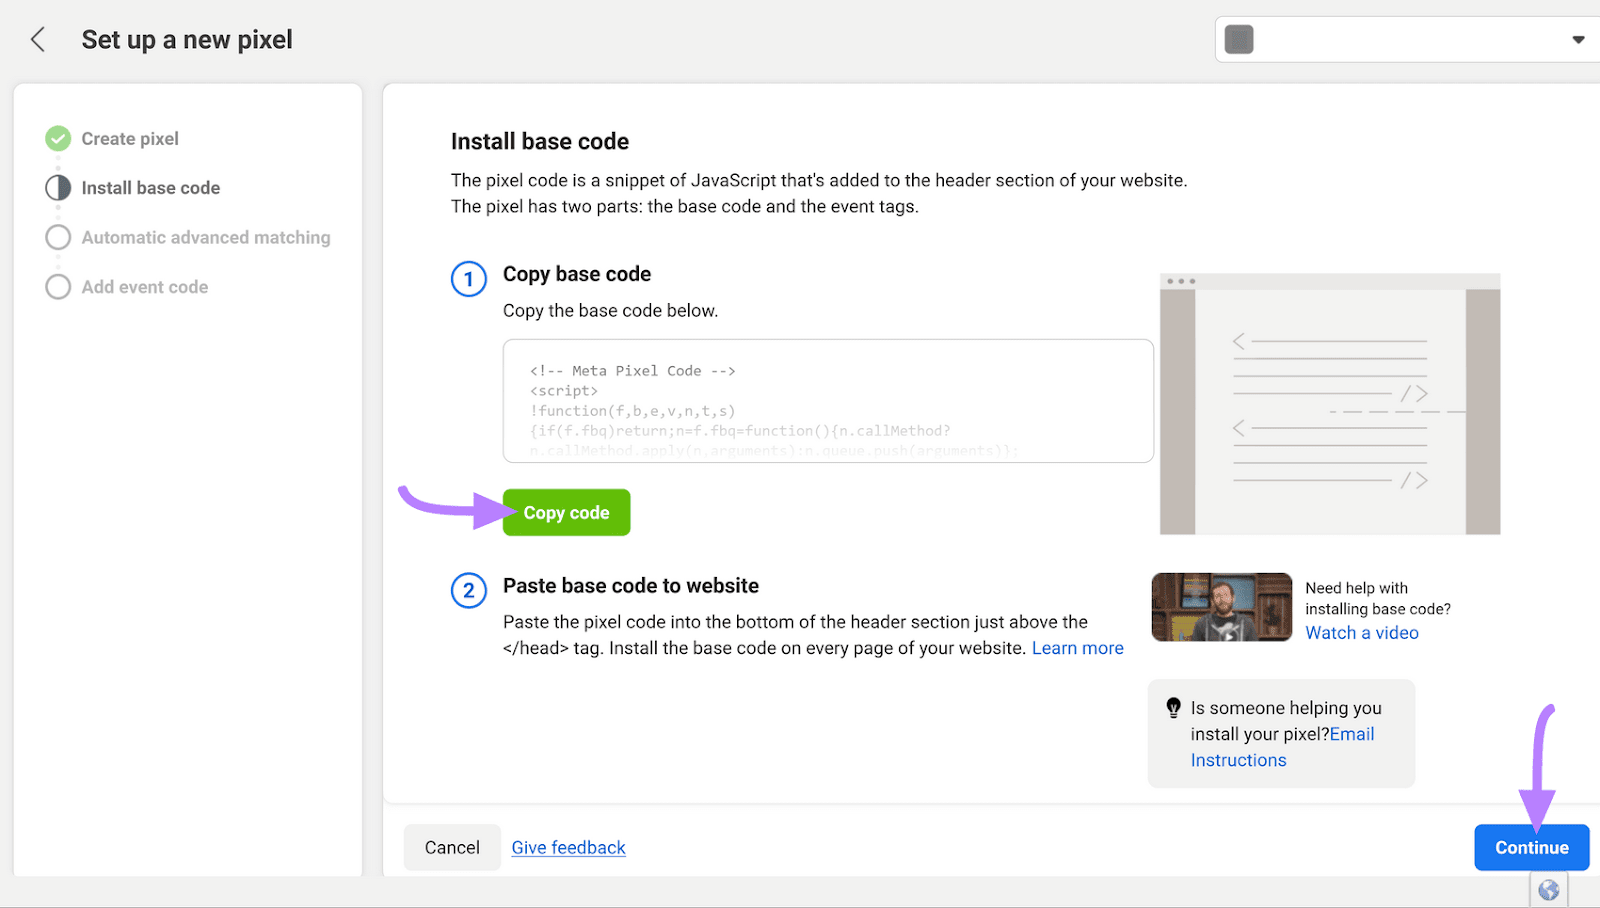
Click “Copy code” to add the Meta Pixel code to your clipboard.
Add this code to your website’s HTML on the bottom of the header section just above the closing head tag (</head>)—you may need assistance from a web developer for this step.
Once you’ve done that, click “Continue.”
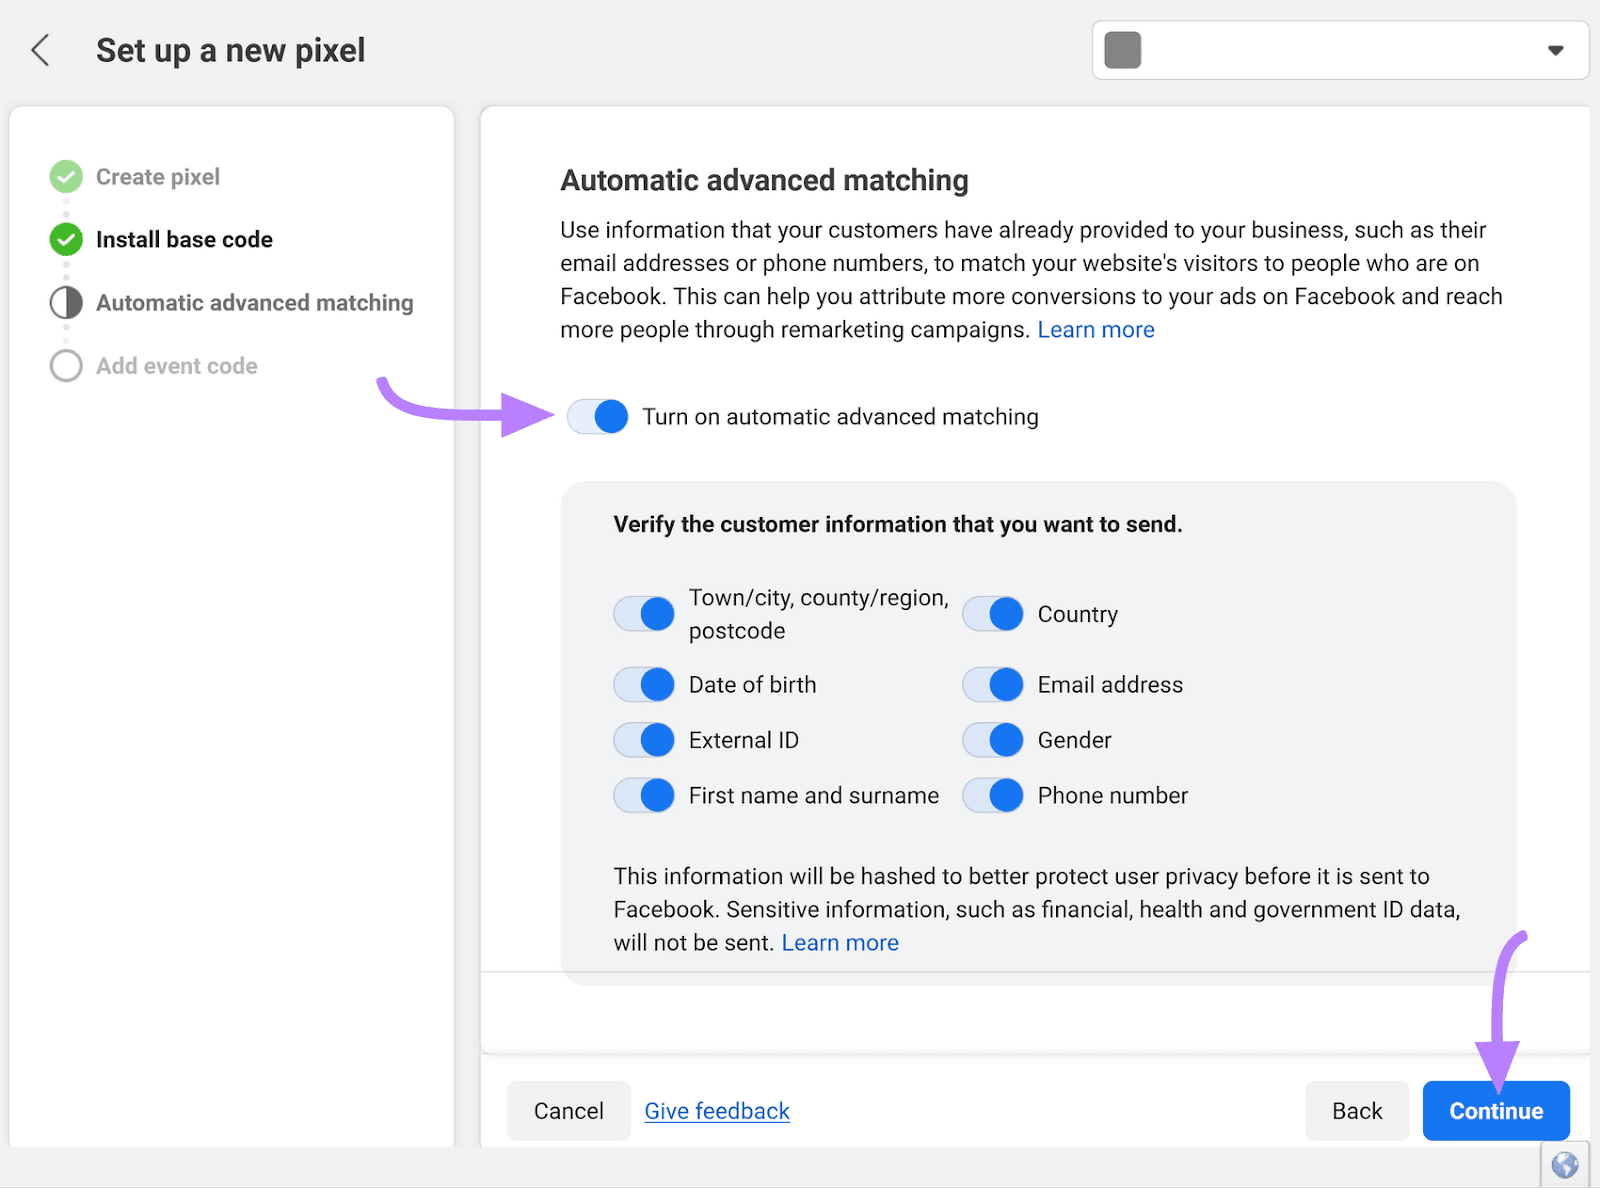
Next, turn on “Automatic advanced matching” (this can help improve your ad performance). Then, click “Continue.”
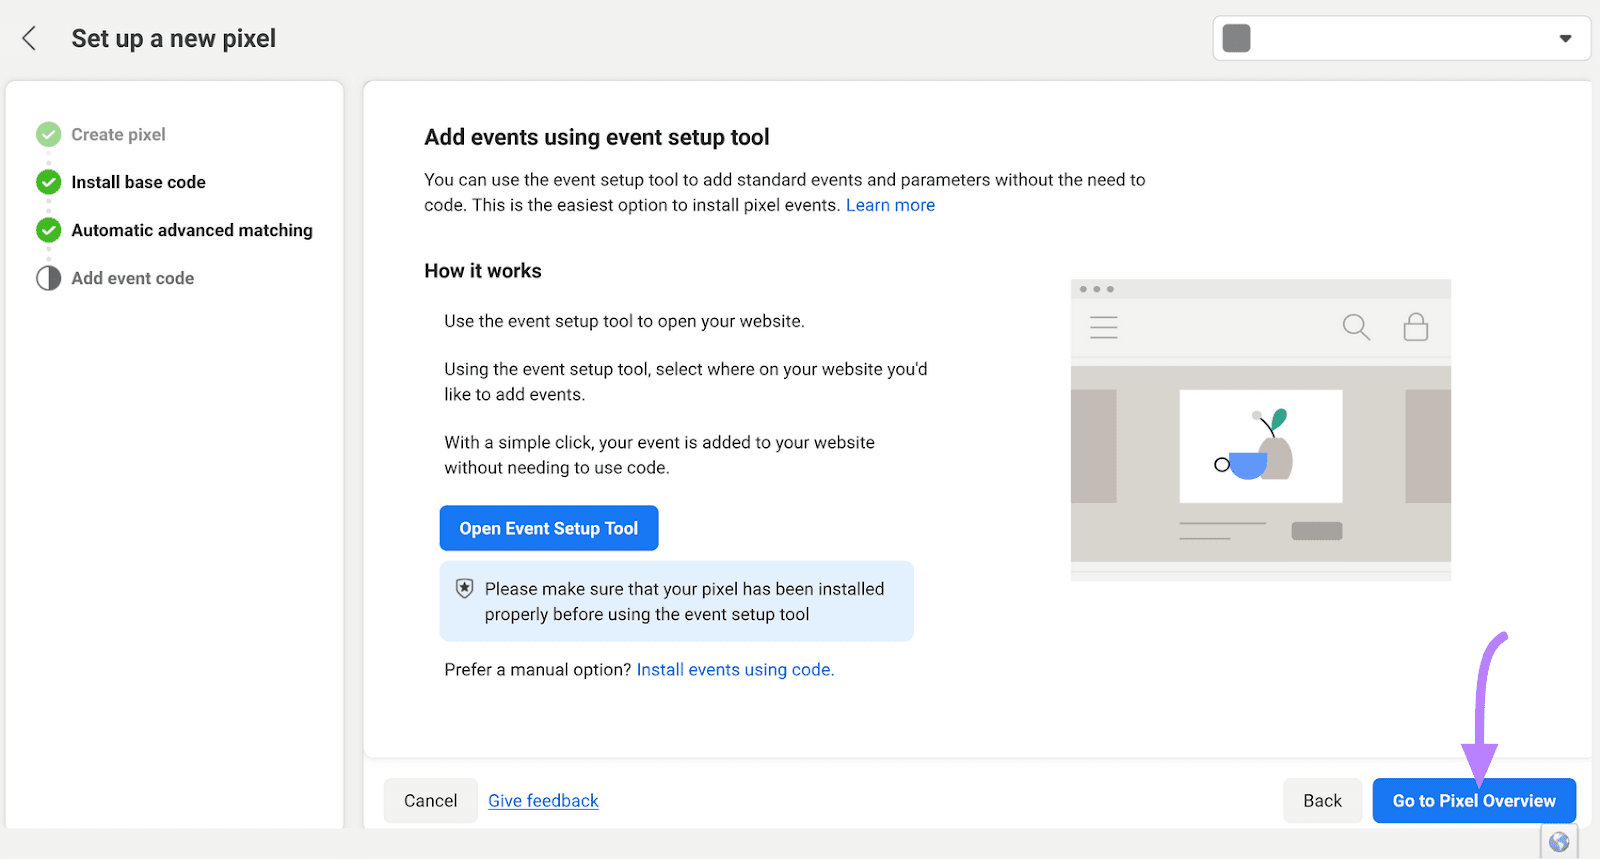
Now, select “Go to Pixel Overview.”
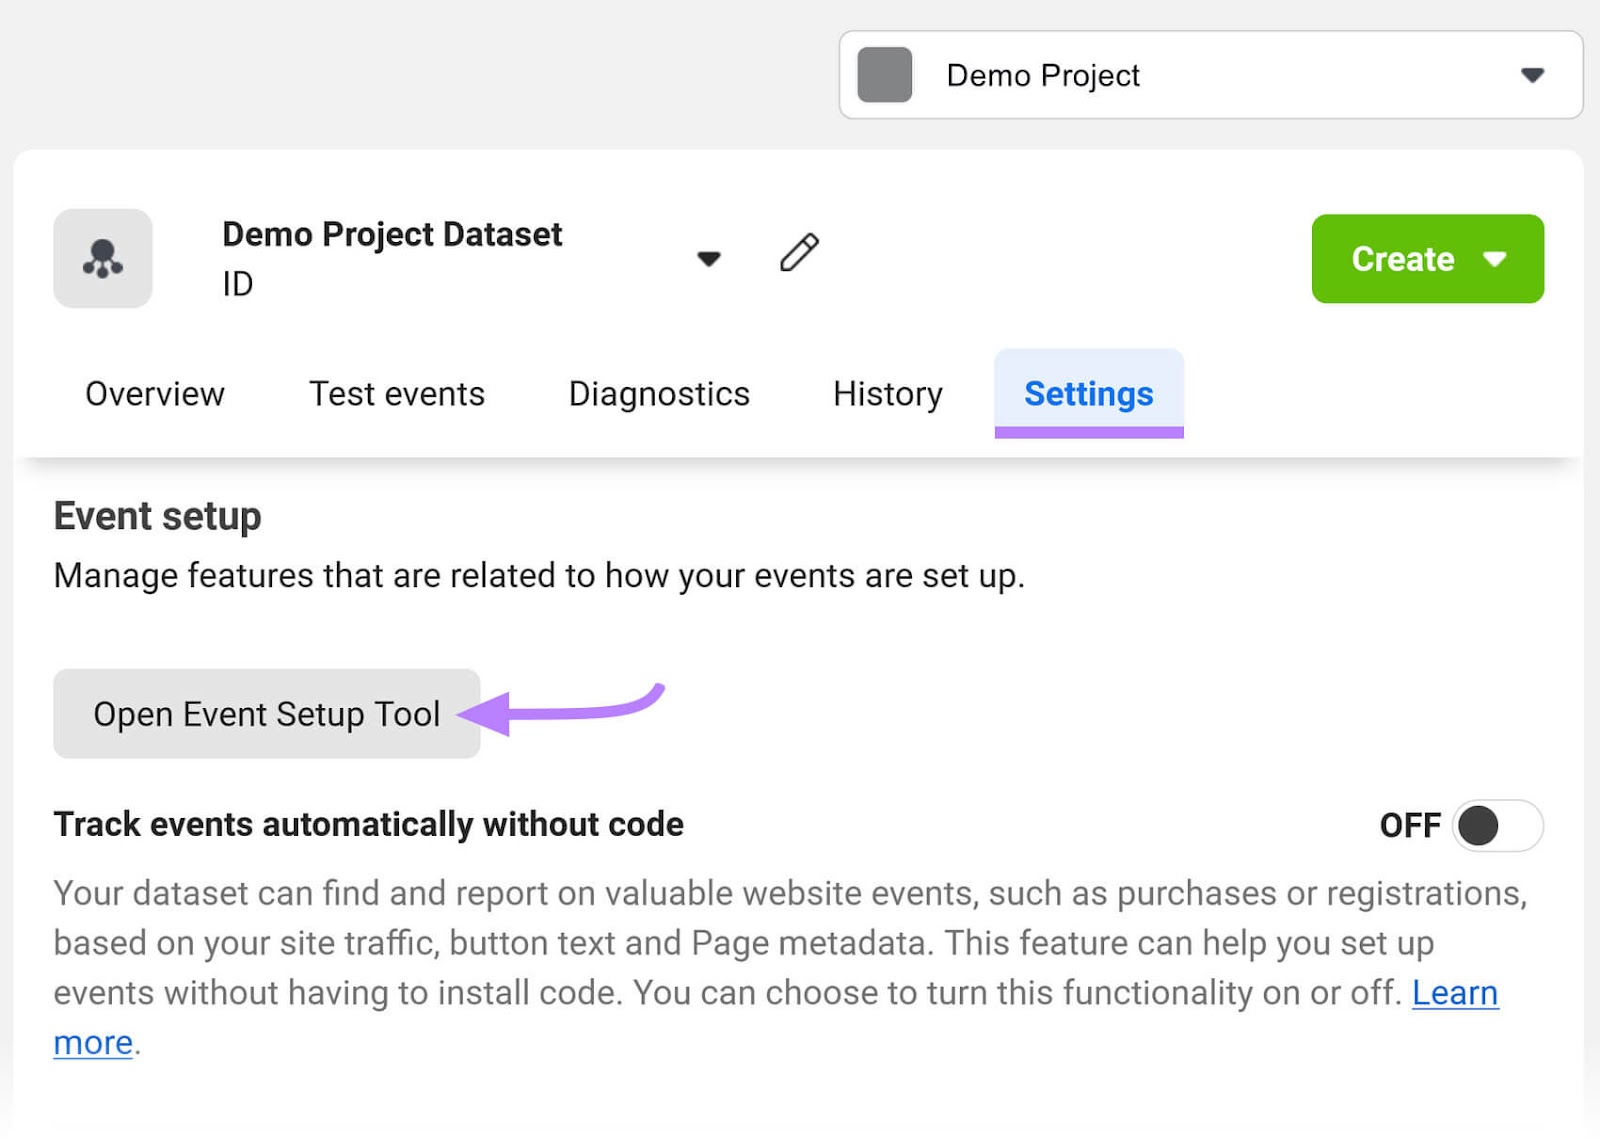
You’ll then be taken to the “Data sources” page (you may have to refresh this page).
From here, select the “Settings” tab. Scroll down to “Event setup” and click the “Open Event Setup Tool” button.
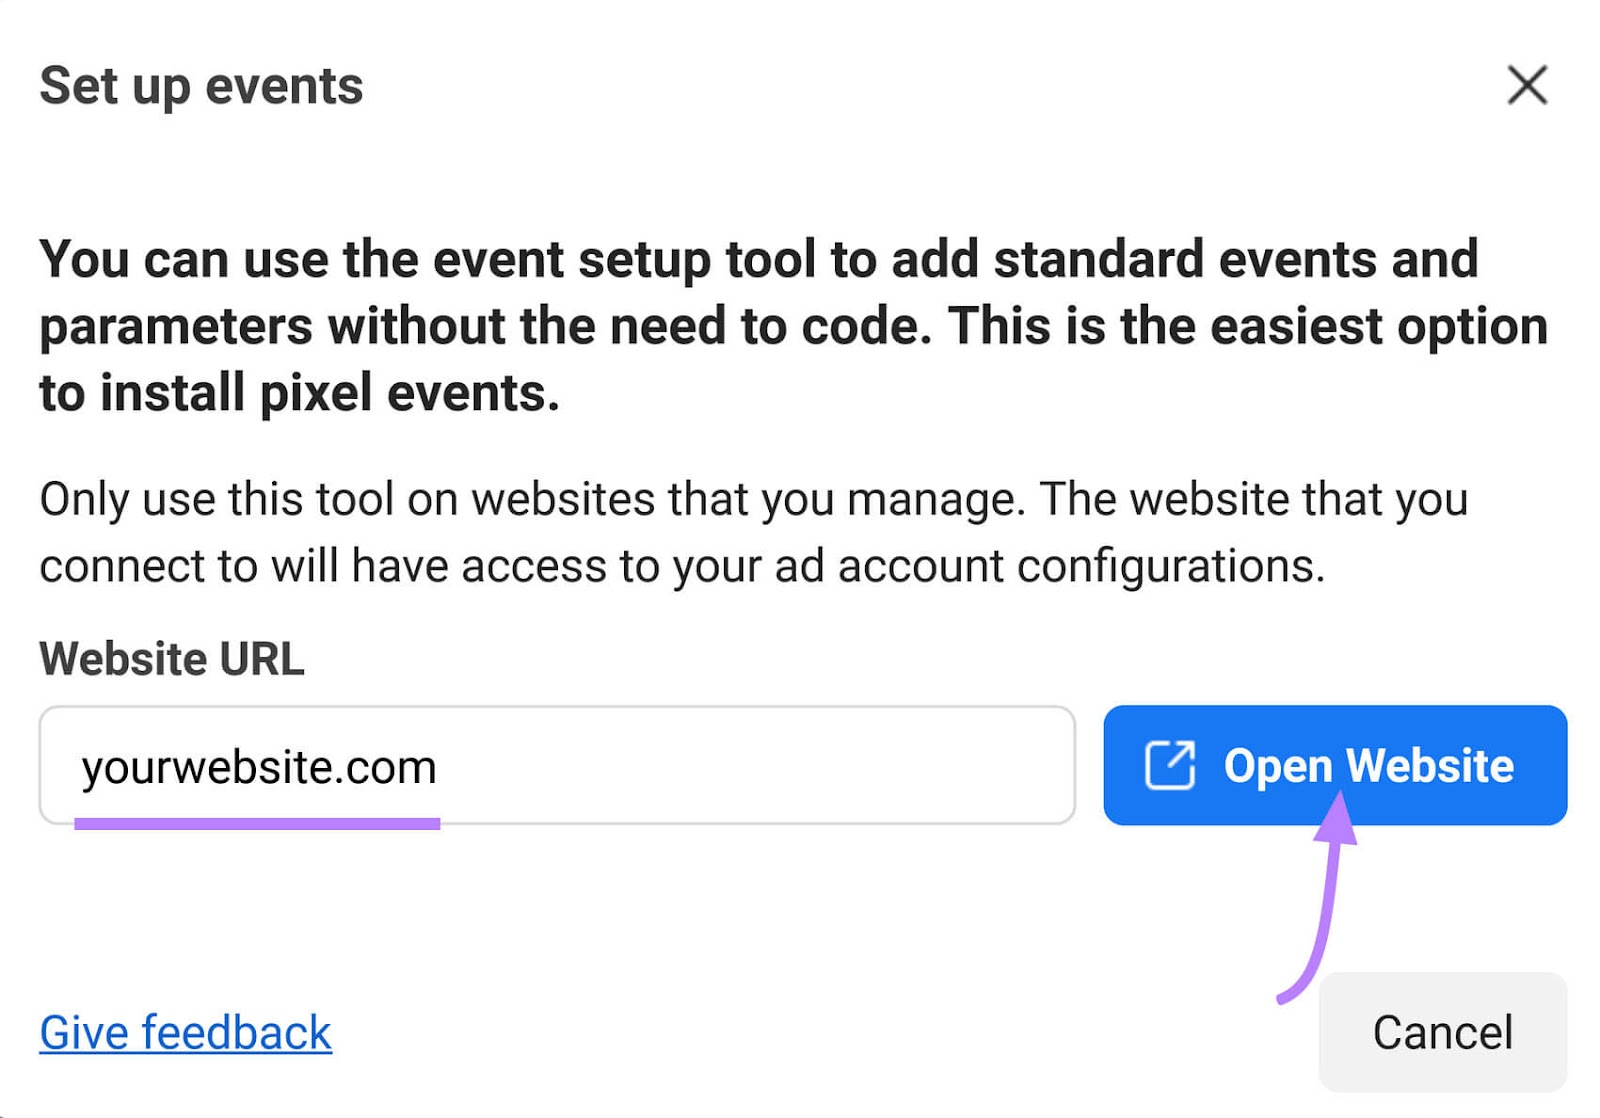
Enter your website’s domain and click the “Open Website” button.
You’ll then be taken to your website. Where you can indicate the different events you want to track.
Common Setup Mistakes to Avoid
Setting up Facebook Business Manager can be confusing at times.
To ensure your account is ready for success, avoid these common mistakes:
Giving a User the Wrong Level of Access
Only give admin access to people you trust or team members who truly need it. Routinely go through and check who has access to what and confirm who should have access with team leaders or managers.
Sharing Access to Your Personal Account
Many people think you need to link your Business Manager account with a personal Facebook profile. You should avoid involving your personal account altogether.
This way, you’re keeping your personal life and work life separate.
Not Owning the Manager Account
If you’ve hired an agency or third-party vendor to manage your Business Manager account, ensure you retain ownership of the account. And only grant the agency or vendor admin access.
If you give full control and the relationship changes, you could run the risk of losing access to your own assets and business page.
Meta Business Manager: Setup Best Practices
Follow these best practices to ensure Meta Business Manager is set up correctly:
Set Up Two-Factor Authentication
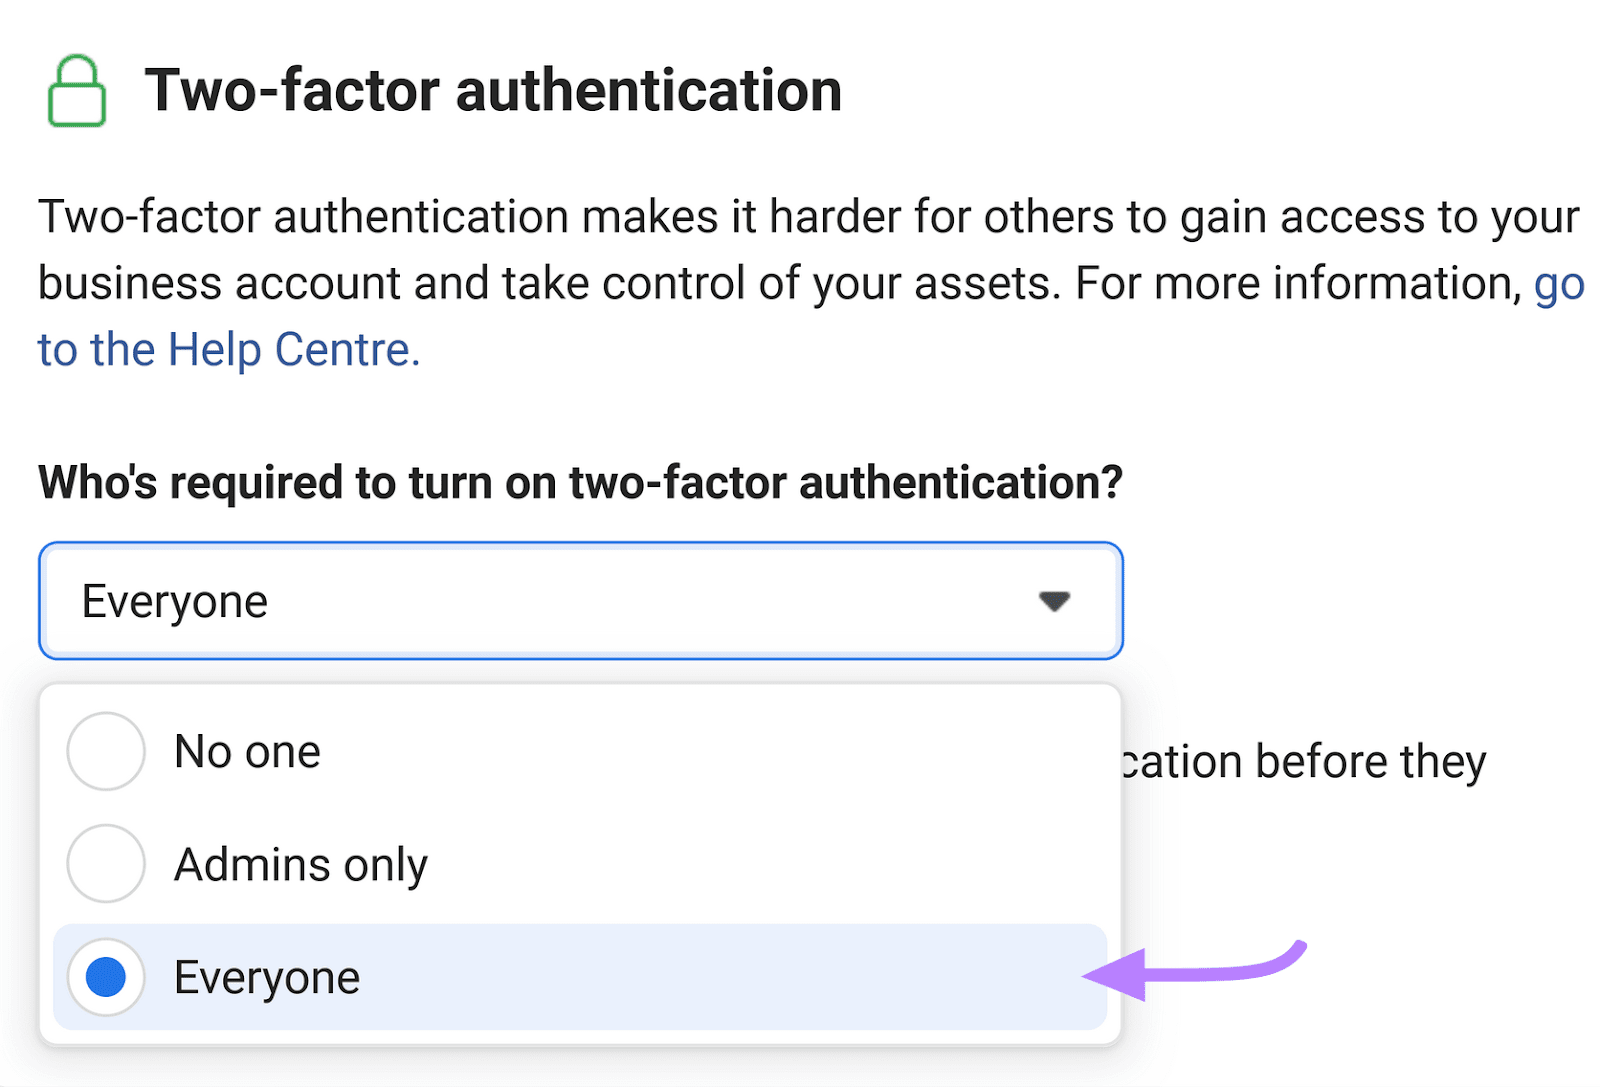
Facebook Business Manager lets you add an extra layer of protection for your business assets with two-factor authentication.
In “Business Settings,” click “Security Center.”

Set up two-factor authentication by clicking “Everyone” on the drop-down menu:
Set Up Locations with Business Manager
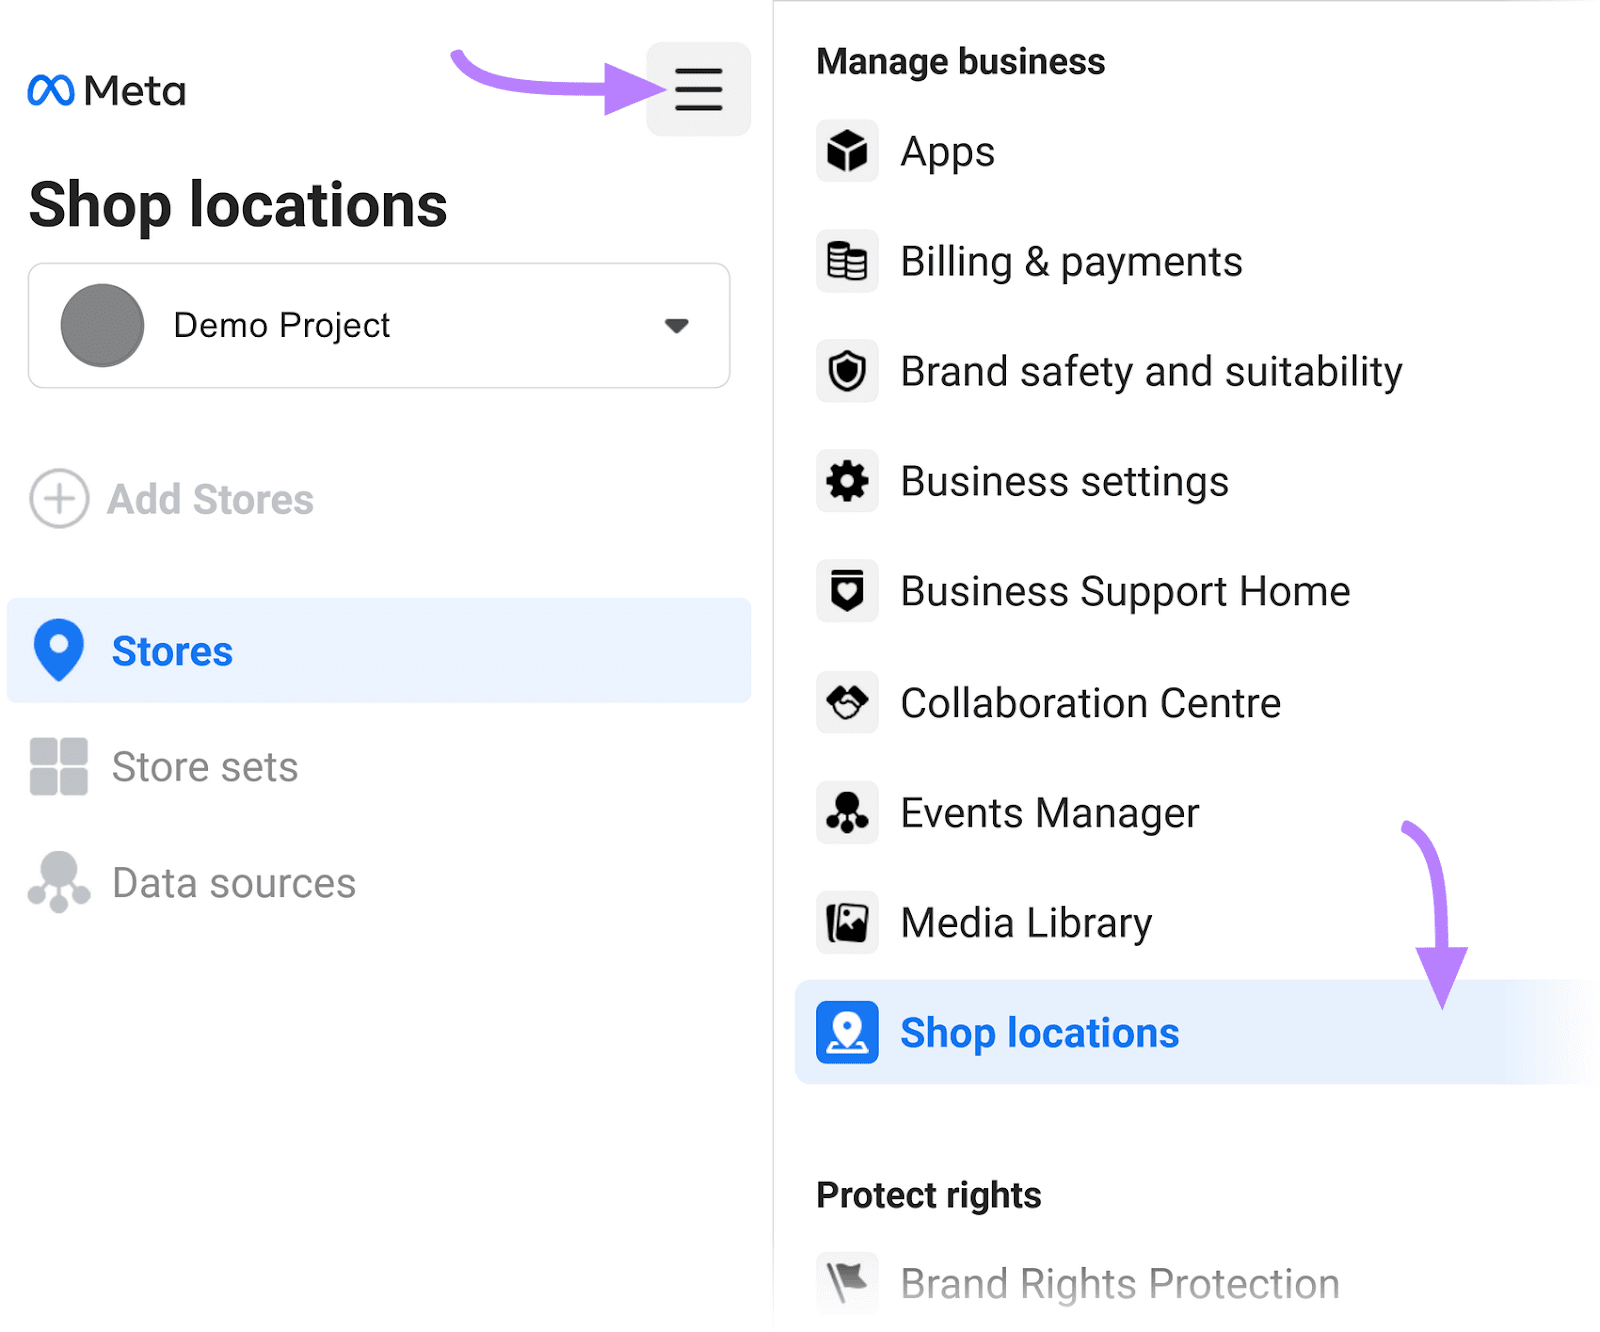
If your business or a business you’re collaborating with has multiple locations, you can use the “Location” function in Business Manager.
Click on the menu button at the top of the page and select “Shop locations.”
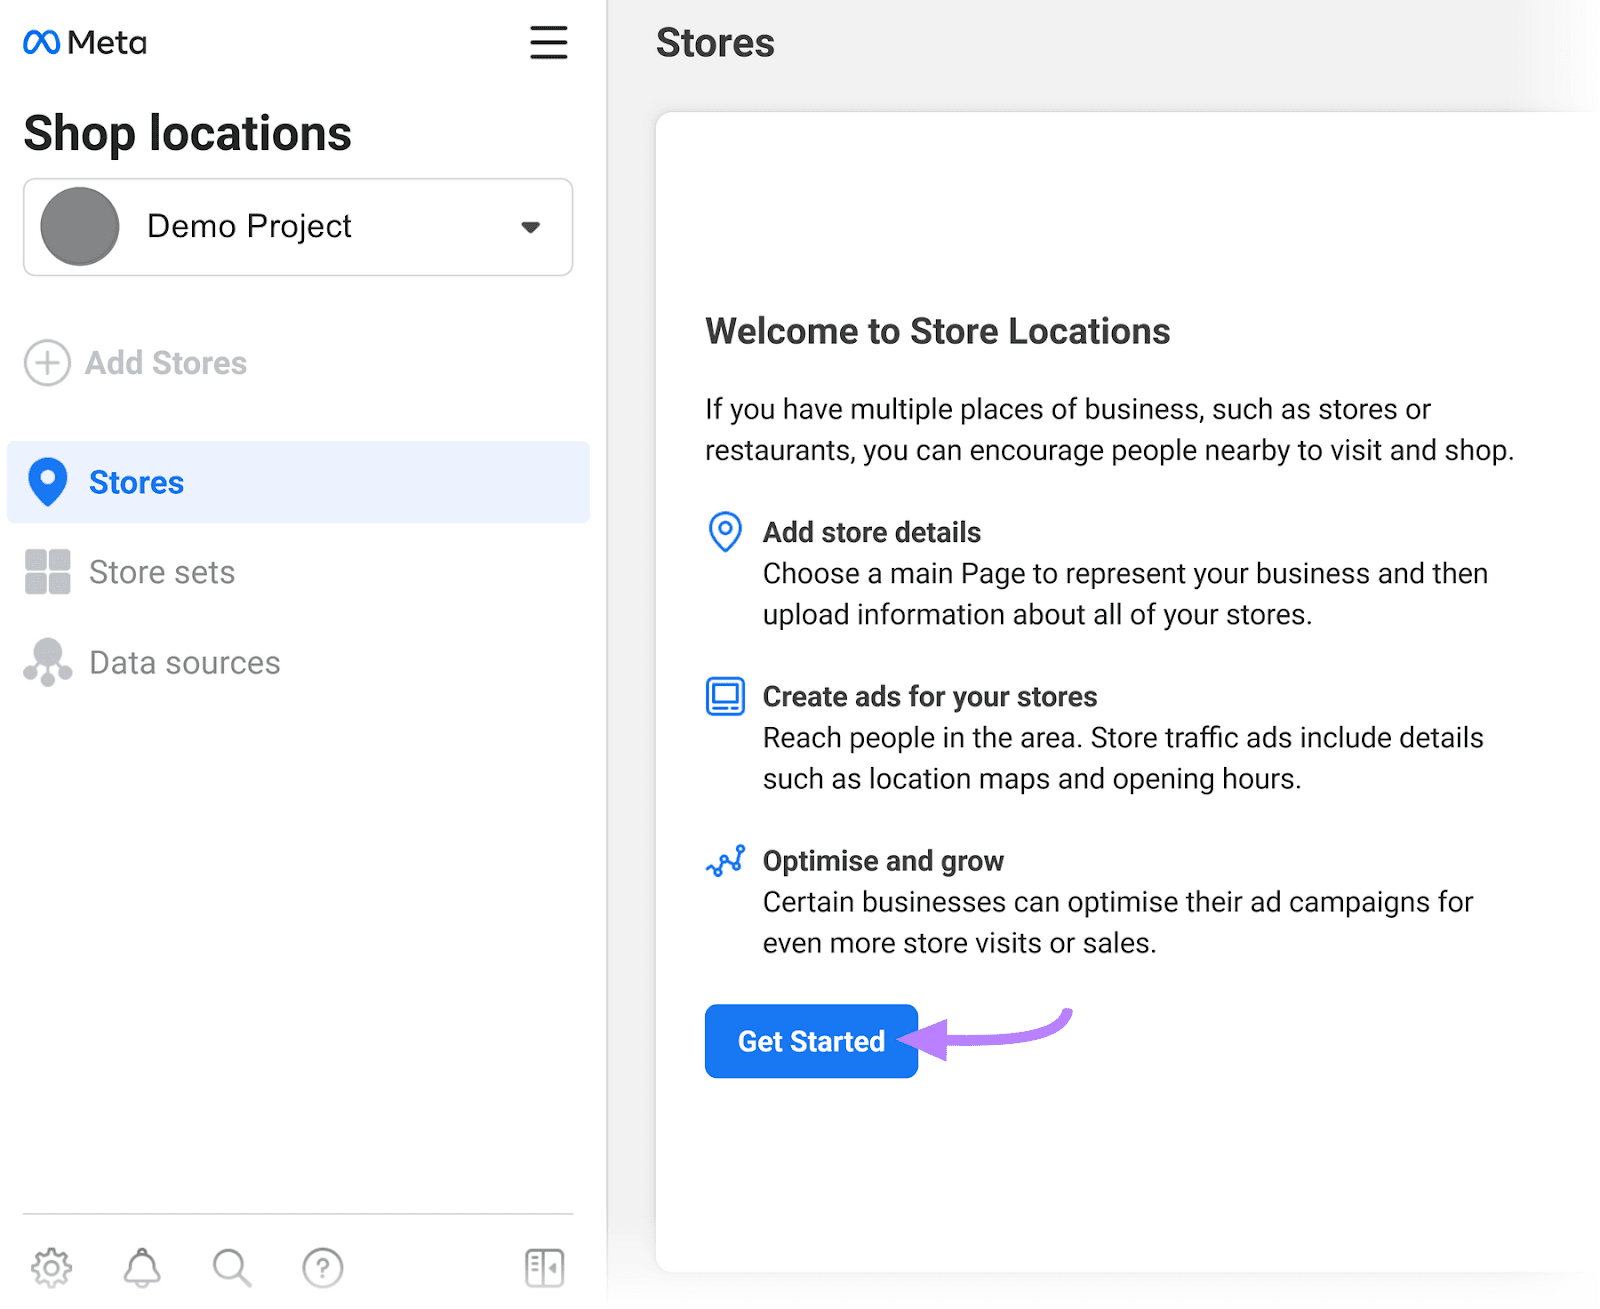
Then, click “Get Started.”
Click the box to make this your main page, and click “Next.”
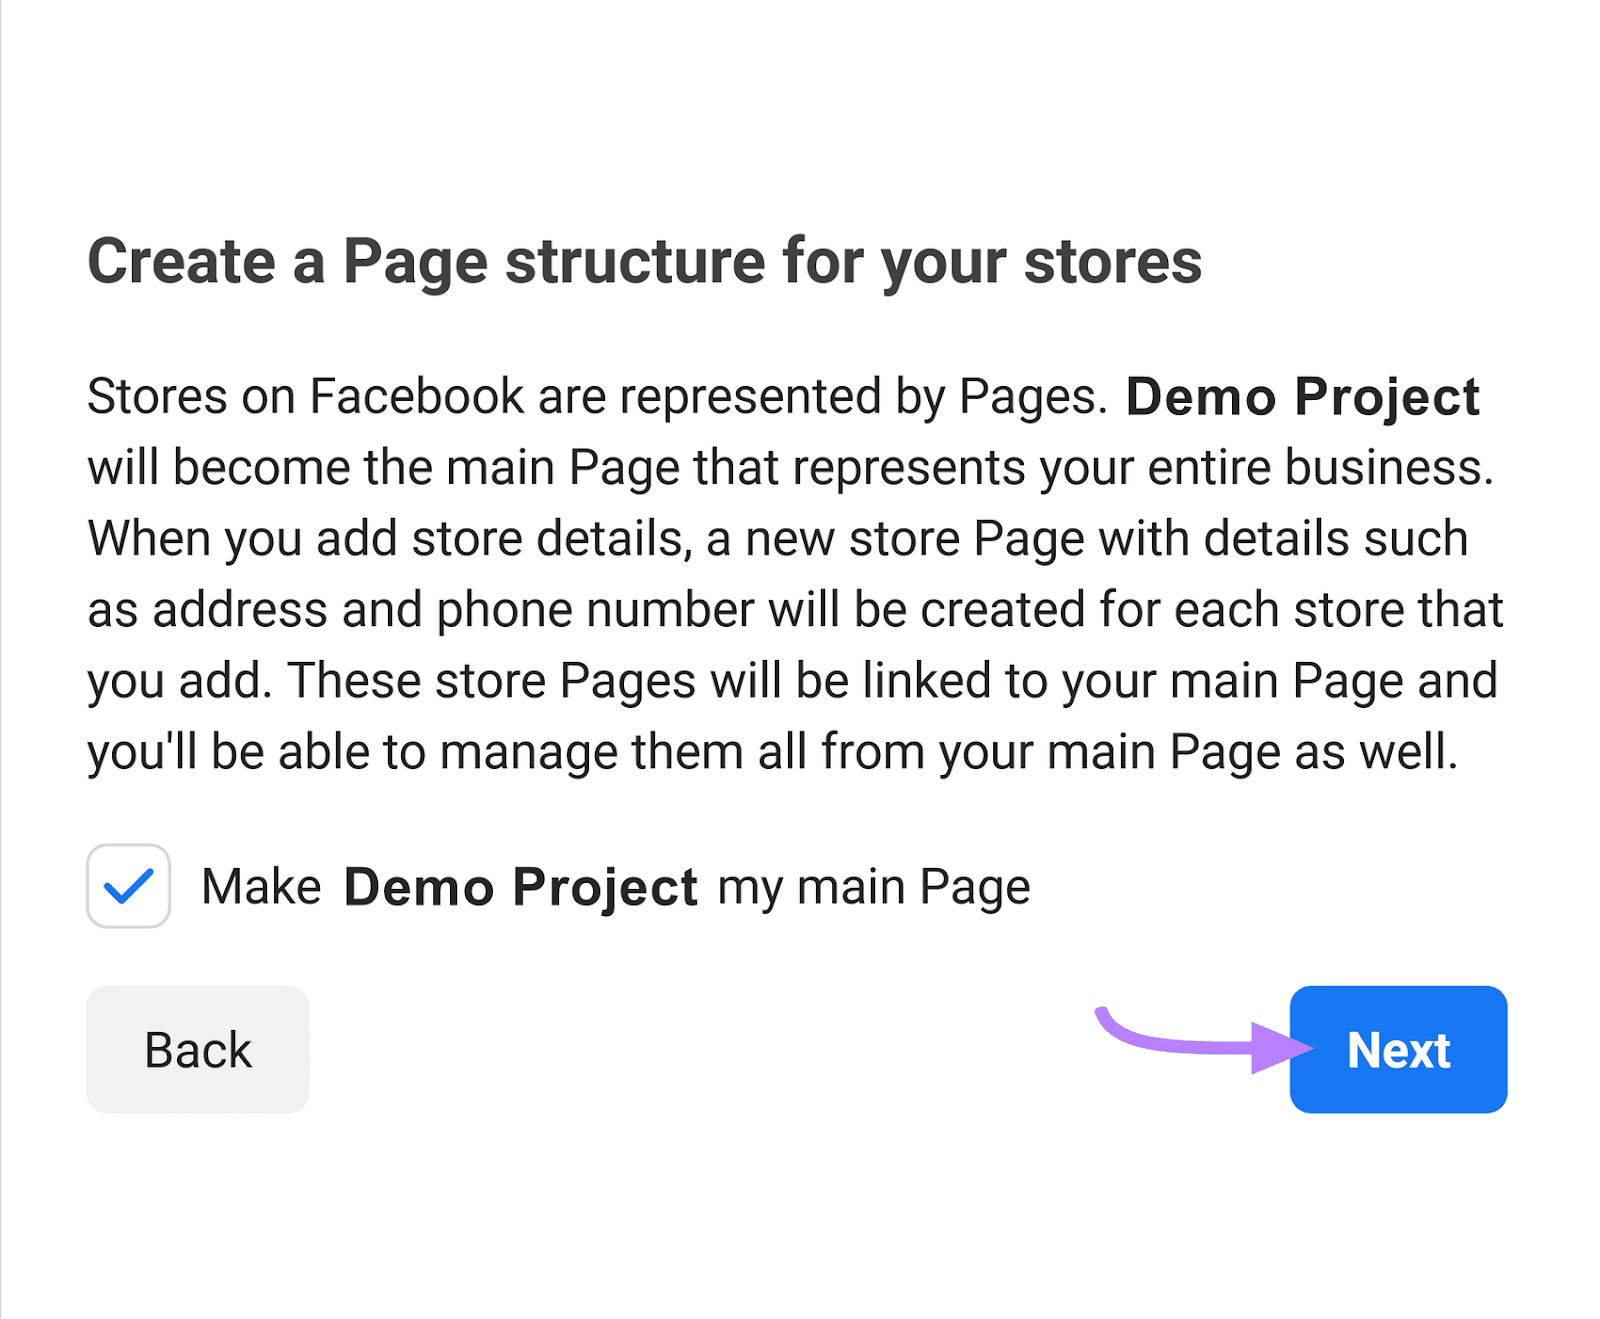
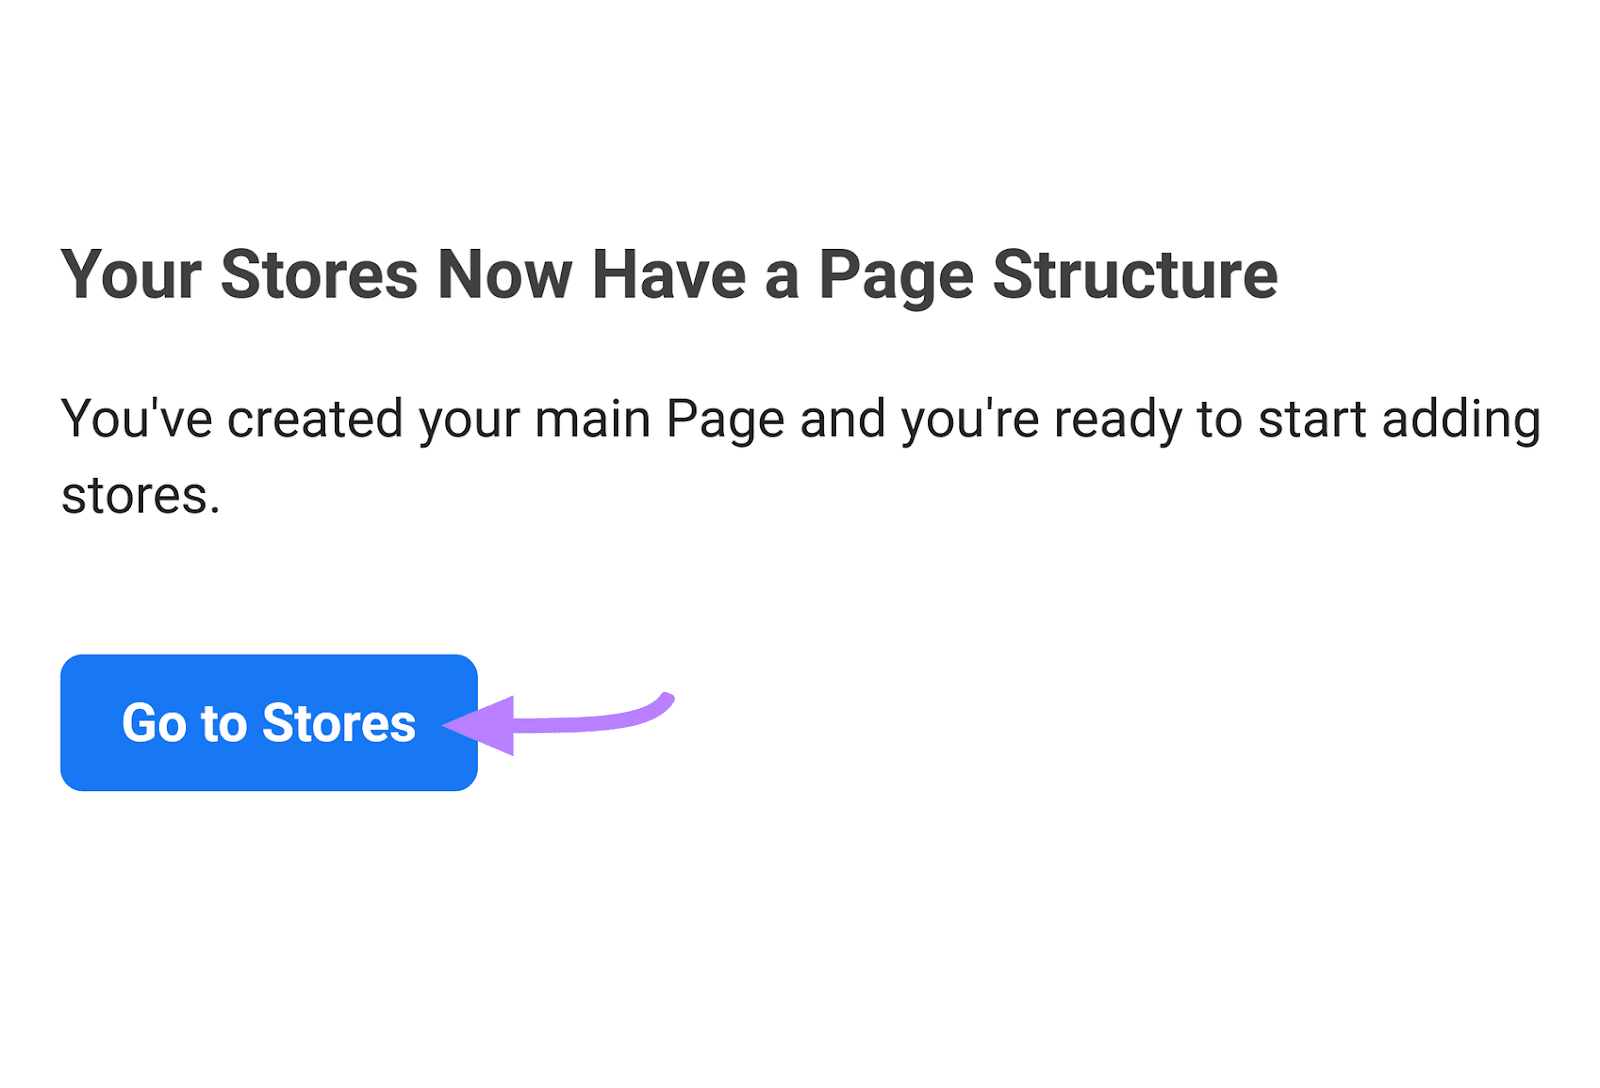
Now that you’ve created a page structure for your stores, click “Go to Stores.”
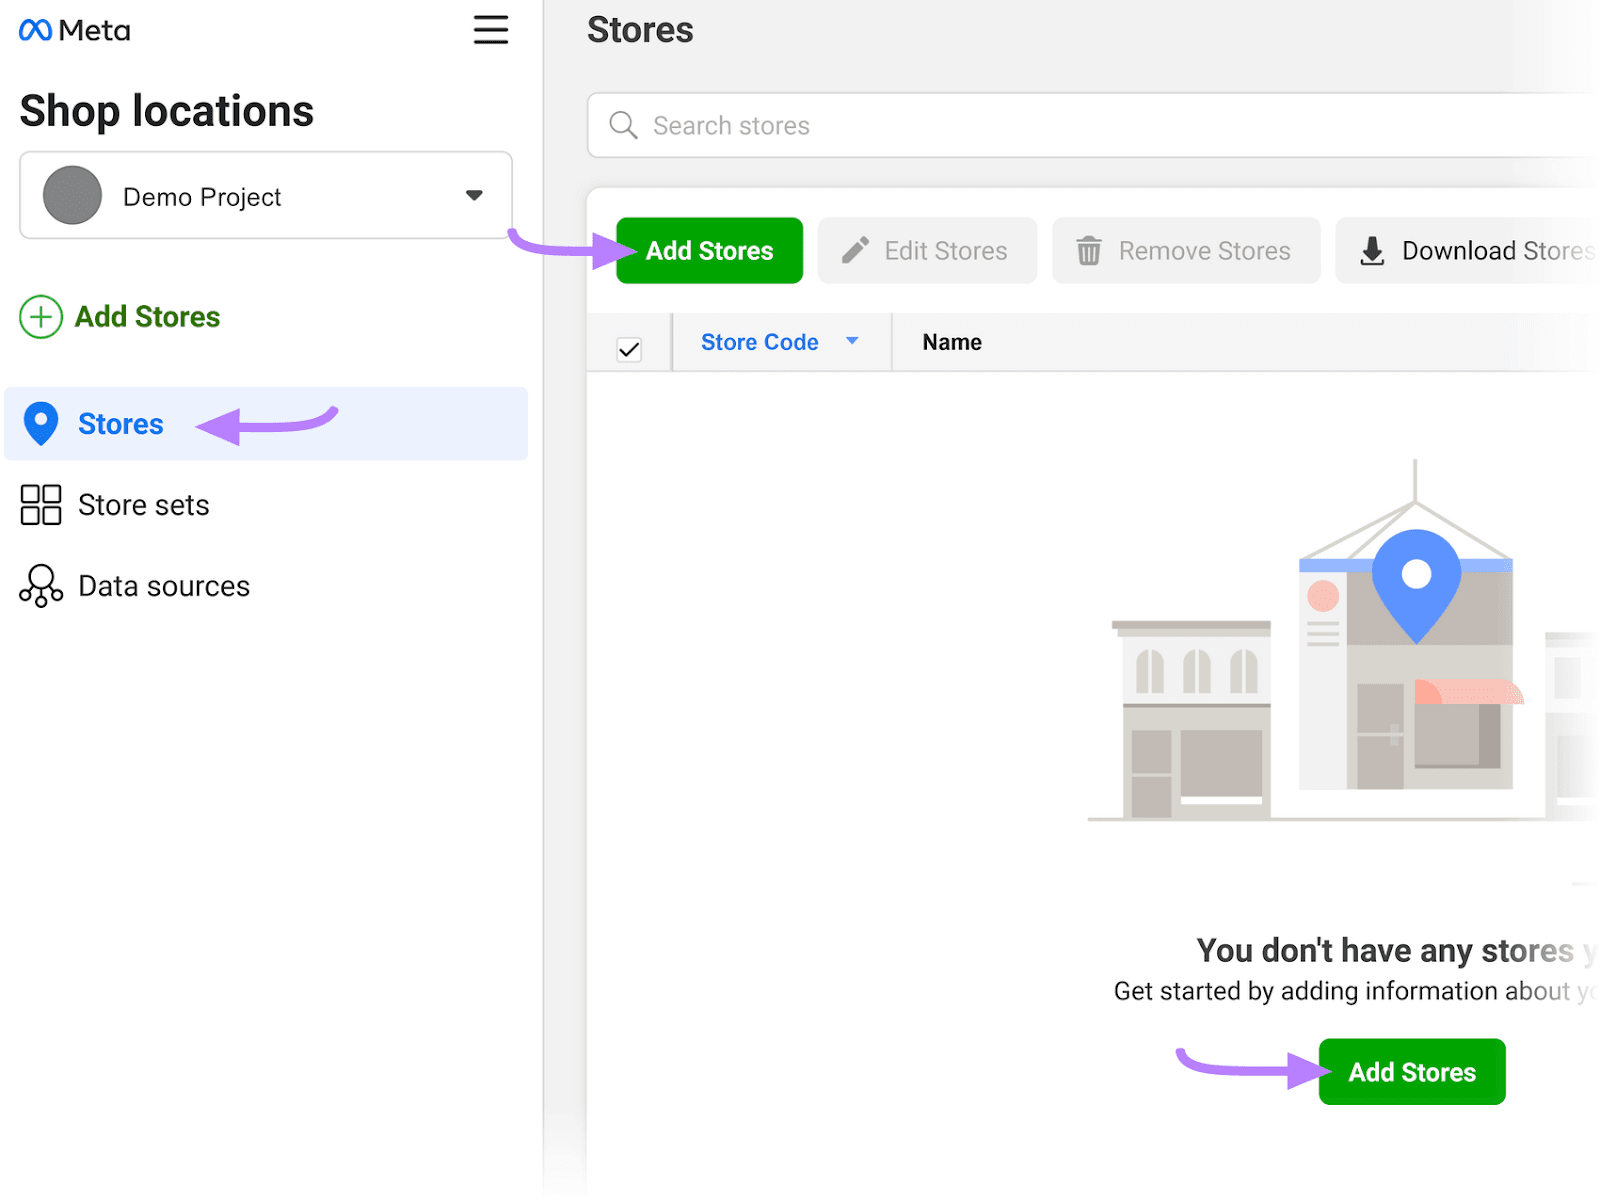
Then, hit “Add Stores.”
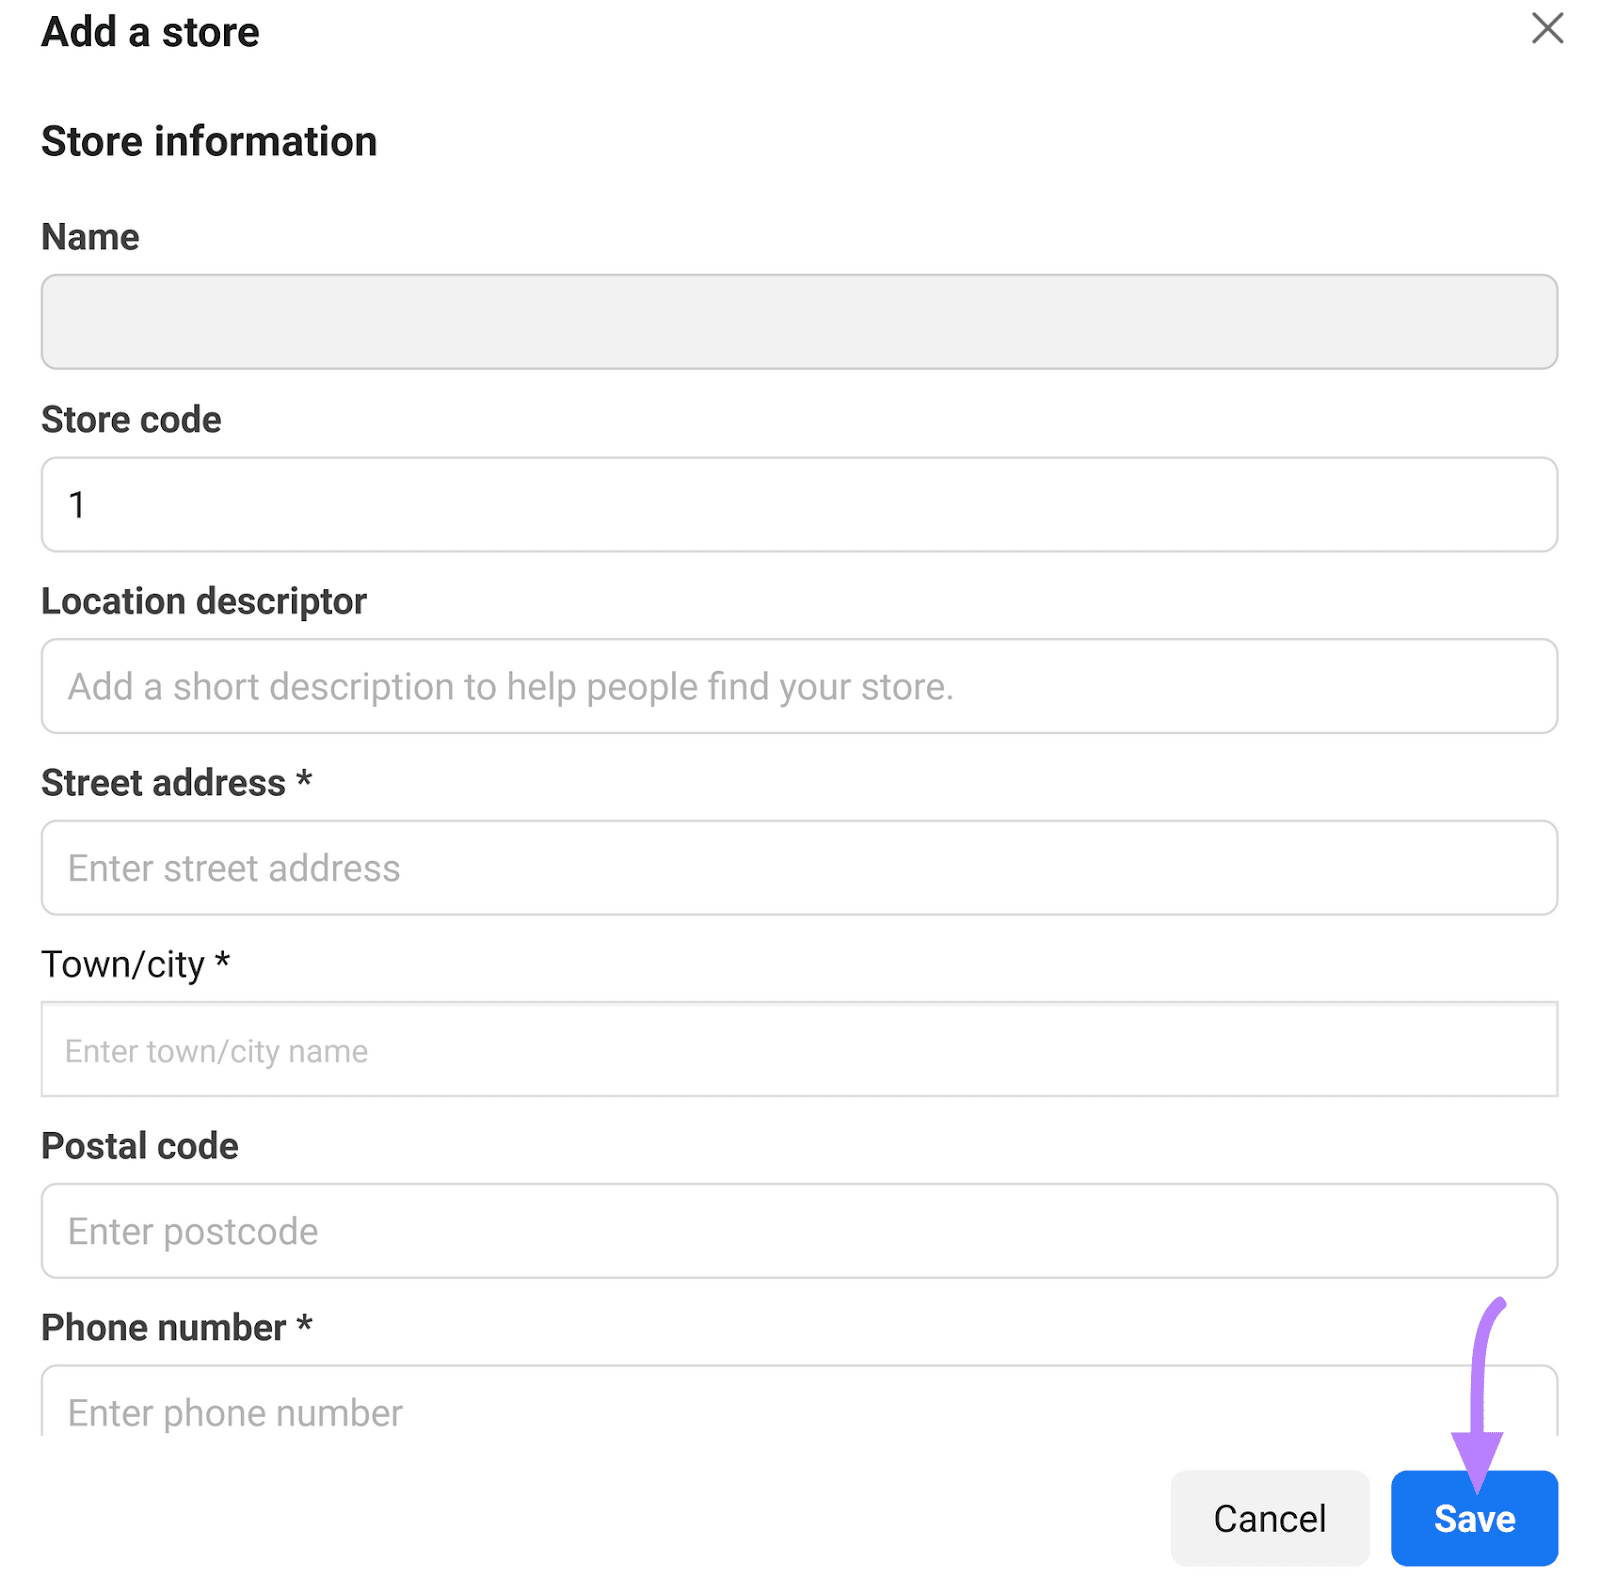
Fill out your store’s information, then click “Save.”
Check Brand Safety
Facebook offers brand safety features with options to manage at a domain and block list level.
For example, domains allows you to set domains for each business page to verify page ownership.
Blocked lists are ideal for exerting greater control of where your ads are displayed. For example, if you don’t want ads displayed on link farms, betting sites, or similar sites.
To add to your block list:
Navigate to “Settings.”
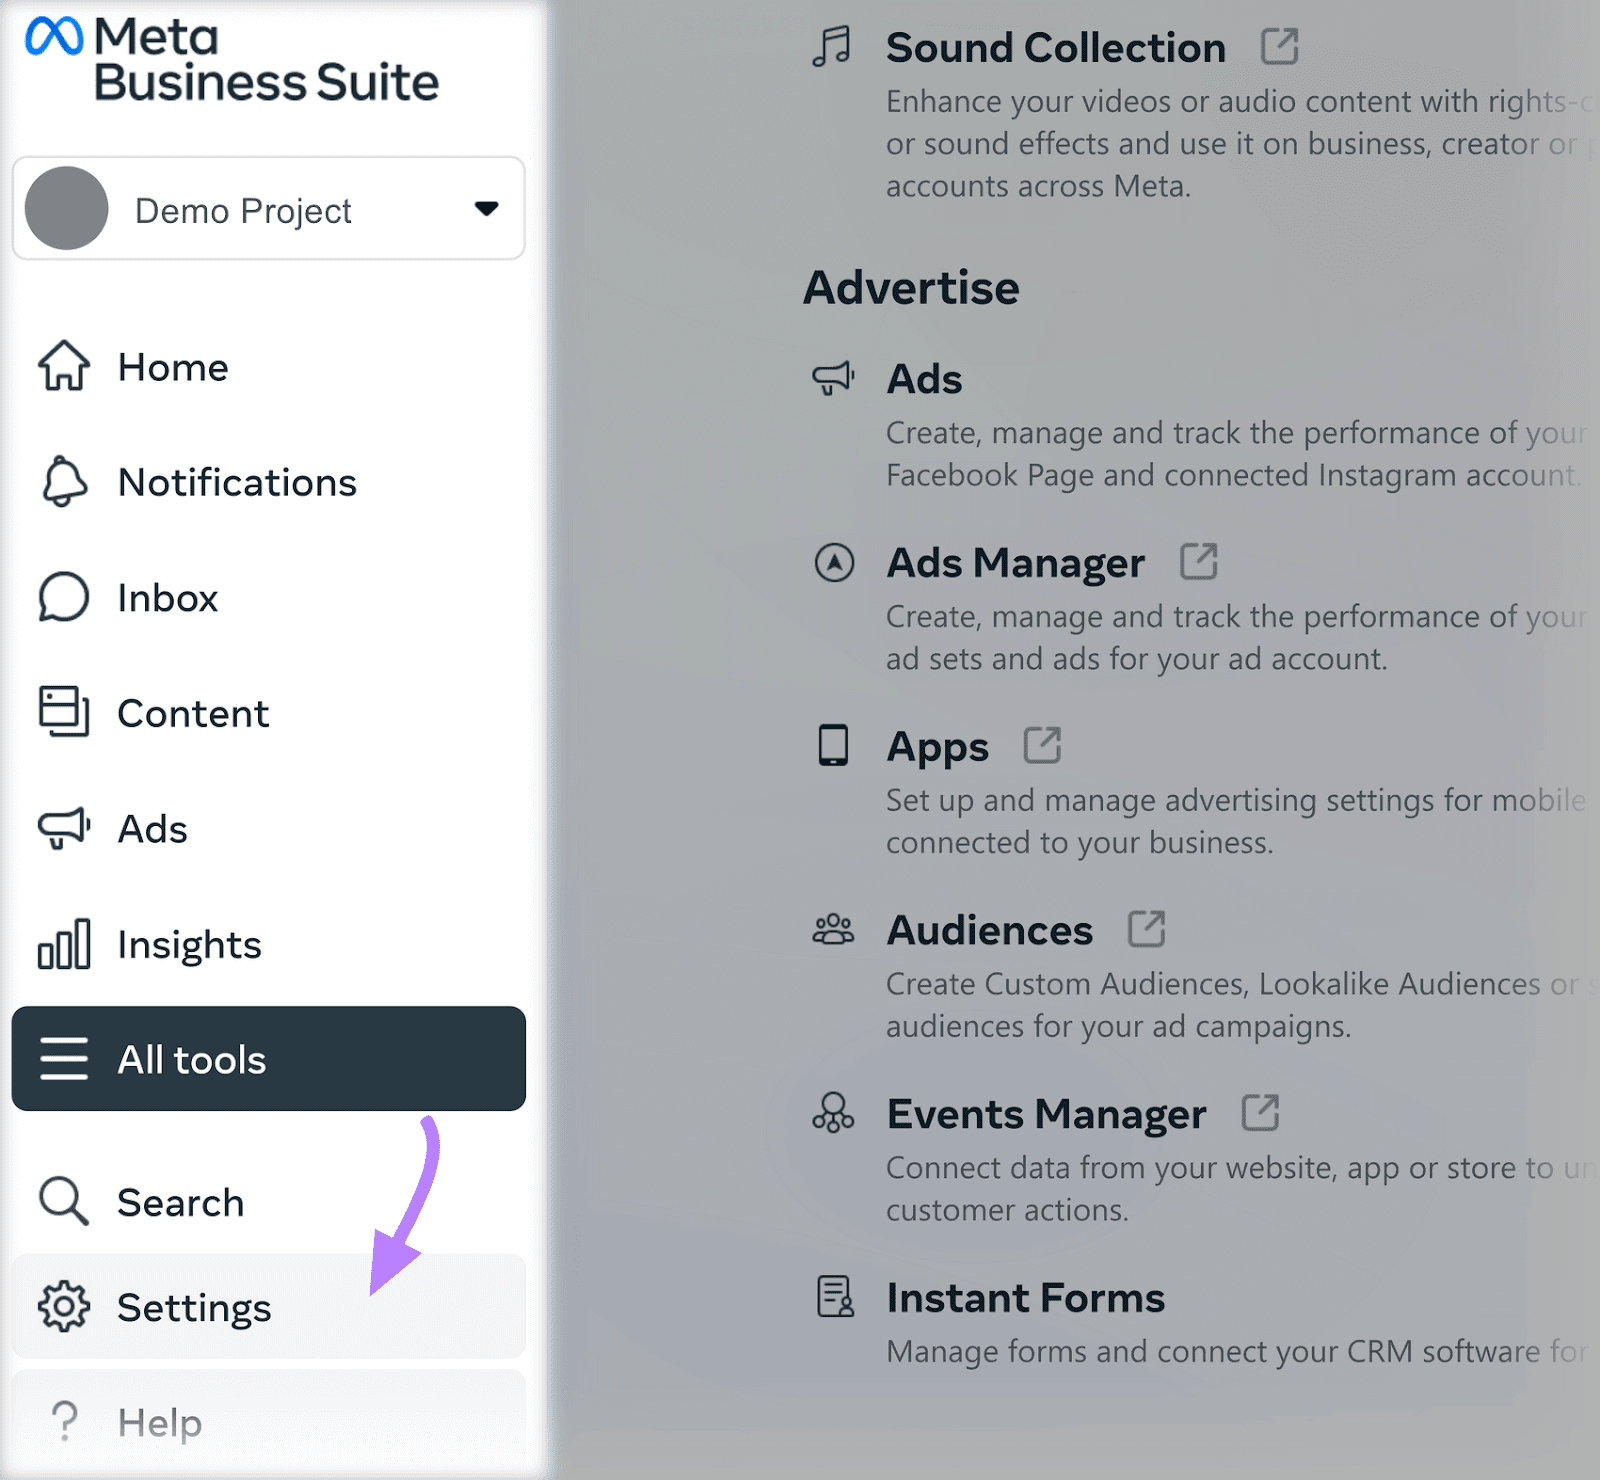
Click “Business Settings”.
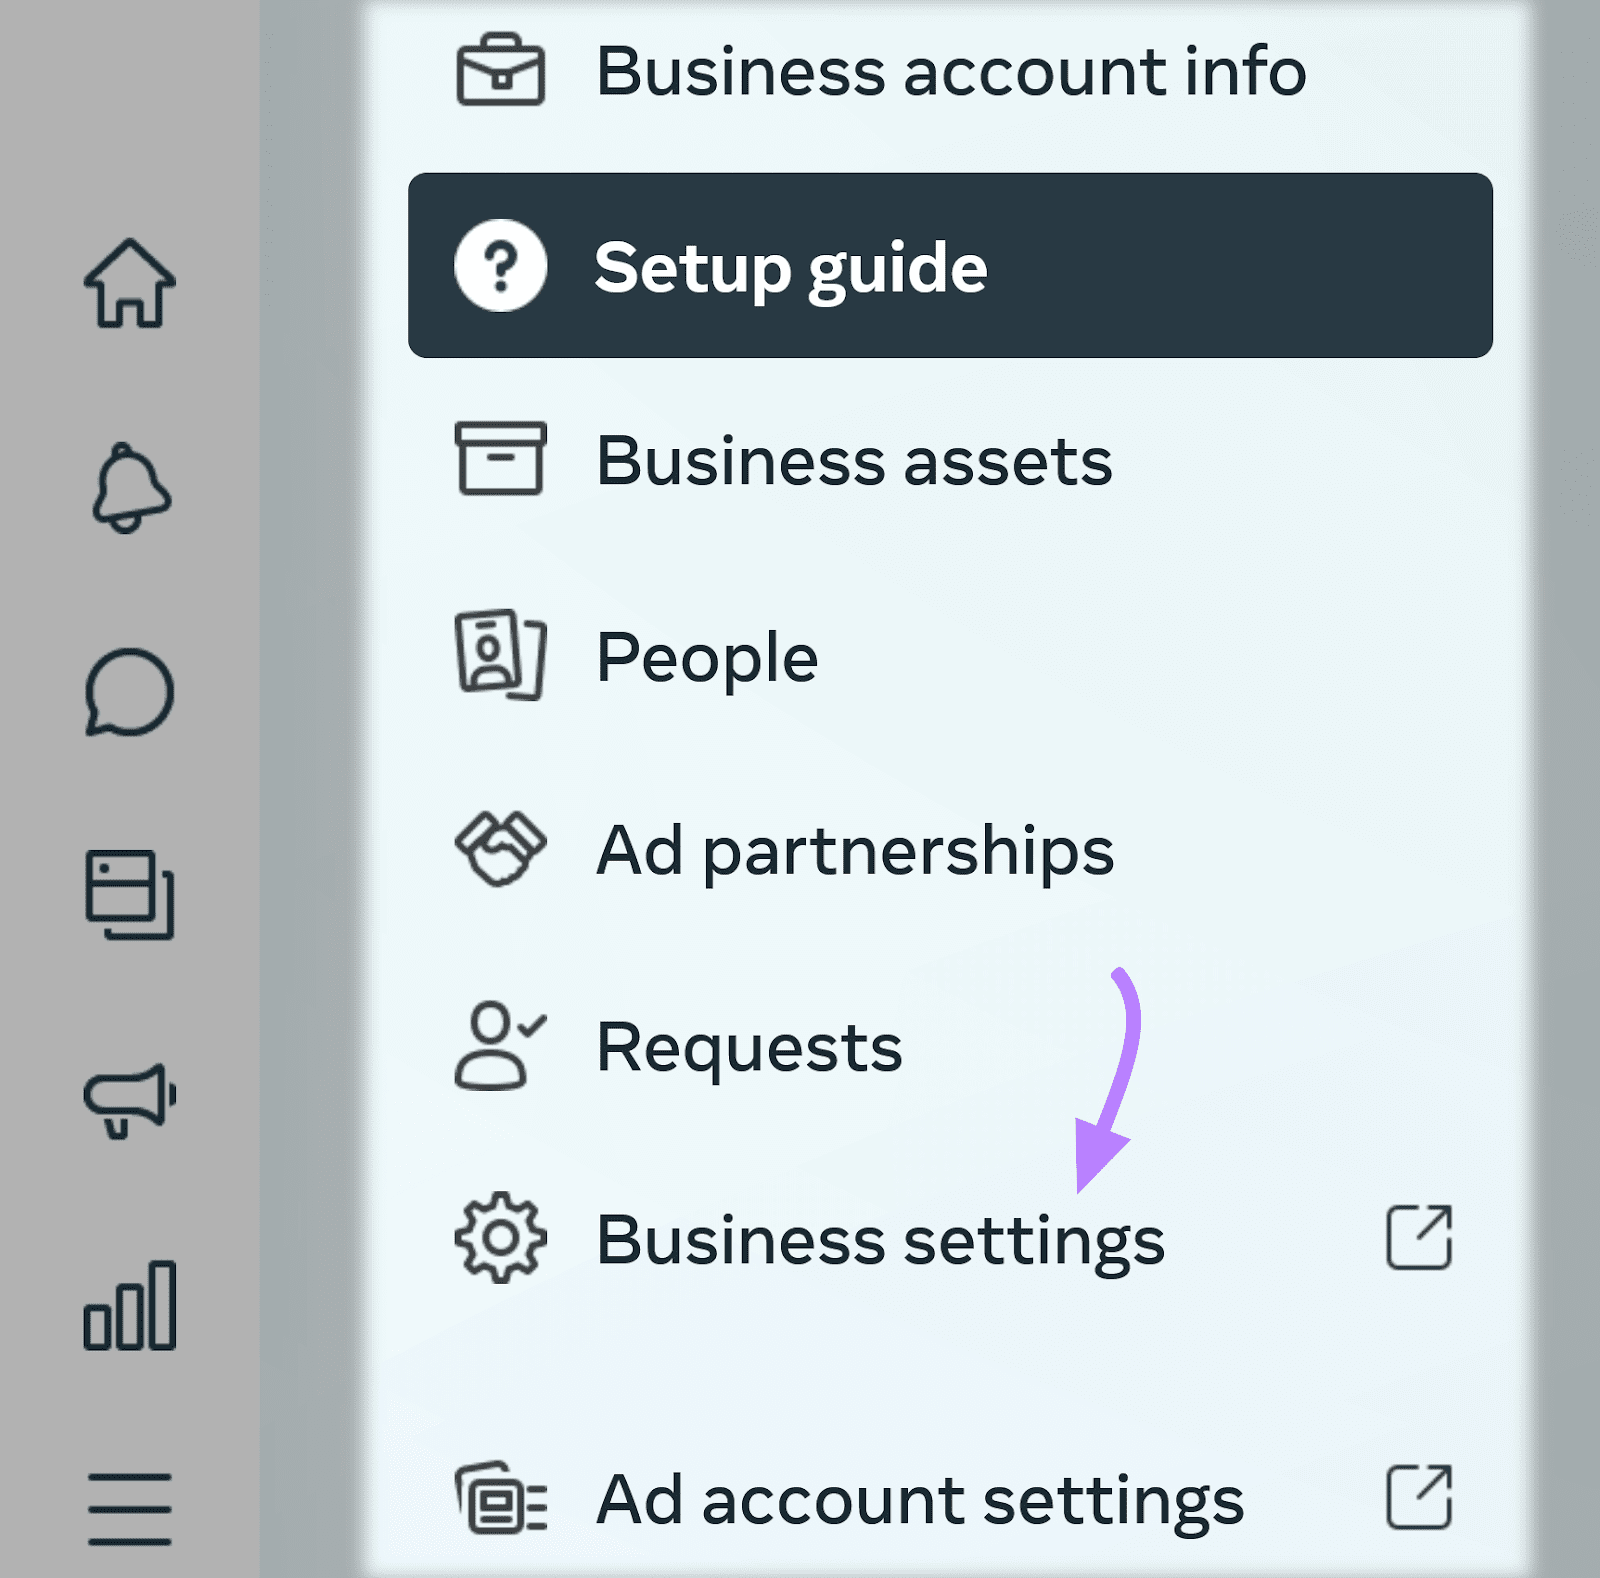
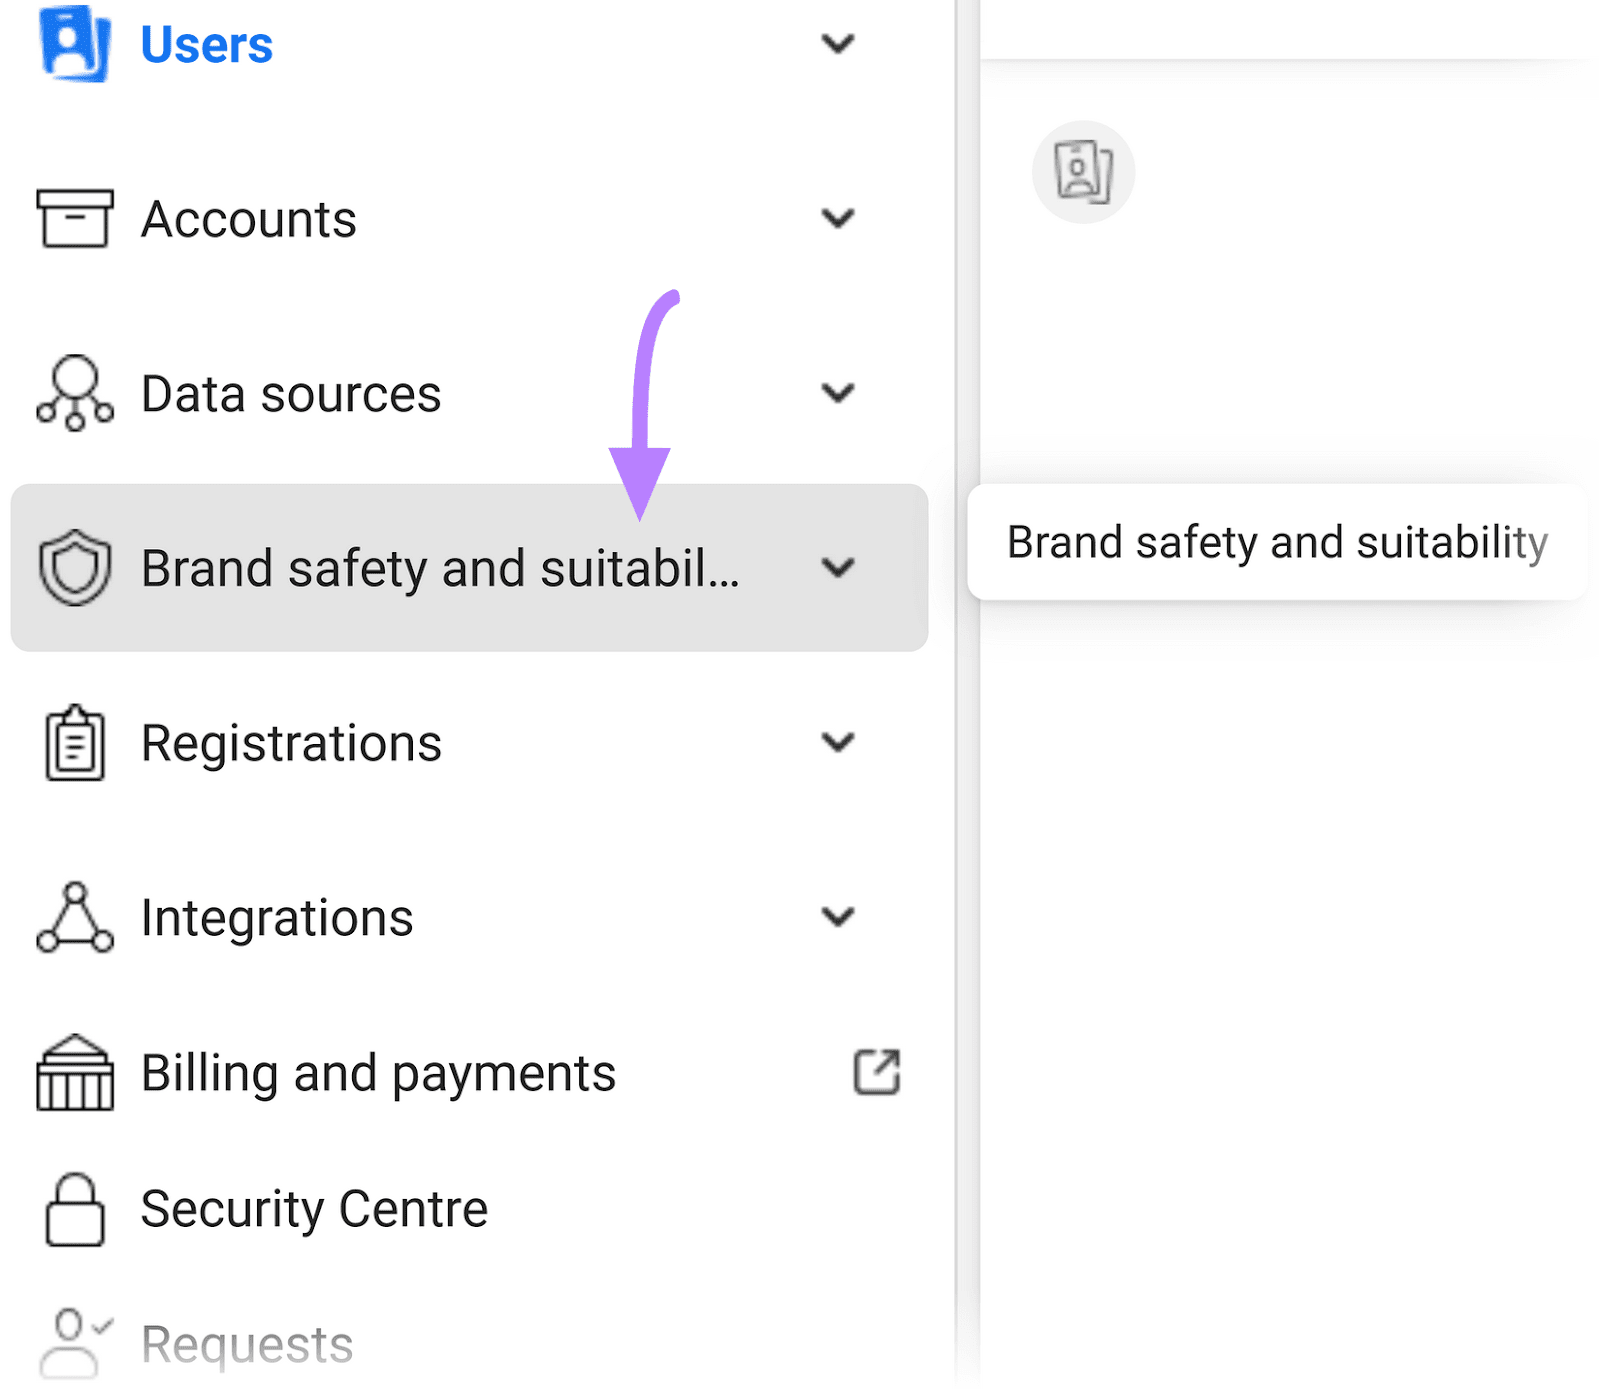
Then, click “Brand safety and suitability.”
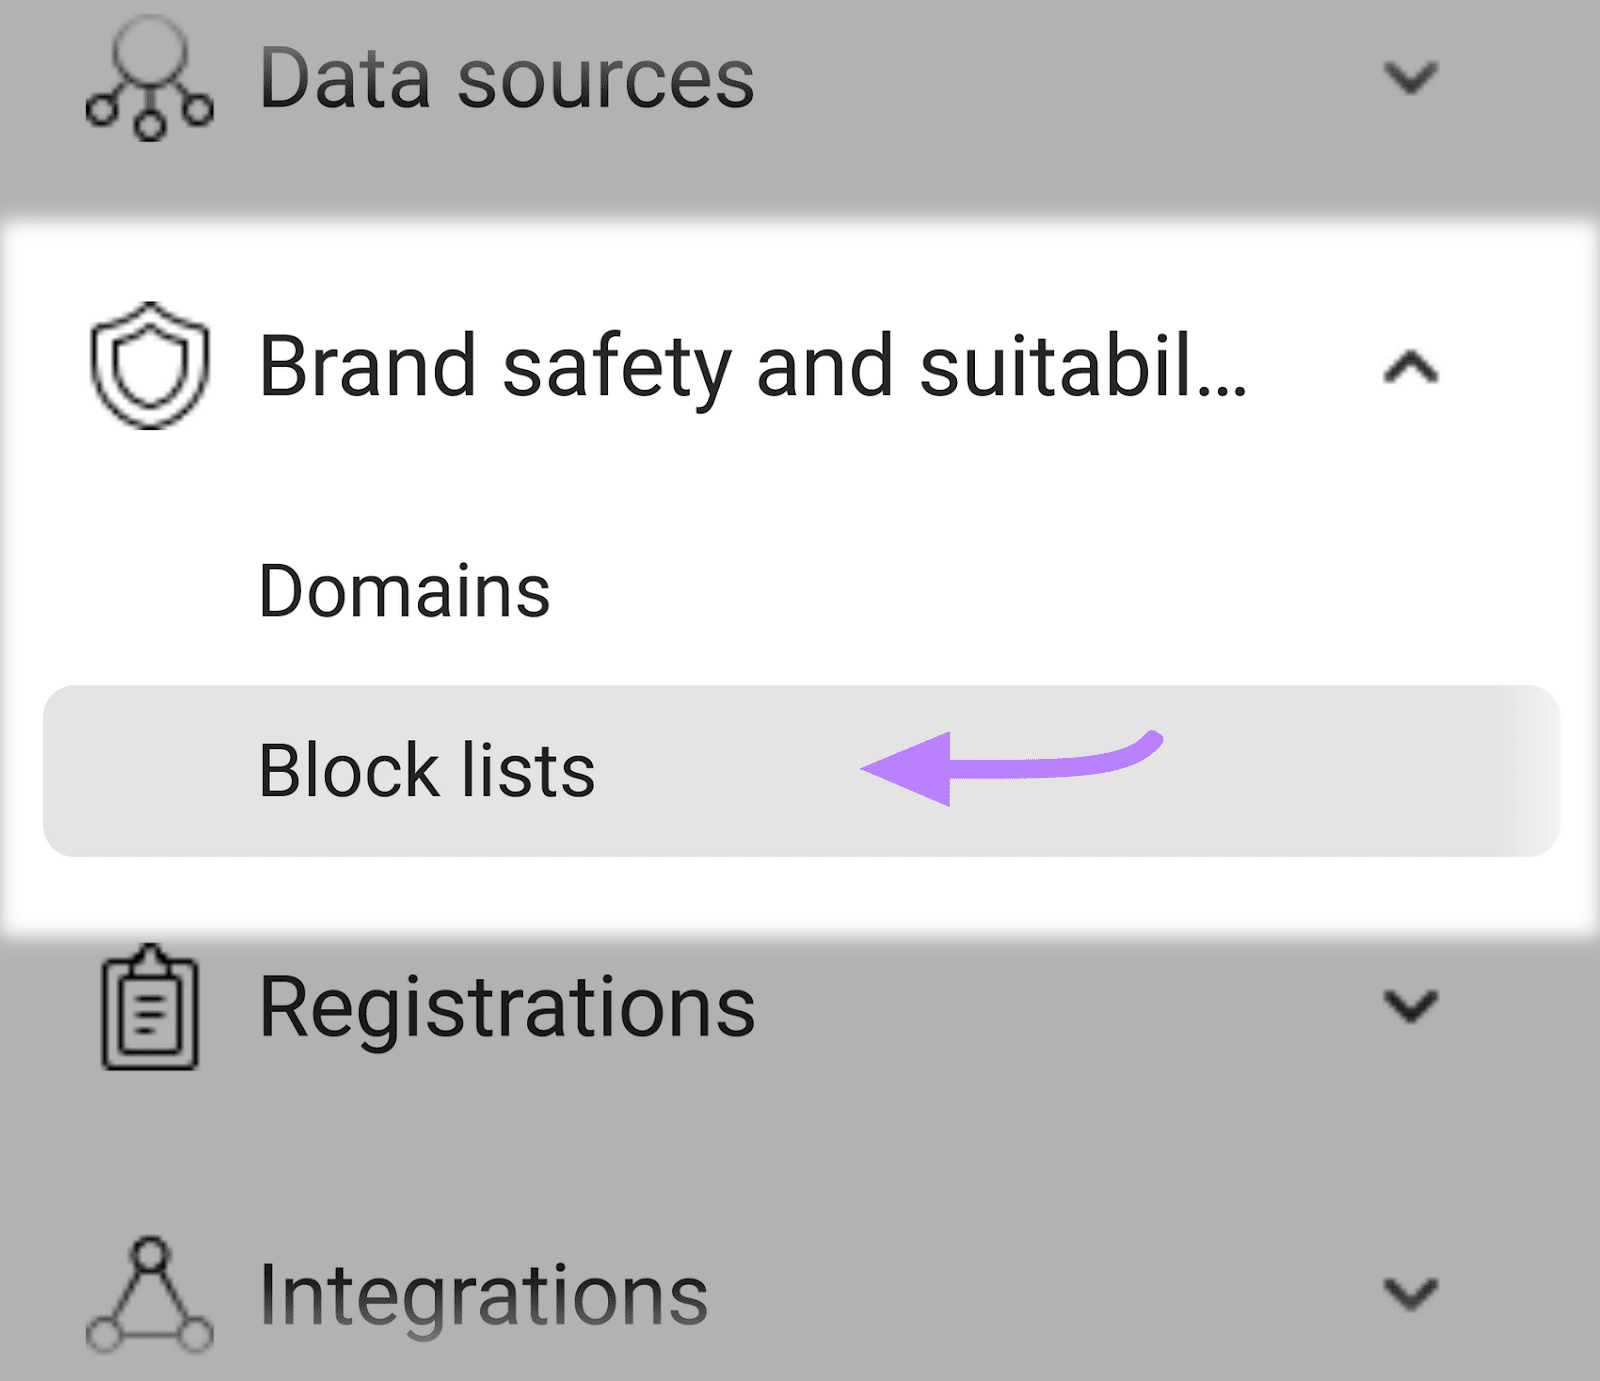
Then, click on “Block lists.”
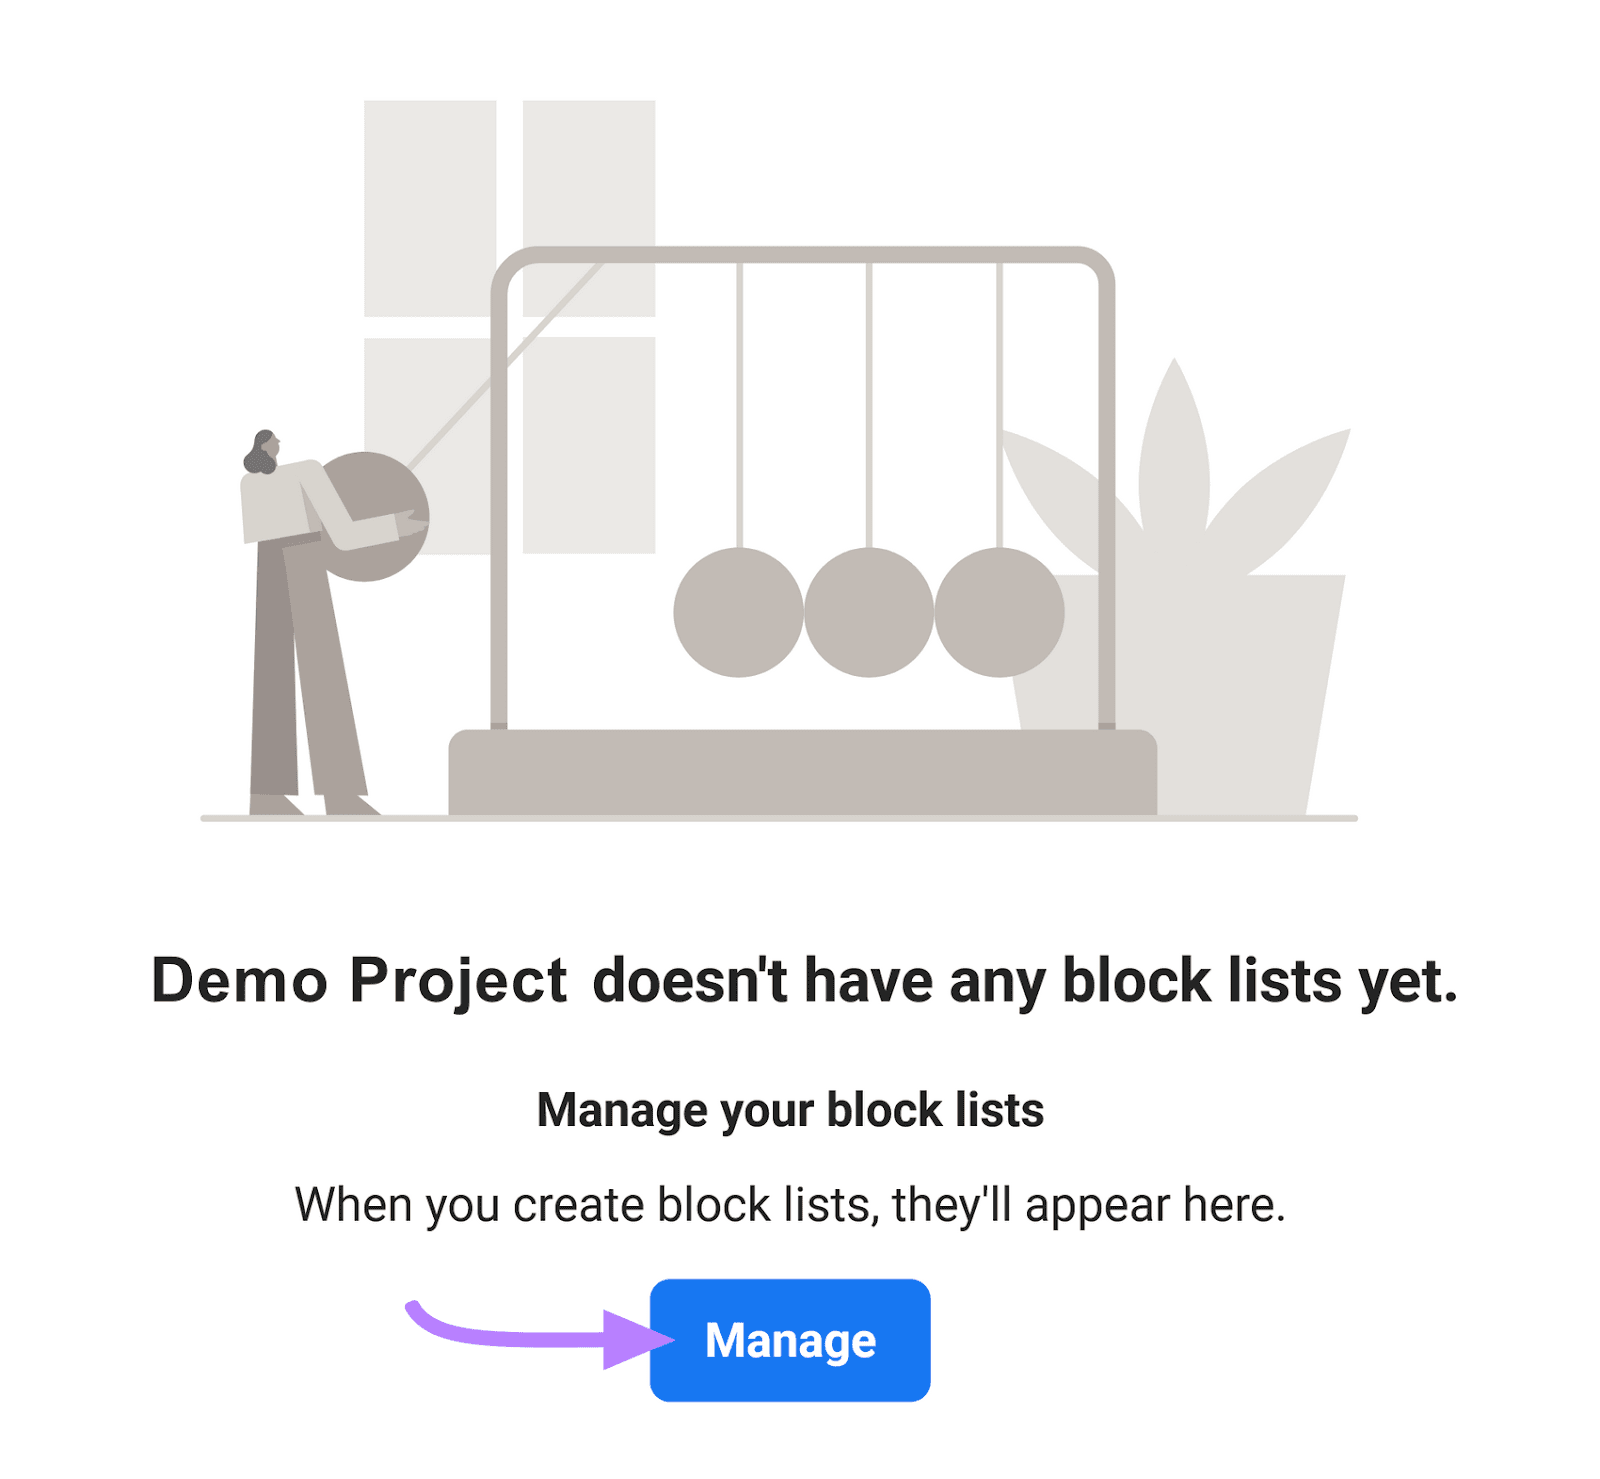
Click the blue “Manage” button.
Then, “Create Block List” in the top right corner.

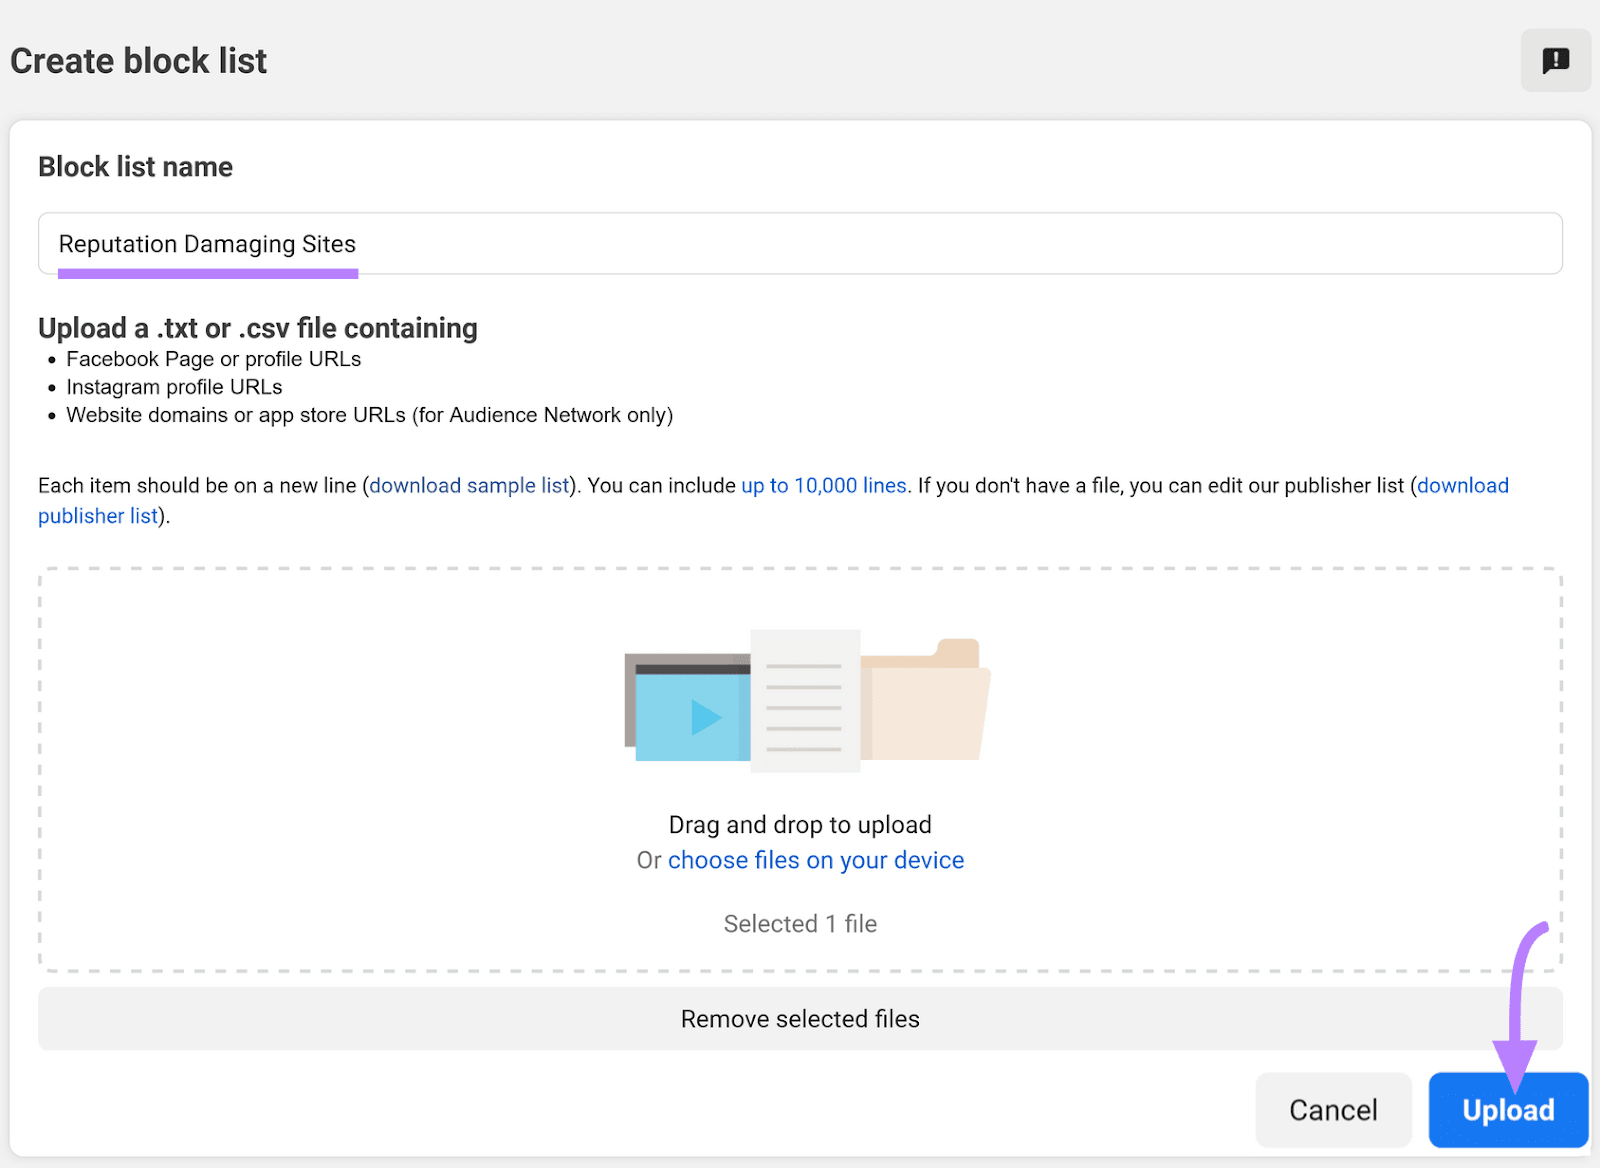
Enter a name for your block list. For example, “Reputation Damaging Sites” and then upload a TXT or CSV file with the relevant information.
Once you’ve finished, click “Upload” to create your block list.
Why Should You Create a Meta Business Manager?
Meta Business Manager provides many benefits for new and existing business owners.
Let’s take a look:
Manage Multiple Facebook Ad Accounts and Pages in One Place
Business Manager allows you to access multiple business pages with one login. And helps track the performance of each Business Page or Ads account from one central dashboard.
Securely Share Access with Multiple People
Grant access to multiple employees or clients without sharing login information or assets rights. If you’ve taken some great pictures for an ad, for example, you retain ownership of the pictures even if other team members or vendors use them in other campaigns.
Easily Collaborate with Other Companies
The Business Manager’s “Partners” feature allows you to add other companies as collaborators. You can give your partners shout-outs, share assets with them, and access their followers.
Control Employee Access to Sensitive Information
Business managers can limit each team member’s access to certain parts of the platform. You won’t have to worry about team members accessing assets or tools they don’t need. You can also easily revoke access to the Business Manager after project completion.
Build Custom Audiences for Effective Ad Campaigns
Meta Business Manager’s powerful campaign builder allows you to create a custom audience, thanks to the data Facebook’s users volunteer to the platform.
As users tag themselves at events, comment on posts, or join groups, Facebook better understands their likes and interests.
The result is an impressive targeting tool that extends beyond simple demographics like gender and age.
Use Facebook Business Manager and Semrush for Social Media Success
Facebook makes it easier than ever to optimize and manage your business with Business Manager.
Use the tool alongside Semrush Social for complete control over your social media marketing.
